How to Take Progress Photos: Lighting, Angles, Poses and a Checklist for Clients
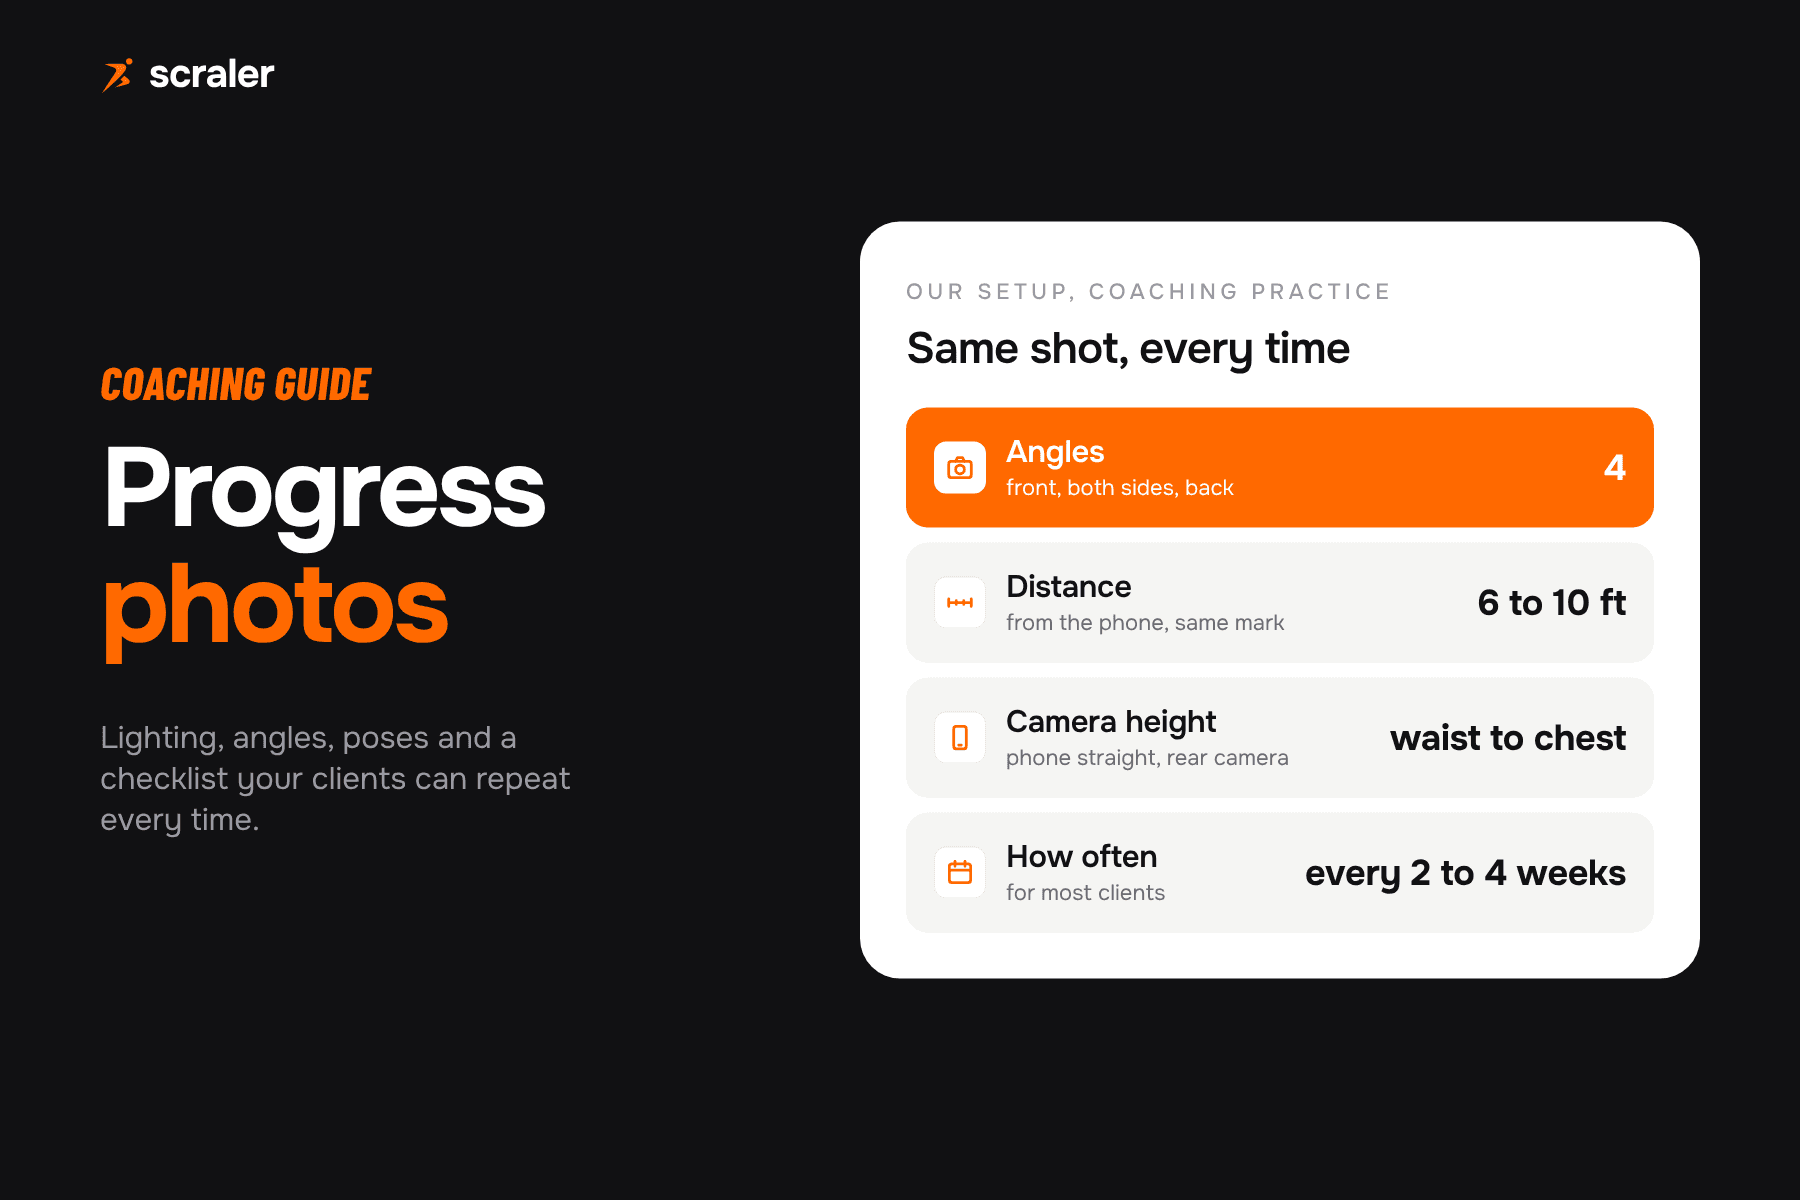
To take progress photos, shoot the front, side and back in the same spot, light, clothing and pose every time, with the phone at waist to chest height and the same distance away. Take them in the morning before eating, every two to four weeks, and compare them with weight and waist measurements, not on their own.

- Consistency beats quality. Same room, same light, same clothes, same distance and same time of day make two photos comparable.
- Take four angles: front, left side, right side and back, relaxed, arms slightly away from the body.
- Every two to four weeks is enough for most clients. Weekly photos mostly show water and lighting, not fat loss.
- Read photos next to weight, waist and other measurements. A photo shows shape, the tape shows size, the scale shows mass.
- Progress photos are personal data. Ask for written consent, keep them in one secure place, and get separate consent before any marketing use.
This guide is for coaches who want photos they can actually compare, and for clients who take them at home. It covers the setup, the poses, when to shoot, how to read the photos with other data, and how to handle consent and storage. The setup numbers are our coaching practice, not study results, so adjust them to the room your client has.
Why take progress photos at all?
The scale gives one number for the whole body. It cannot tell fat from muscle, water or food in the gut. A tape measure is more specific, but only at the sites you measure. Progress pictures show shape (the body type calculator can put a name to it from bust, waist, high hip and hip readings): a narrower waist, broader shoulders, a change in posture. That is why they matter most for weight loss and recomposition clients, where weight can stall while the body changes. They are a third view next to the scale and the tape, not a replacement. Our body measurement chart covers the tape side.
- Shape and proportions
- Posture
- Muscle definition over months
- Change the scale misses during recomposition
- Small changes week to week
- Exact size (use the tape)
- Body mass (use the scale)
- Anything a different light or pose can fake
How do you take progress photos step by step?
- 1Pick one spot
A plain, light wall with nothing behind the client. Mark the floor with tape where they stand and where the phone goes.
- 2Fix the light
Daylight from the front or a ceiling light overhead. Avoid one strong side light, which adds shadows that look like definition.
- 3Set the camera
Rear camera on a tripod or shelf, at waist to chest height, about 6 to 10 feet away, 1x zoom, portrait mode off.
- 4Use a timer
A 10 second timer or a remote. Mirror selfies hide the face and change the angle every time.
- 5Shoot four angles
Front, left side, right side, back. Head to feet in frame, the same framing every time.
- 6Upload the same day
Send them in the check-in so they sit next to that week's weight and measurements.
- Keep it like this
- Same room, same wall, tape marks on the floor
- Why it matters
- A new background changes how the body reads
- Keep it like this
- Same light source, front or overhead
- Why it matters
- Side light adds shadows that look like muscle
- Keep it like this
- Same mark, about 6 to 10 feet
- Why it matters
- Closer makes the middle of the body look bigger
- Keep it like this
- Waist to chest height, phone straight, not tilted
- Why it matters
- Shooting down shrinks the legs, shooting up shrinks the head
- Keep it like this
- Rear camera, 1x, no wide angle, no filters
- Why it matters
- Wide lenses stretch the edges of the frame
- Keep it like this
- The same fitted outfit every time
- Why it matters
- Loose clothes hide shape, new clothes change it
- Keep it like this
- Morning, after the bathroom, before food and training
- Why it matters
- Food, water and a pump all change the photo
| Variable | Keep it like this | Why it matters |
|---|---|---|
| Location | Same room, same wall, tape marks on the floor | A new background changes how the body reads |
| Lighting | Same light source, front or overhead | Side light adds shadows that look like muscle |
| Distance | Same mark, about 6 to 10 feet | Closer makes the middle of the body look bigger |
| Camera height | Waist to chest height, phone straight, not tilted | Shooting down shrinks the legs, shooting up shrinks the head |
| Lens | Rear camera, 1x, no wide angle, no filters | Wide lenses stretch the edges of the frame |
| Clothing | The same fitted outfit every time | Loose clothes hide shape, new clothes change it |
| Time of day | Morning, after the bathroom, before food and training | Food, water and a pump all change the photo |
These are our working rules, not a published protocol. The point of each one is the same: change only the body between two photos.
What poses and angles should progress photos use?
Use a relaxed, neutral stance for every angle. Flexed poses are fine as an extra, but they are hard to repeat, so they make poor comparison photos.
- Front. Feet hip width apart, weight even, arms hanging slightly away from the body so the waist is visible. Look straight at the camera.
- Left side and right side. Turn 90 degrees, arms hanging at the sides or crossed in front of the chest, the same way each time. Both sides, because the body is rarely symmetric.
- Back. Feet as in the front photo, arms slightly away from the body. Hair up if it covers the shoulders.
- Posture. Stand tall but do not suck in the stomach. The goal is the client's normal standing posture, not their best one.
- Optional flexed set. Front and back double biceps, or the client's own pose, for motivation and for physique clients.
How to take progress photos as a female client?
The rules are the same for every client, but a few details come up more often with women. Wear the same sports bra and shorts or briefs every time, since a different bra changes the line of the chest and back. Note where the client is in her menstrual cycle if she tracks it, because some women hold more water in certain phases, and comparing photos from the same phase is fairer. Tie hair up for the back and side photos. And let clients choose what they wear and whether the face is in frame: a photo with the head cropped out is still useful for comparison, and it makes many clients more willing to send them.
How do you take gym progress photos?
Gym progress photos are harder to keep consistent. Gym lighting is often strong and from above, mirrors force selfies, and clients often shoot after training with a pump. If a client insists on the gym, pick one mirror-free spot, shoot before the workout, and use the same spot every time. For workout progress photos meant for social media, flexed and pumped is fine. Just keep those separate from the comparison set.
How often should you take progress photos?
For most clients, every two to four weeks. Body shape changes slowly, so weekly photos mostly show differences in water, food and light, and they can discourage a client who sees no change. Our usual setup: weight and short questions in a weekly check-in, then photos and the full set of measurements every four weeks, the same rhythm we suggest in the client check-in form template. Take a baseline set at the start, before the first session, next to the fitness assessment.
- Photo frequency
- Every 4 weeks
- Pair with
- Weekly weight average, waist, waist to height ratio
- Photo frequency
- Every 4 weeks
- Pair with
- Waist, hips, chest, arms, thighs, strength numbers
- Photo frequency
- Every 4 to 6 weeks
- Pair with
- Weight, arm, chest and thigh measurements
- Photo frequency
- Every 1 to 2 weeks, closer to the event
- Pair with
- Weight, posing practice photos kept separate
| Client goal | Photo frequency | Pair with |
|---|---|---|
| Weight loss | Every 4 weeks | Weekly weight average, waist, waist to height ratio |
| Recomposition | Every 4 weeks | Waist, hips, chest, arms, thighs, strength numbers |
| Muscle gain | Every 4 to 6 weeks | Weight, arm, chest and thigh measurements |
| Physique prep | Every 1 to 2 weeks, closer to the event | Weight, posing practice photos kept separate |
These frequencies are our practice, not study data.
How do you compare progress photos with weight and measurements?
Compare the newest photo with the baseline and with the one from four weeks earlier, angle by angle, side by side at the same size. Then check whether the other data tells the same story. If weight is flat but the waist is down and the photos look leaner, the client is likely losing fat and gaining or keeping muscle. If the photos look different but no measurement moved, check the setup first: a change of light or distance is the most common cause.
- Waist. The single most useful number next to a photo. Our waist to height ratio calculator turns it into a ratio you can track.
- Body fat estimate. The body fat calculator gives a tape-based estimate. Use it as a trend, not an exact value.
- Weight. Use a weekly average, not a single morning, so the photo is compared with a stable number.
- Client notes. How clothes fit and how the client feels. These often move before the photo does.
What is the progress photo consistency checklist?
Send this to clients with the first photo request, or paste it into the description of the photo question in your check-in.
- 1.Same room and wall, standing on the tape mark.
- 2.Same light: daylight from the front or the ceiling light, no flash.
- 3.Phone on the second tape mark, at waist to chest height, rear camera, 1x zoom.
- 4.10 second timer, no mirror.
- 5.Same outfit as last time.
- 6.Morning, after the bathroom, before food, drinks and training.
- 7.Relaxed stance, no flexing, no sucking in.
- 8.Front, left side, right side, back. Head to feet in frame.
- 9.No filters, no editing, no beauty mode.
- 10.Upload all four in the check-in the same day.
How should trainers handle consent and storage of progress photos?
Progress photos are some of the most sensitive data a coach holds. If you coach clients in the EU or UK, the GDPR applies to them. A photo of an identifiable person is personal data. Under Recital 51 of the GDPR, a photo only counts as biometric data when it is processed with specific technical means to uniquely identify someone, which normal coaching does not do. But photos taken to track body change may reveal information about a client's health, and data concerning health (Article 4(15)) is a special category under Article 9, where explicit consent is the usual legal basis. Outside the EU and UK other privacy laws apply, so check with an adviser for your country. This section is general information, not legal advice.
- Ask for explicit, written consent that names the purpose: tracking progress in coaching. Put it in onboarding, for example next to the client intake form.
- Make withdrawal easy. Under Article 7(3) a client can withdraw consent at any time, and it must be as easy to withdraw as to give.
- Ask separately for marketing. Using a before and after on your website or Instagram is a different purpose. Get a separate yes, per photo, and never make coaching depend on it.
- Collect only what you need. Data minimisation (Article 5(1)(c)) means four angles, not a camera roll. A cropped face is fine.
- Keep them in one secure place. Not in a group chat, personal email or your own phone's camera roll.
- Delete when the purpose ends. Storage limitation (Article 5(1)(e)) means you keep them no longer than needed. Set a rule, such as deleting a set of photos a fixed time after a client leaves, and tell clients what it is.
What is the best progress photos app?
For a client on their own, the phone camera with a timer and a dedicated album is enough. For a coach with many clients, the problem is not taking photos but collecting them on time, keeping each set next to that month's numbers and comparing them later. That is what a check-in in a coaching app is for.
How do you collect progress photos in weekly check-ins with Scraler?
In Scraler, you build a check-in template once and add photo questions from a fixed list: front, side left, side right and back. Add weight, measurements, rating scales and open questions to the same form. Send it on a recurring schedule, weekly, every two weeks or at a custom interval, and clients get a push notification and an in-app reminder when it is due.
When the check-in comes in, you review it on one screen: leave notes, approve it or ask for a revision, and reply in writing or with a recorded video. Photos are labelled by angle, and the compare view puts two dates side by side, with a wipe slider to move between them. Weight and measurements from the same check-in go to the client's progress charts, so the photo and the numbers sit together.
Build a check-in with front, side and back photo questions, send it on a schedule, and compare every client's photos side by side next to their charts.
See client check-insFrequently asked questions
- What is the best time of day to take progress photos?
- In the morning, after using the bathroom and before eating, drinking or training. Food, water and a post-workout pump all change how the body looks, and morning is the easiest time to repeat.
- How often should you take progress photos?
- Every two to four weeks for most clients. Weekly photos mostly show changes in water and lighting. Take a baseline set at the start and compare each new set with it and with the previous one.
- What should you wear for progress photos?
- The same fitted outfit every time, such as a sports bra and shorts or swim shorts. Loose or new clothing hides or changes the body outline, which makes two photos hard to compare.
- How do you take progress photos without a mirror?
- Put the phone on a tripod or shelf at waist to chest height, about 6 to 10 feet away, and use a 10 second timer or a remote. Use the rear camera at 1x zoom, and mark both the phone and foot positions on the floor.
- Are weight loss progress photos better than the scale?
- Neither is enough alone. The scale shows mass, the tape shows size at a few sites, and photos show shape. Read weight loss progress photos next to a weekly weight average and the waist measurement.
- What are progression photos?
- Progression photos is another name for progress photos or progress pictures: the same poses taken at regular intervals so the changes over weeks and months are visible side by side.
- Can a trainer post client progress photos online?
- Only with separate, explicit consent for that use. Consent to share photos for coaching does not cover marketing. Ask per photo, let the client choose cropping, and make it easy to withdraw.
- How should trainers store client progress photos?
- In one secure system, not in chat threads, email or a personal camera roll. Keep only the angles you need, delete them when the coaching purpose ends, and tell clients your retention rule.