
Publishing to the App Store and Google Play
Ship your own app in the App Store and Google Play, under your own name, starting from no Apple Developer account at all.
Your app in the stores
With your own app, clients download your app, under your name, from the App Store and Google Play.
The App Store page
In My App, open the App Store page. It shows your store listing as you fill it in.
Icon, name and description
Start with the icon, the name, a subtitle and a description.
Screenshots
The screenshots are drawn from your app's design. Choose the background, the text colour and the headline font.
Your Apple Developer account
For the App Store you need your own Apple Developer account. Apple charges 99 dollars a year for it.
Create an Apple Account
No account yet? Start with an Apple Account. Create one on account dot apple dot com, and turn on two-factor authentication. Apple requires it for developers.
Enroll in the Apple Developer Program
Then enroll in the Apple Developer Program, on developer dot apple dot com. Enroll as an individual, and your own legal name is shown as the seller of your app. Enroll as an organization, and it is your company name. Apple then also asks for a DUNS number, and a website on your own domain. Start your enrollment, and sign in with your Apple Account.
Apple's agreements, your details and payment
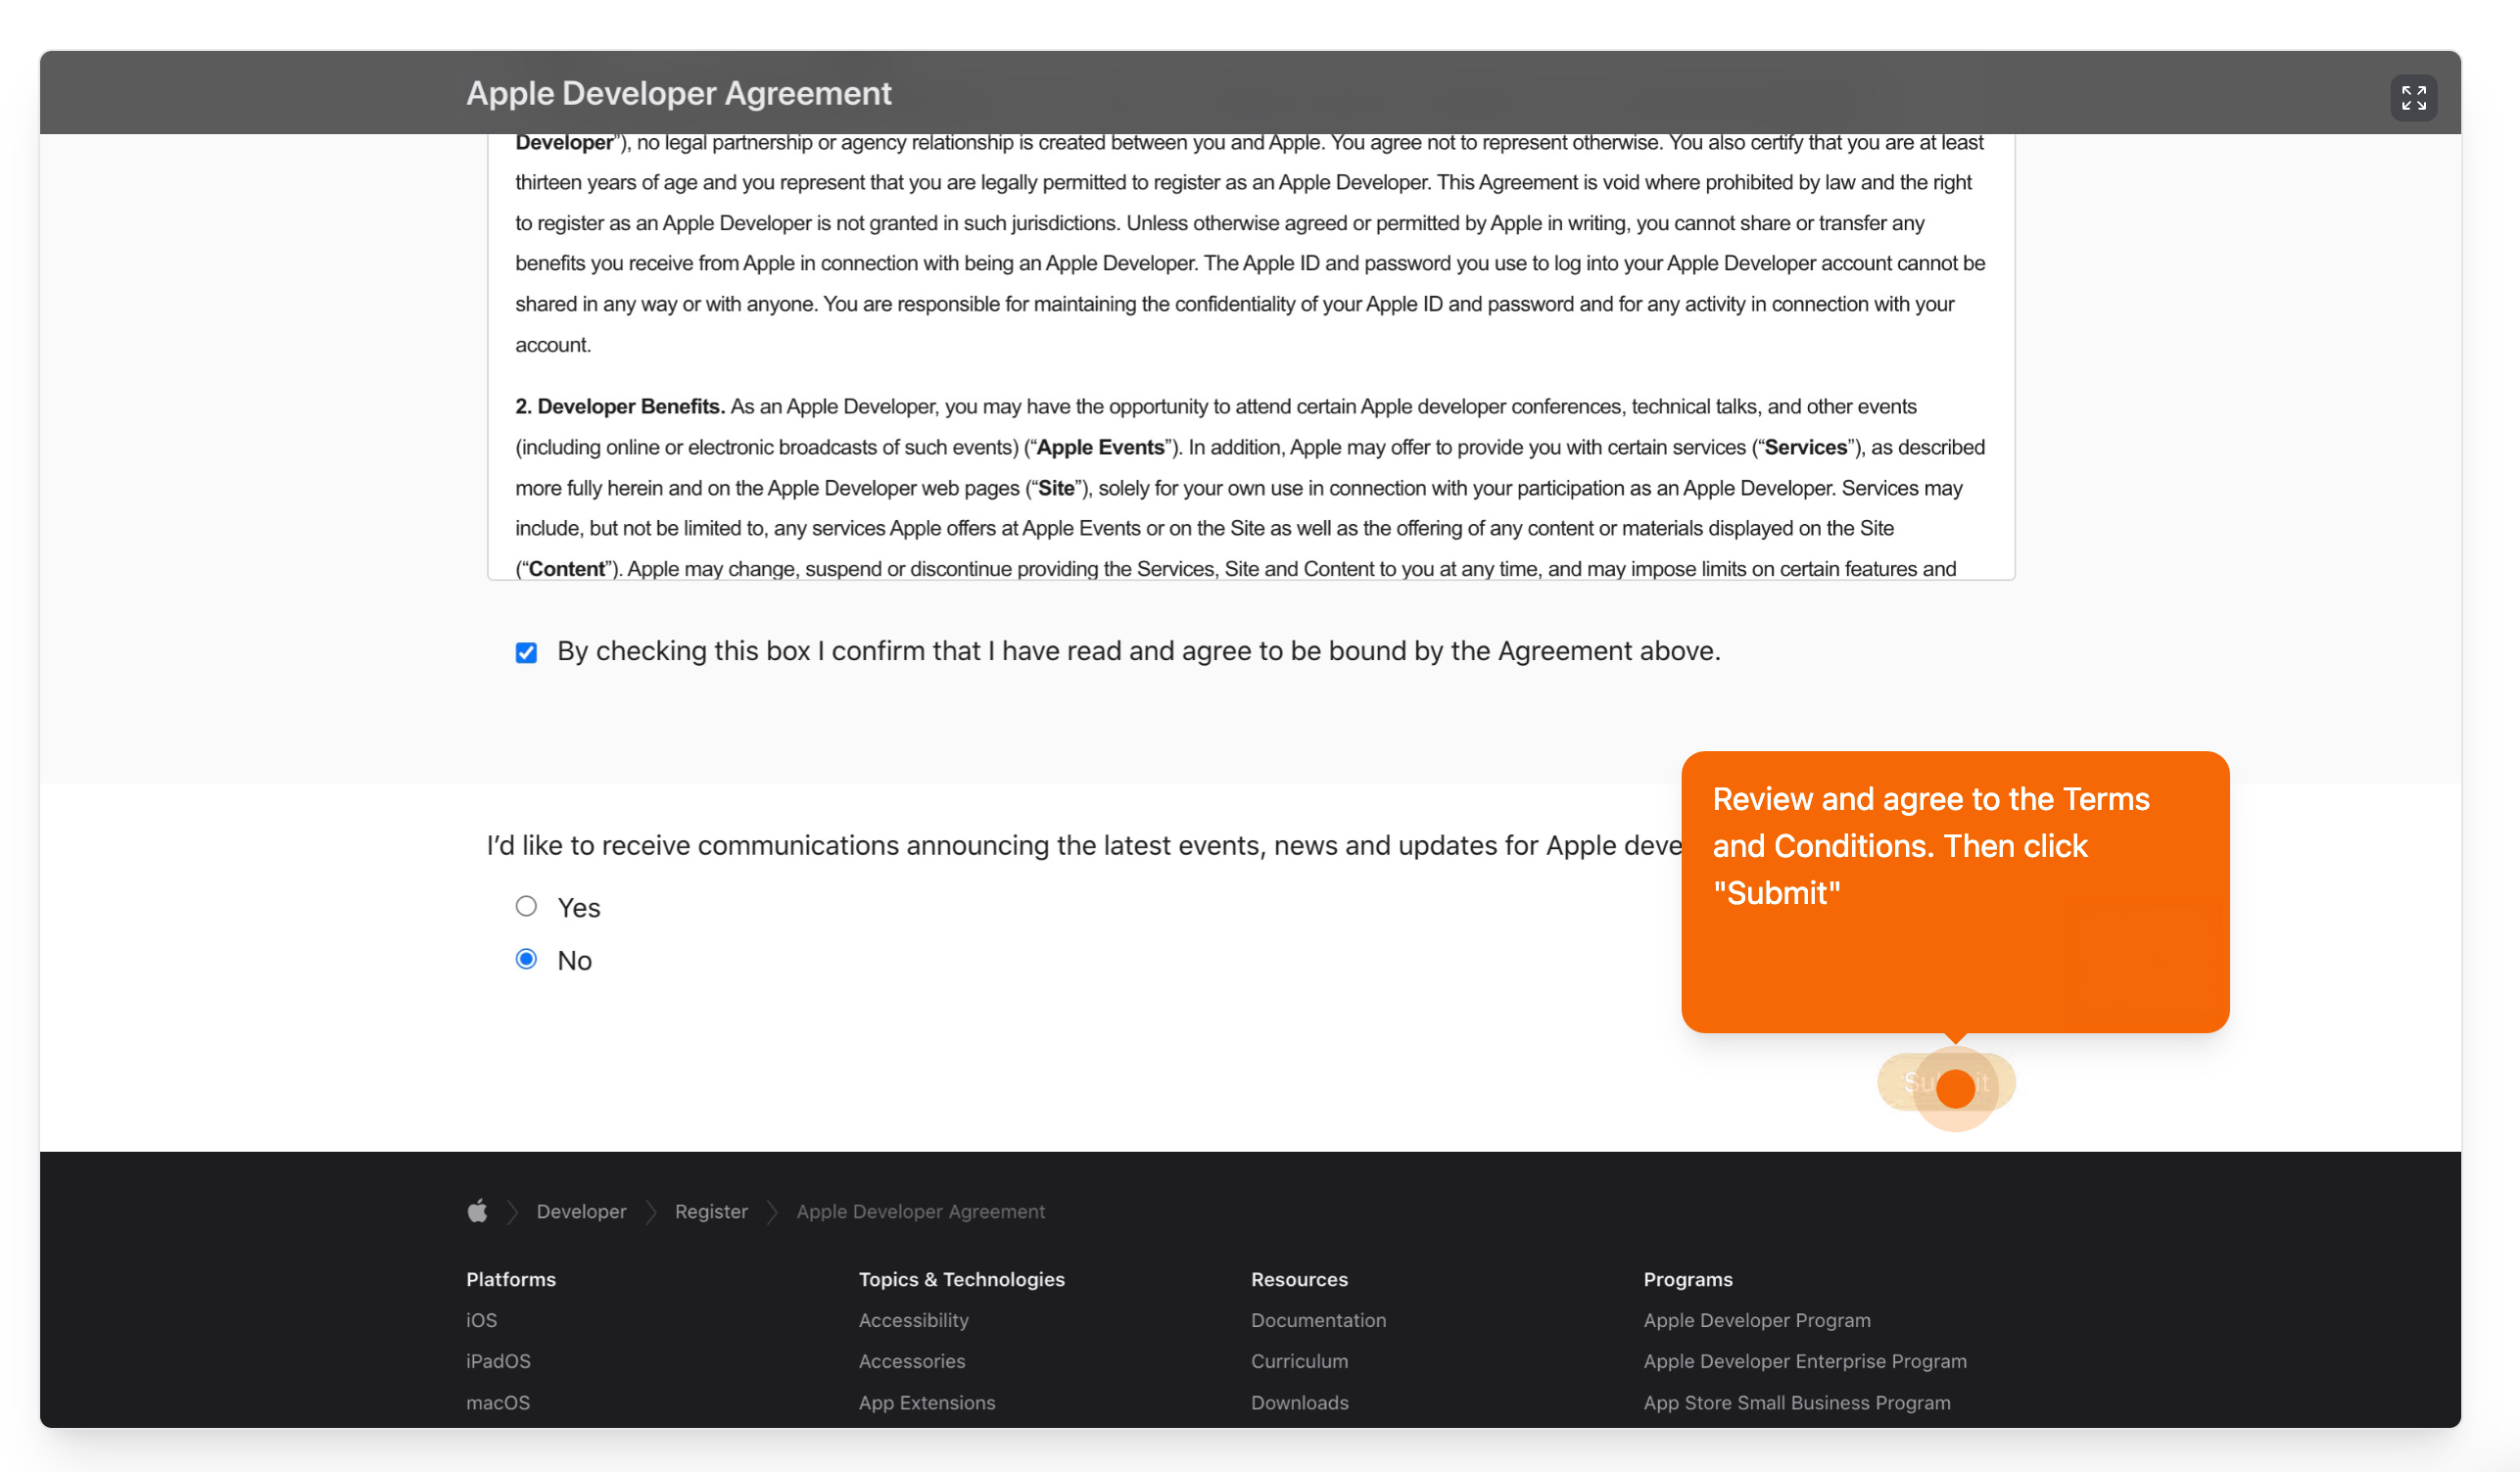
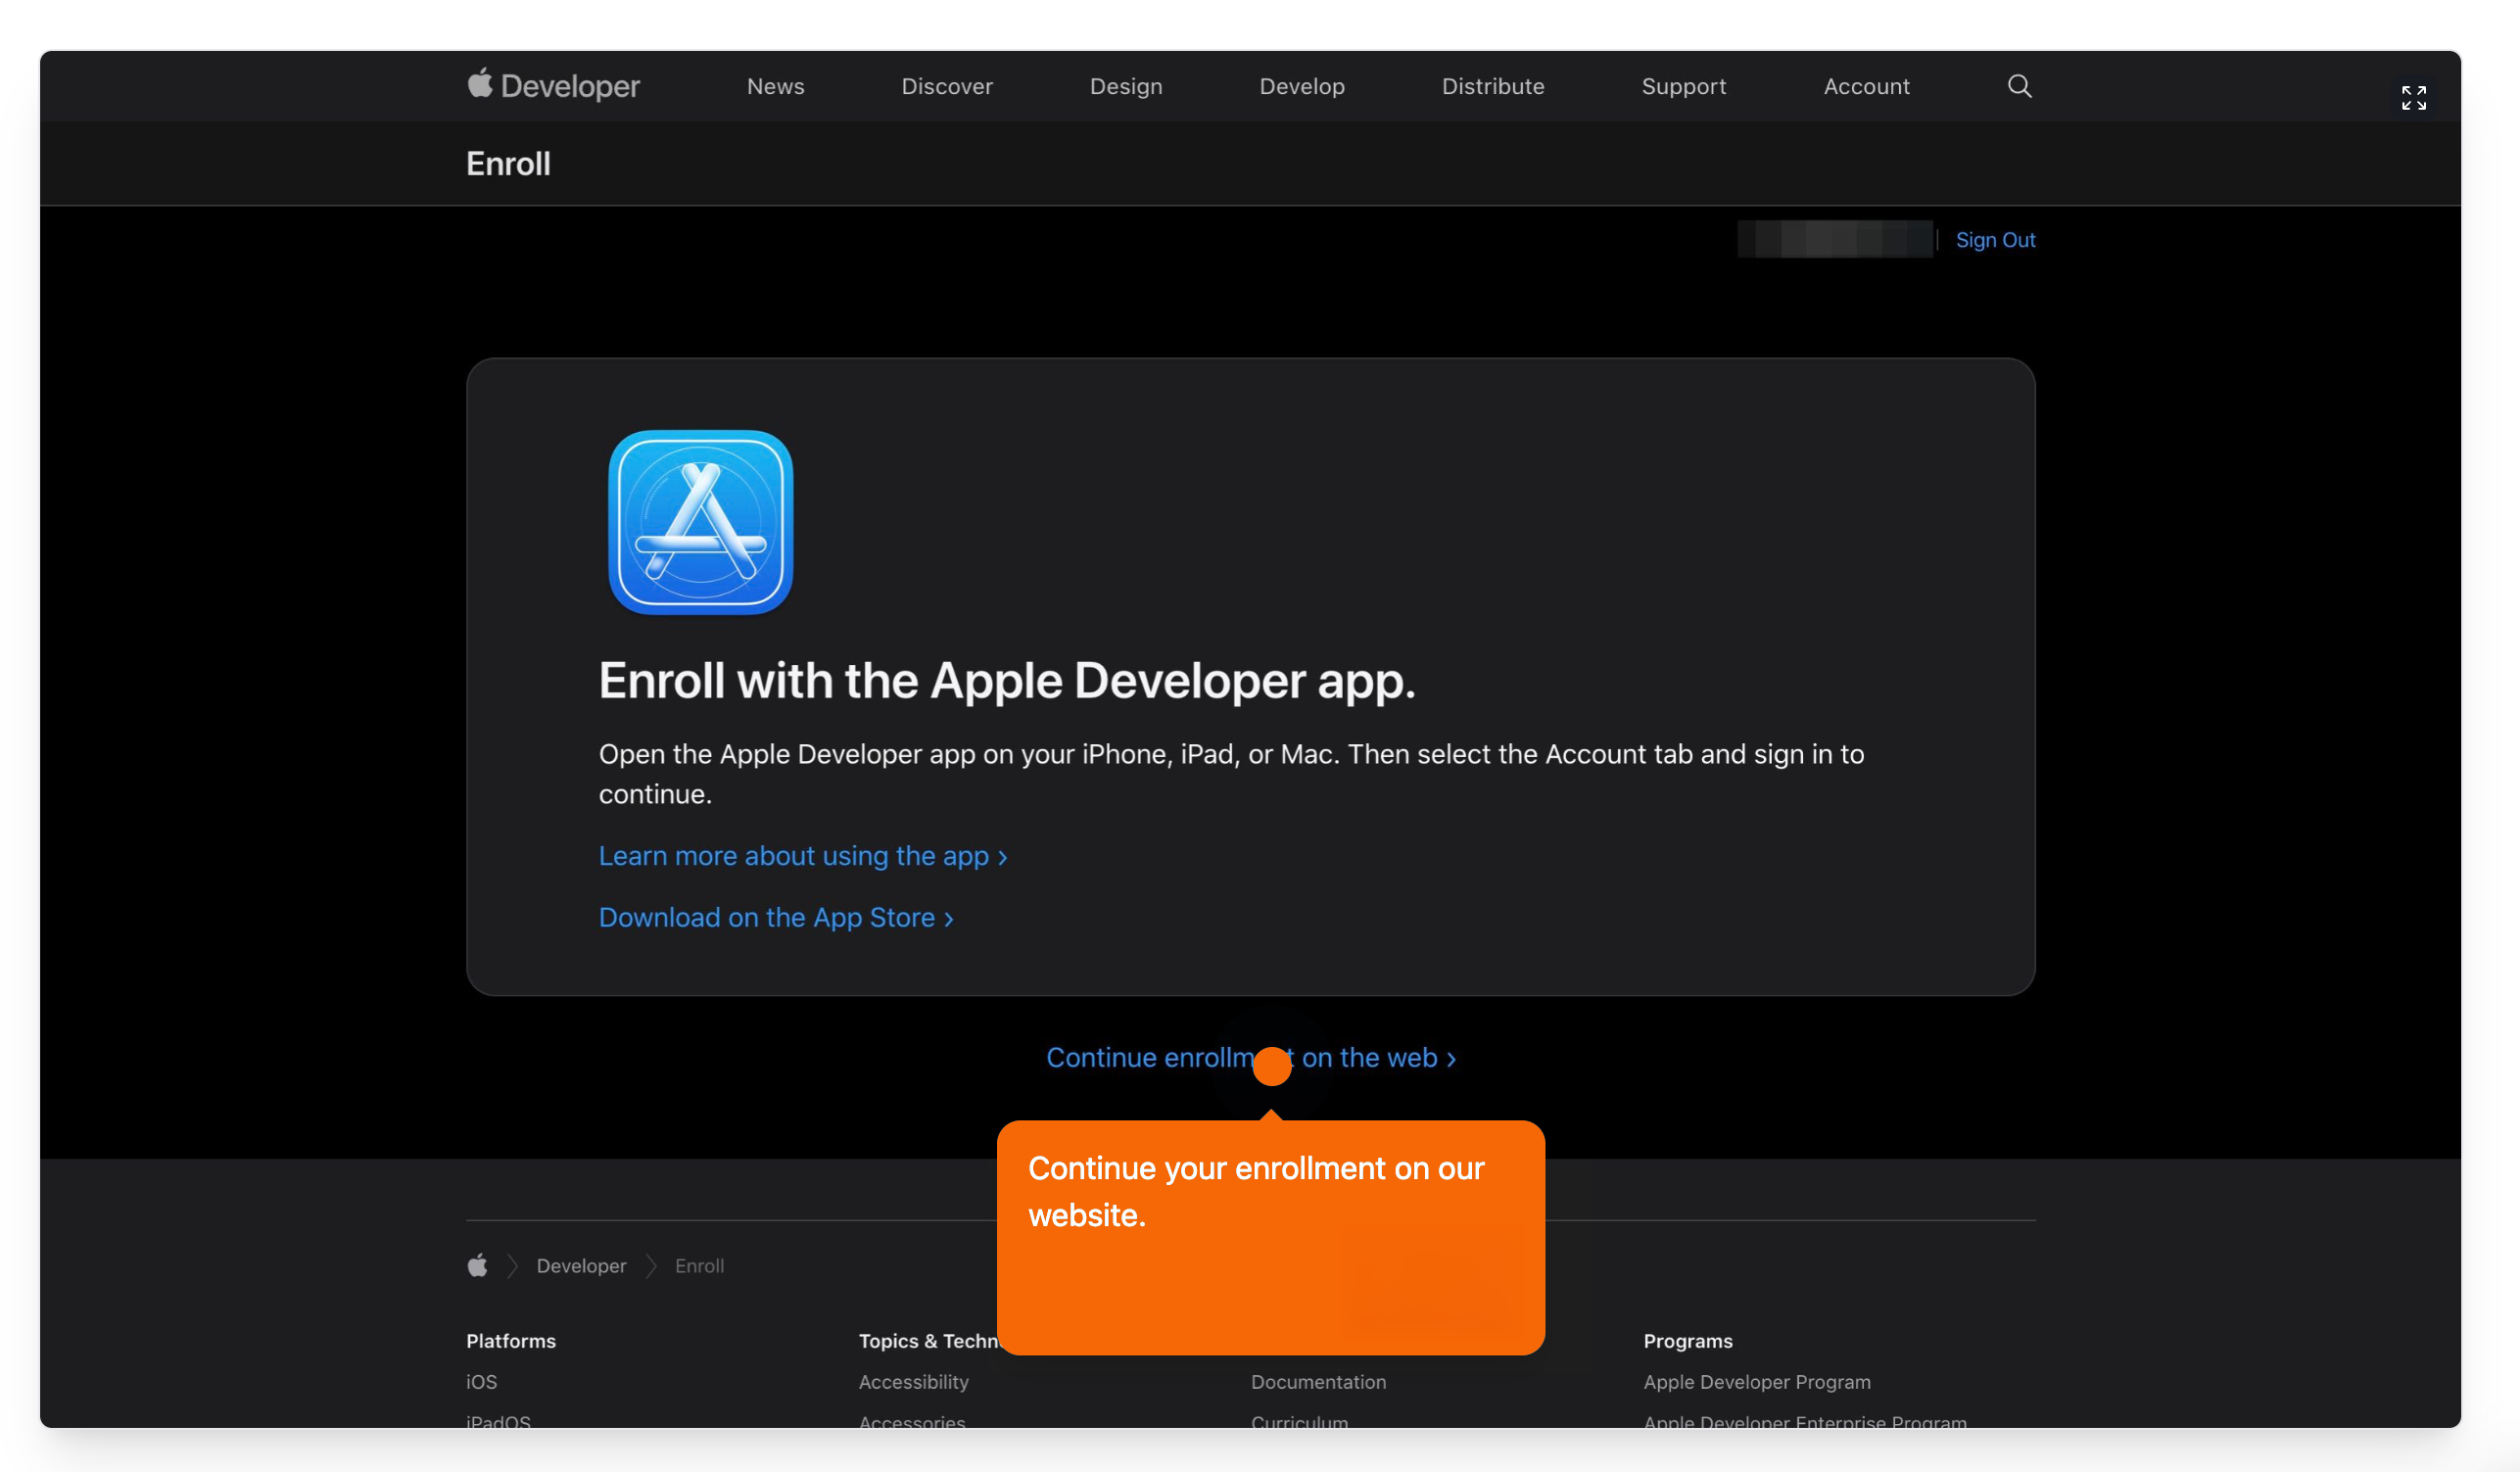
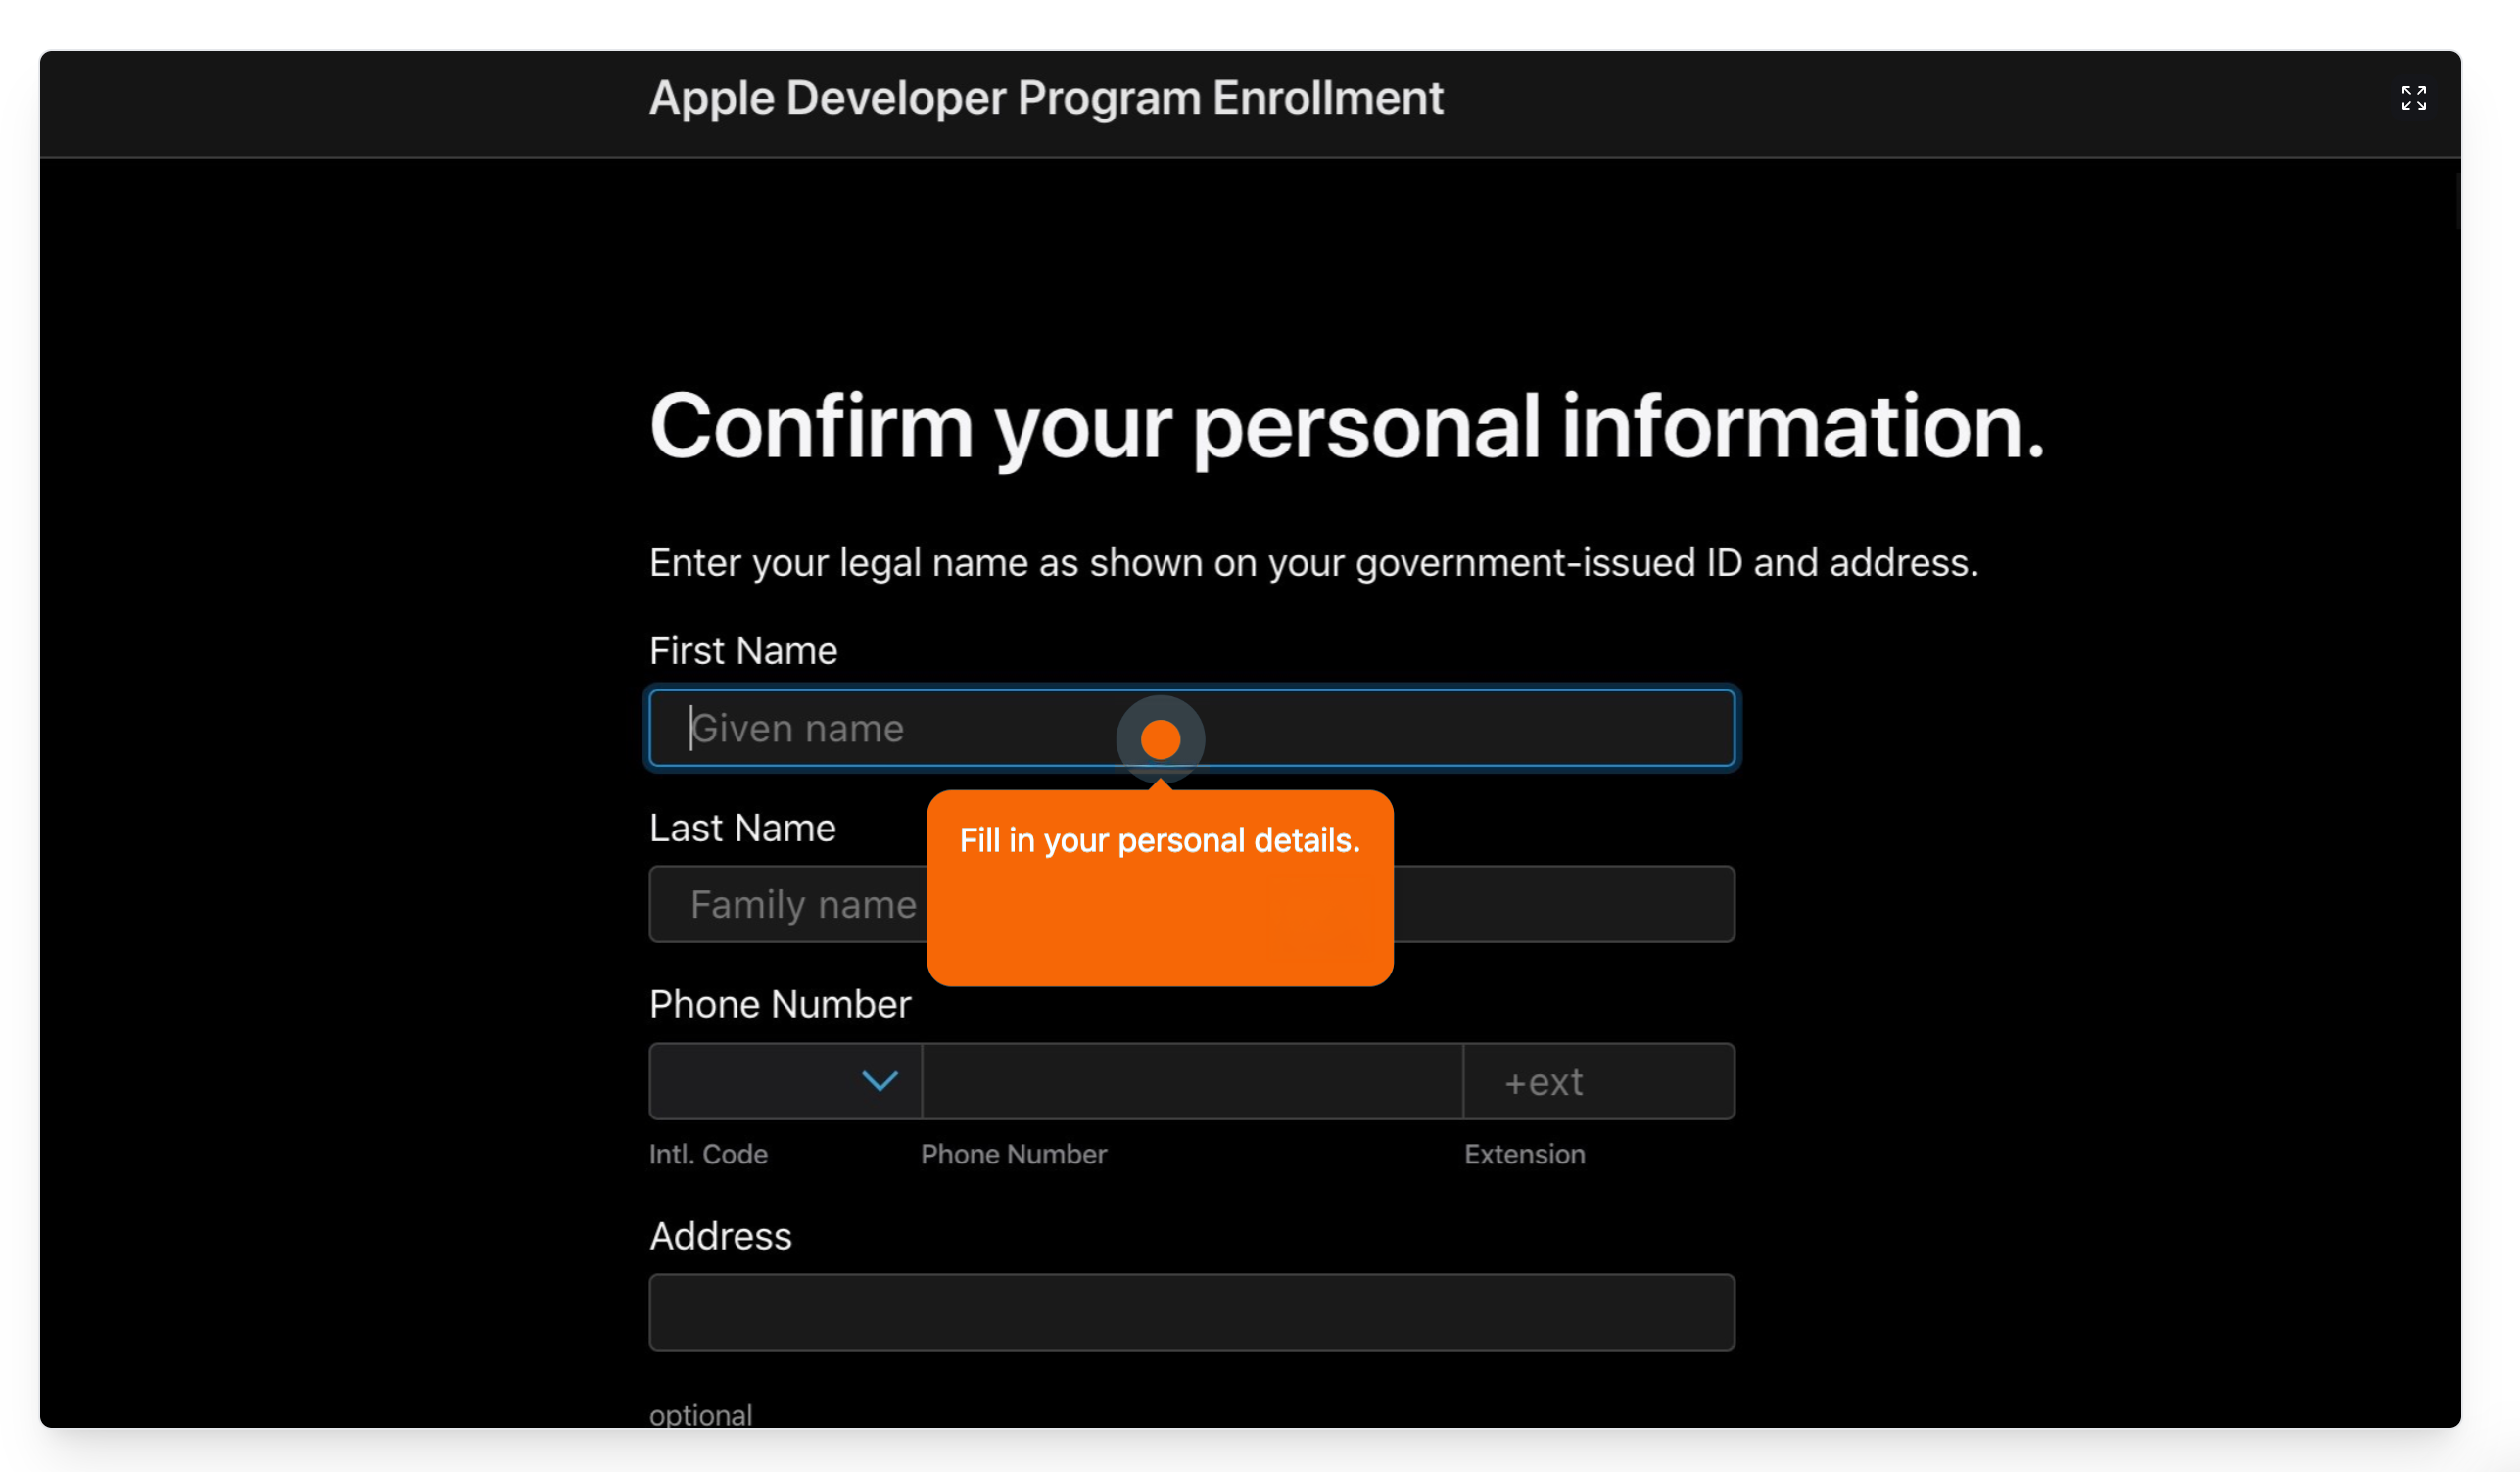
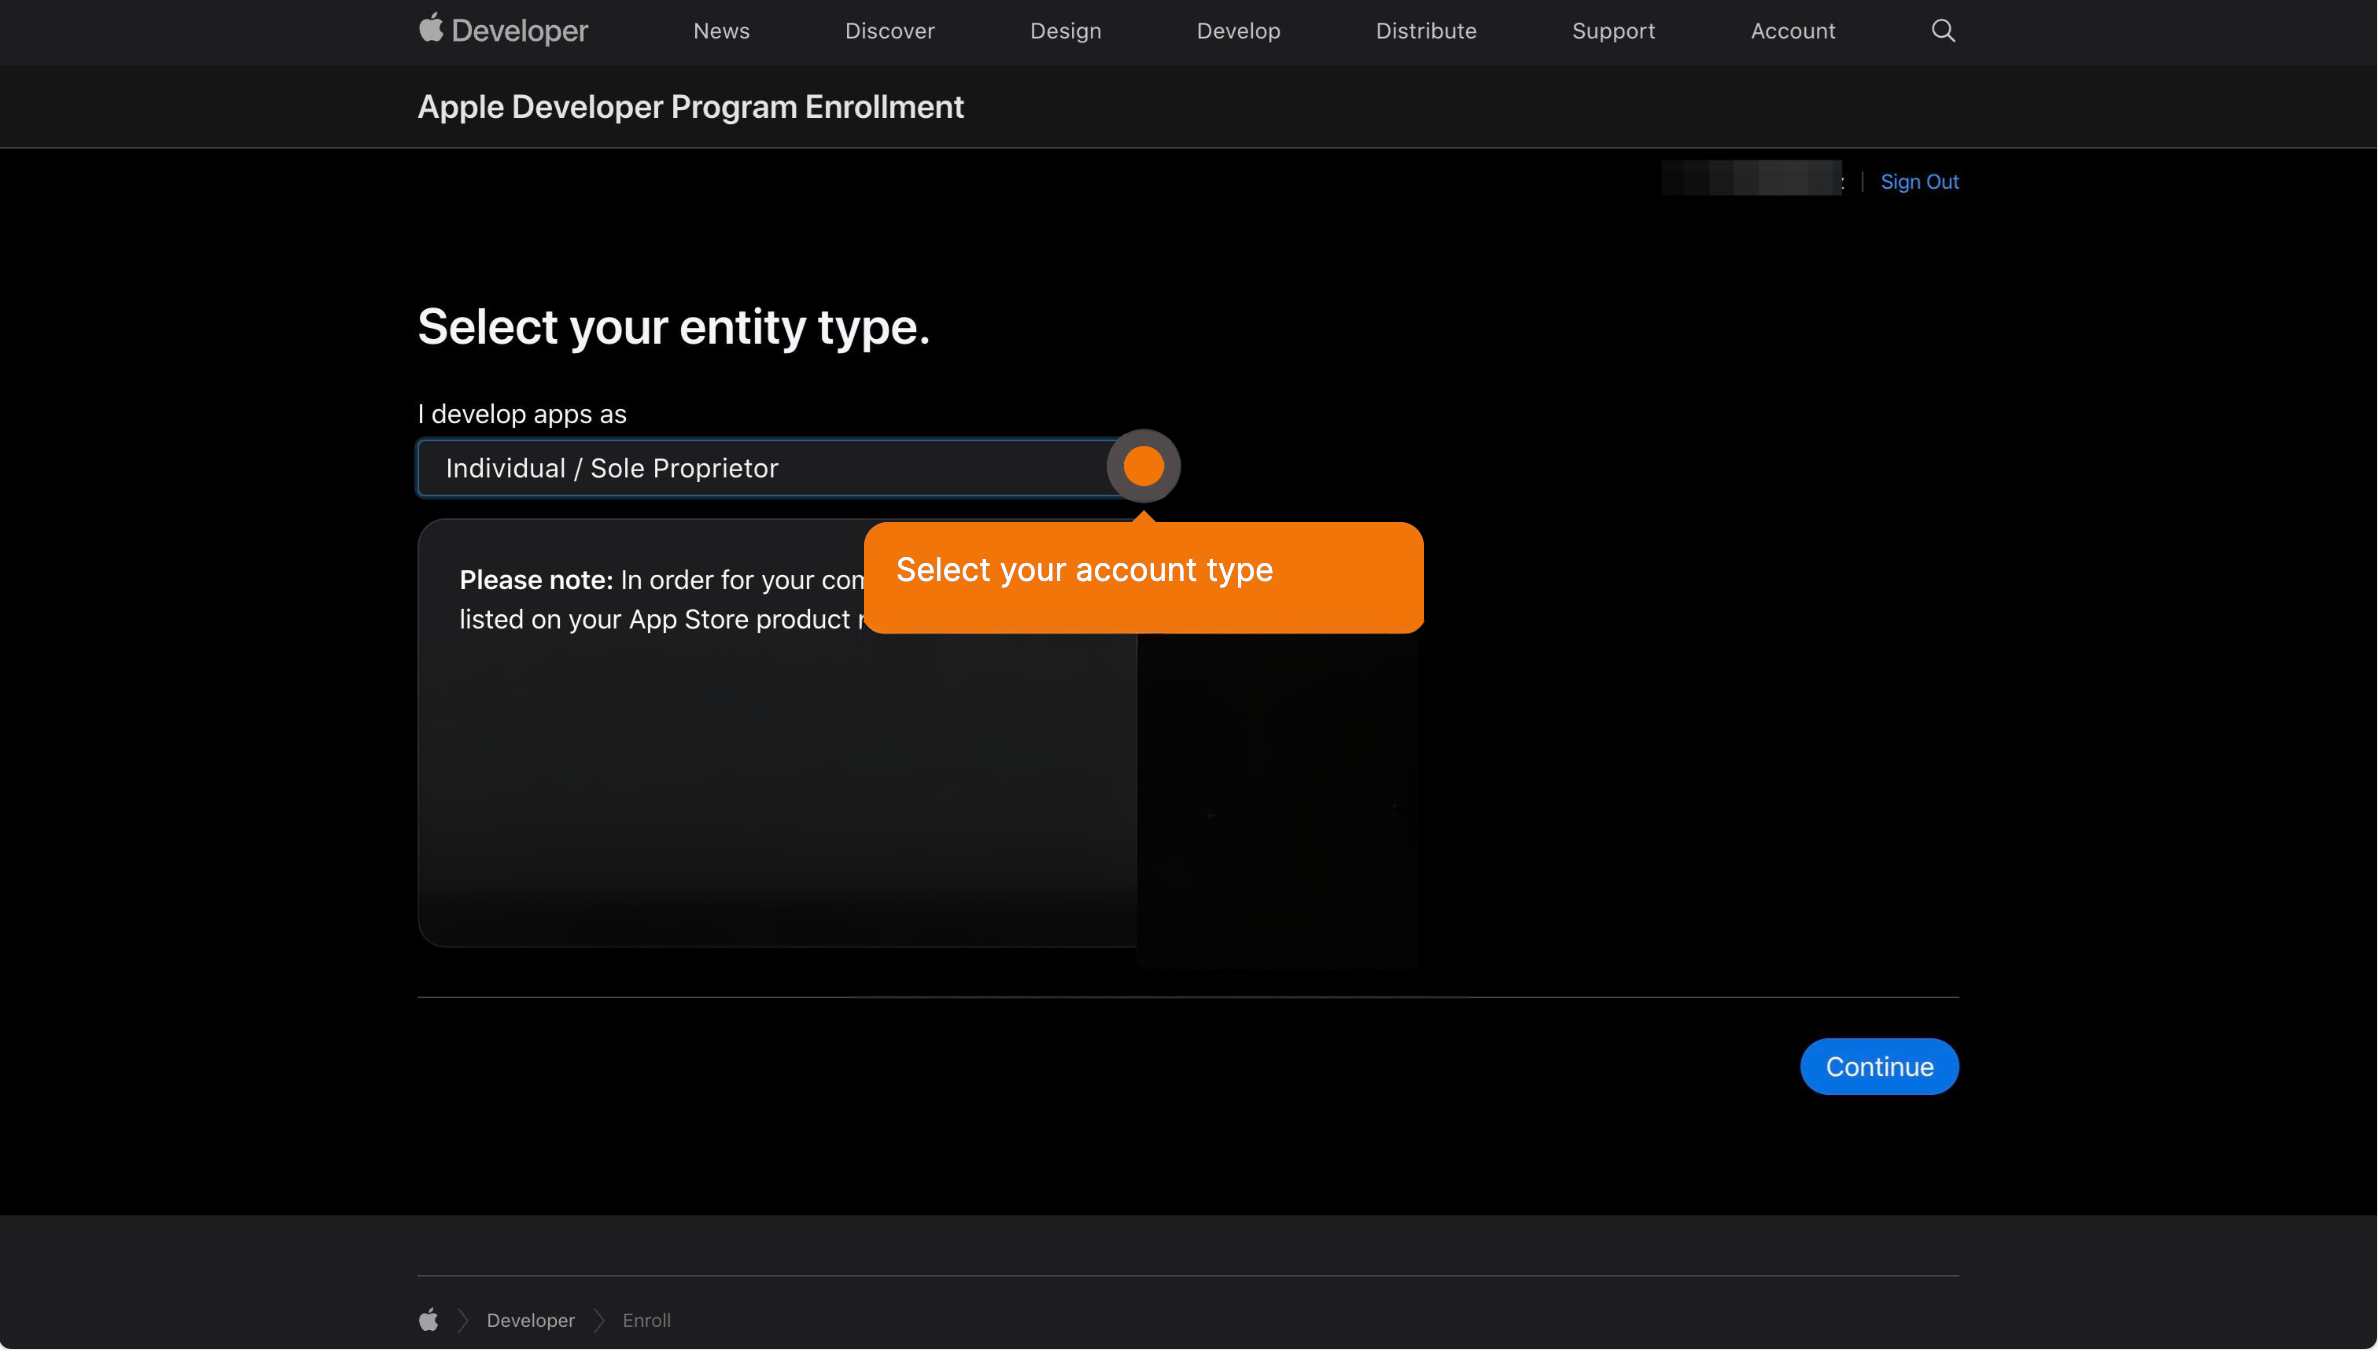
Apple first shows the Apple Developer Agreement. Tick the box and submit. On your account page, click Enroll today, and continue on the web, or in the Apple Developer app. Enter your legal name, exactly as it is on your ID, with your phone number and address. Choose your entity type: individual, or organization. Next is the Apple Developer Program License Agreement. Read it, tick the box and continue. Then purchase the membership and enter your payment details. Apple confirms by email, usually within two business days. Wait for that email before you go on.
Business compliance in App Store Connect
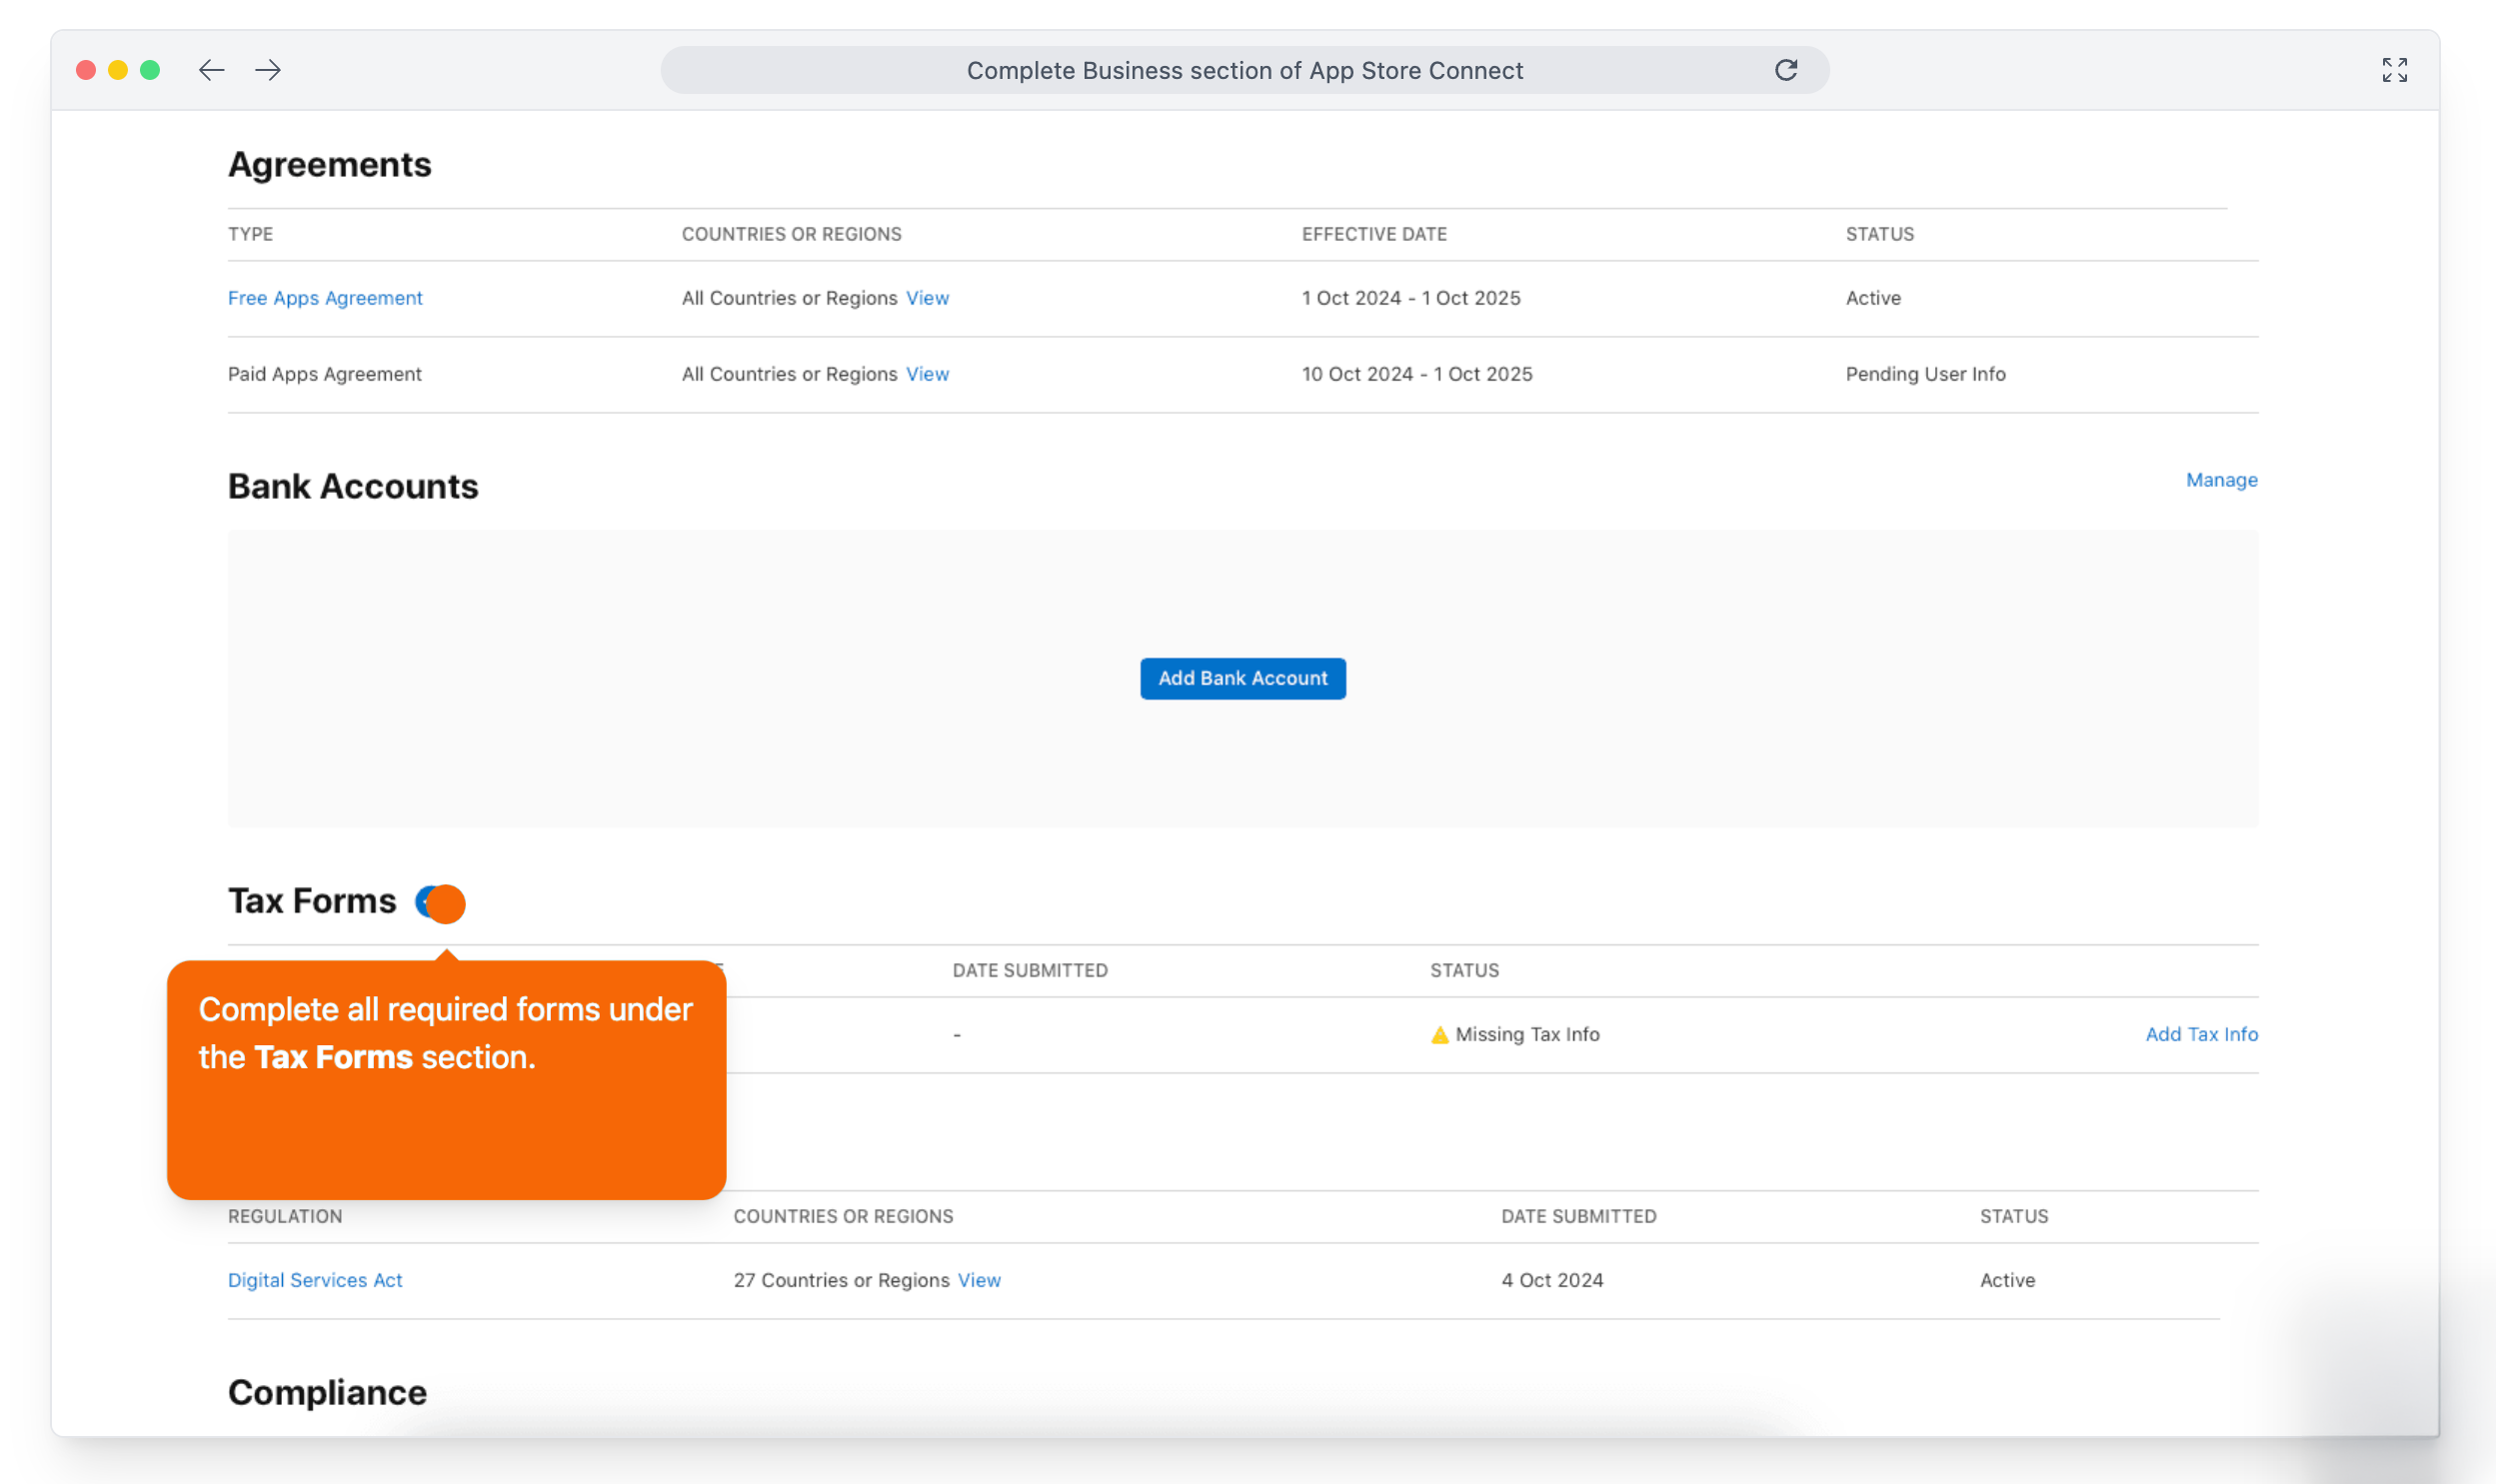
Once you are approved, sign in to App Store Connect and open Business. Complete the compliance requirements: tell Apple whether you are a trader, and add your legal entity. Then, under Agreements, view and agree to the terms.
Connect your account in Scraler
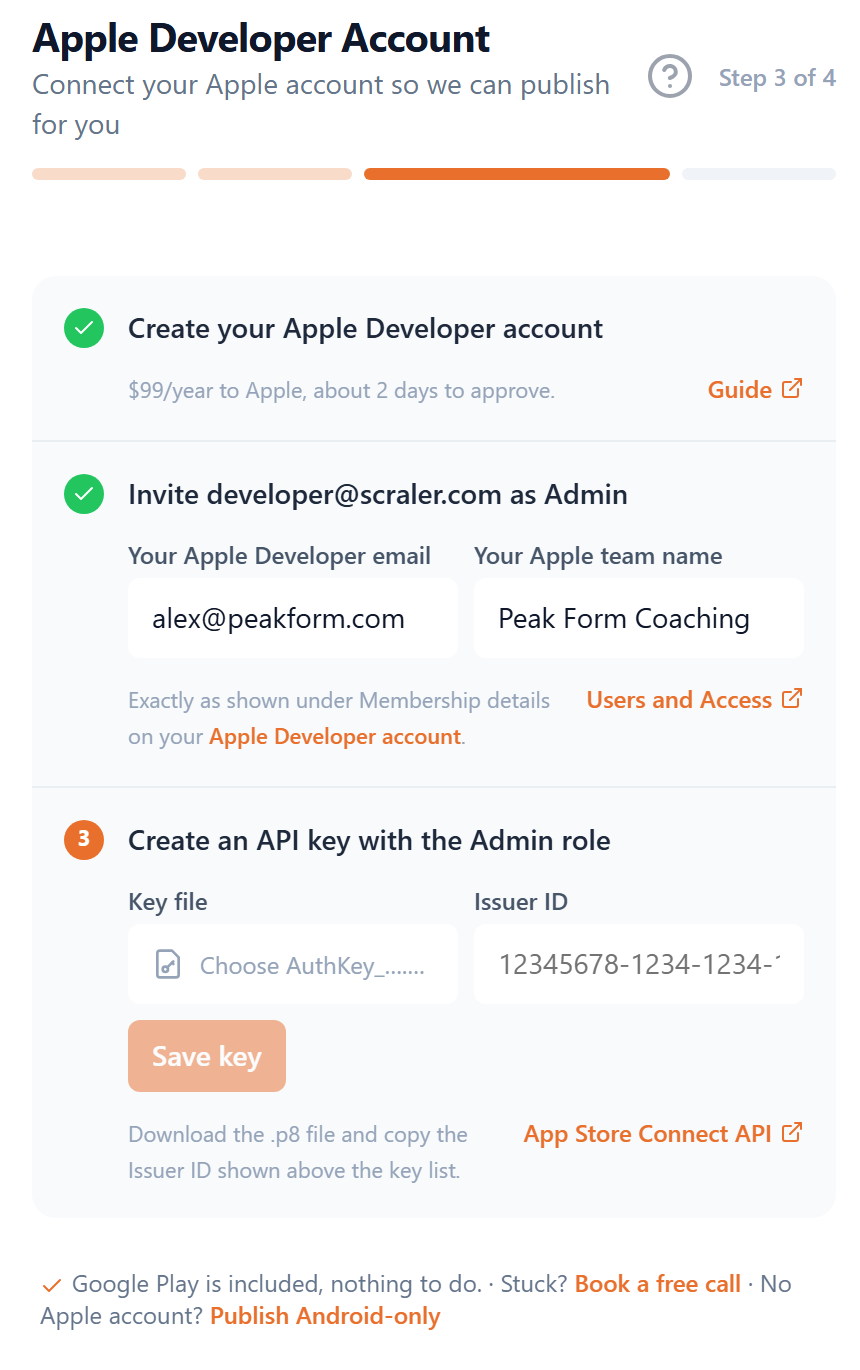
Back in Scraler, fill in the account's email, and your team name exactly as Apple shows it under Membership details.
Invite Scraler in App Store Connect
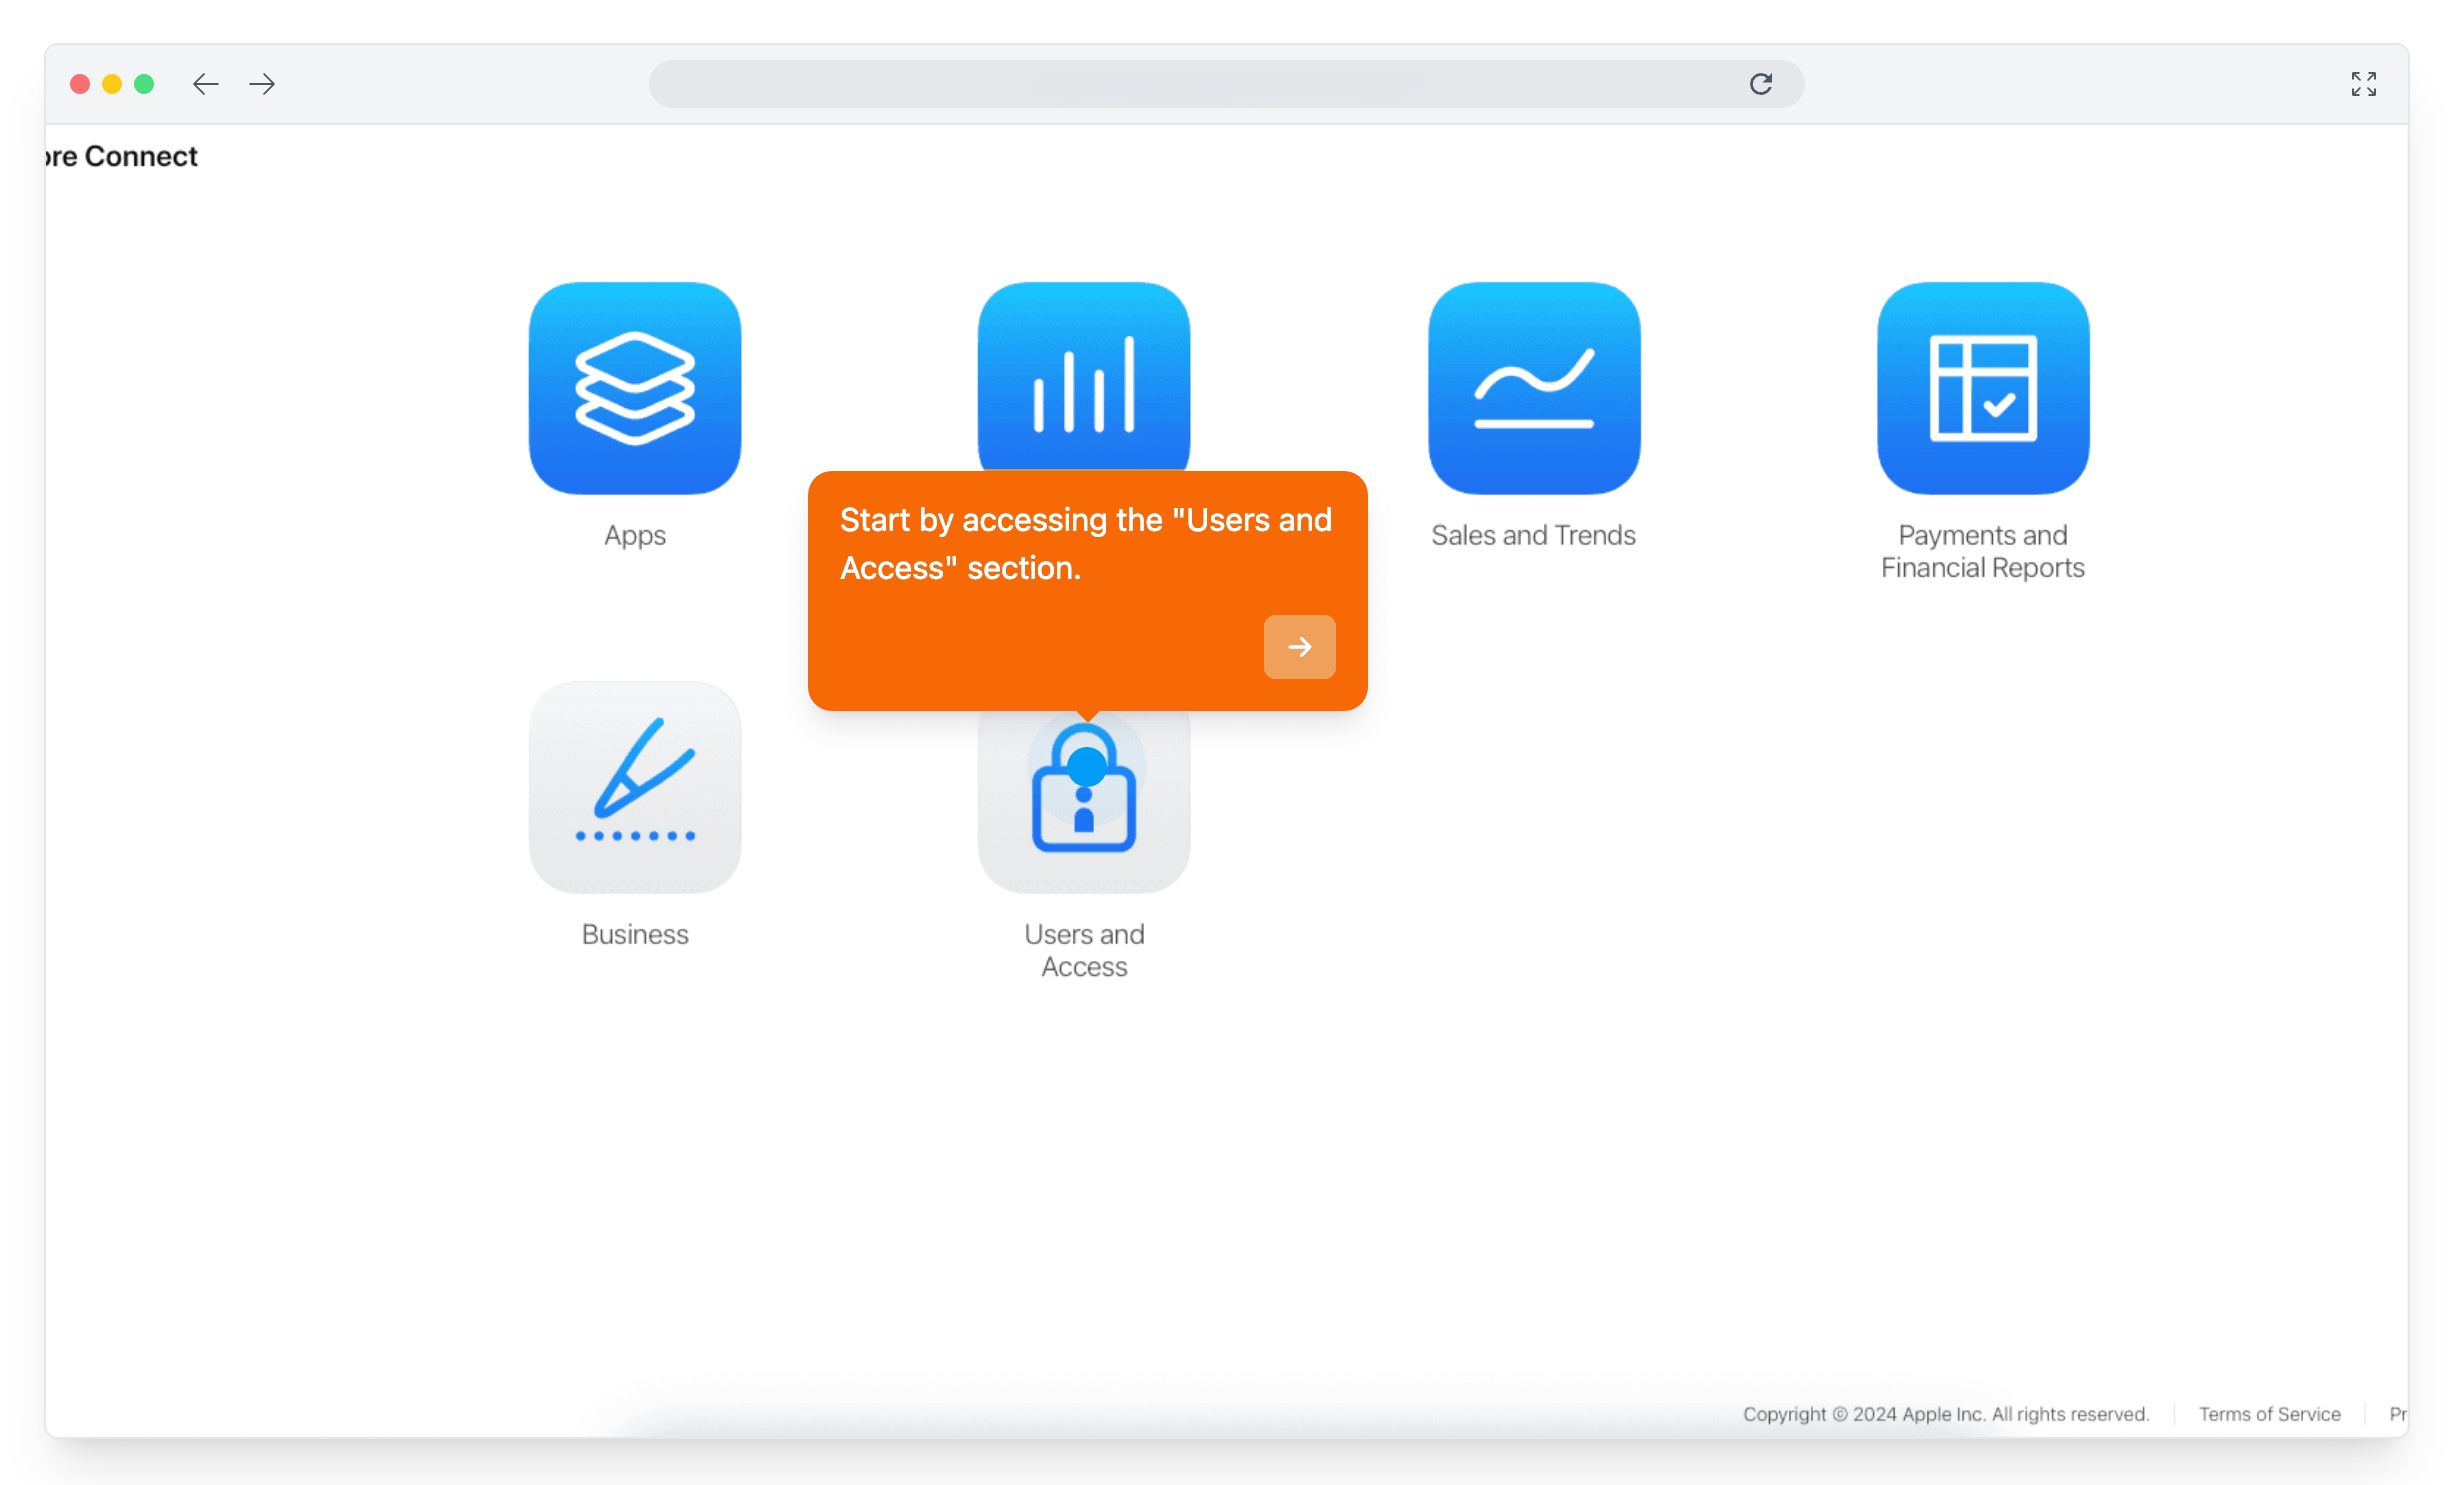
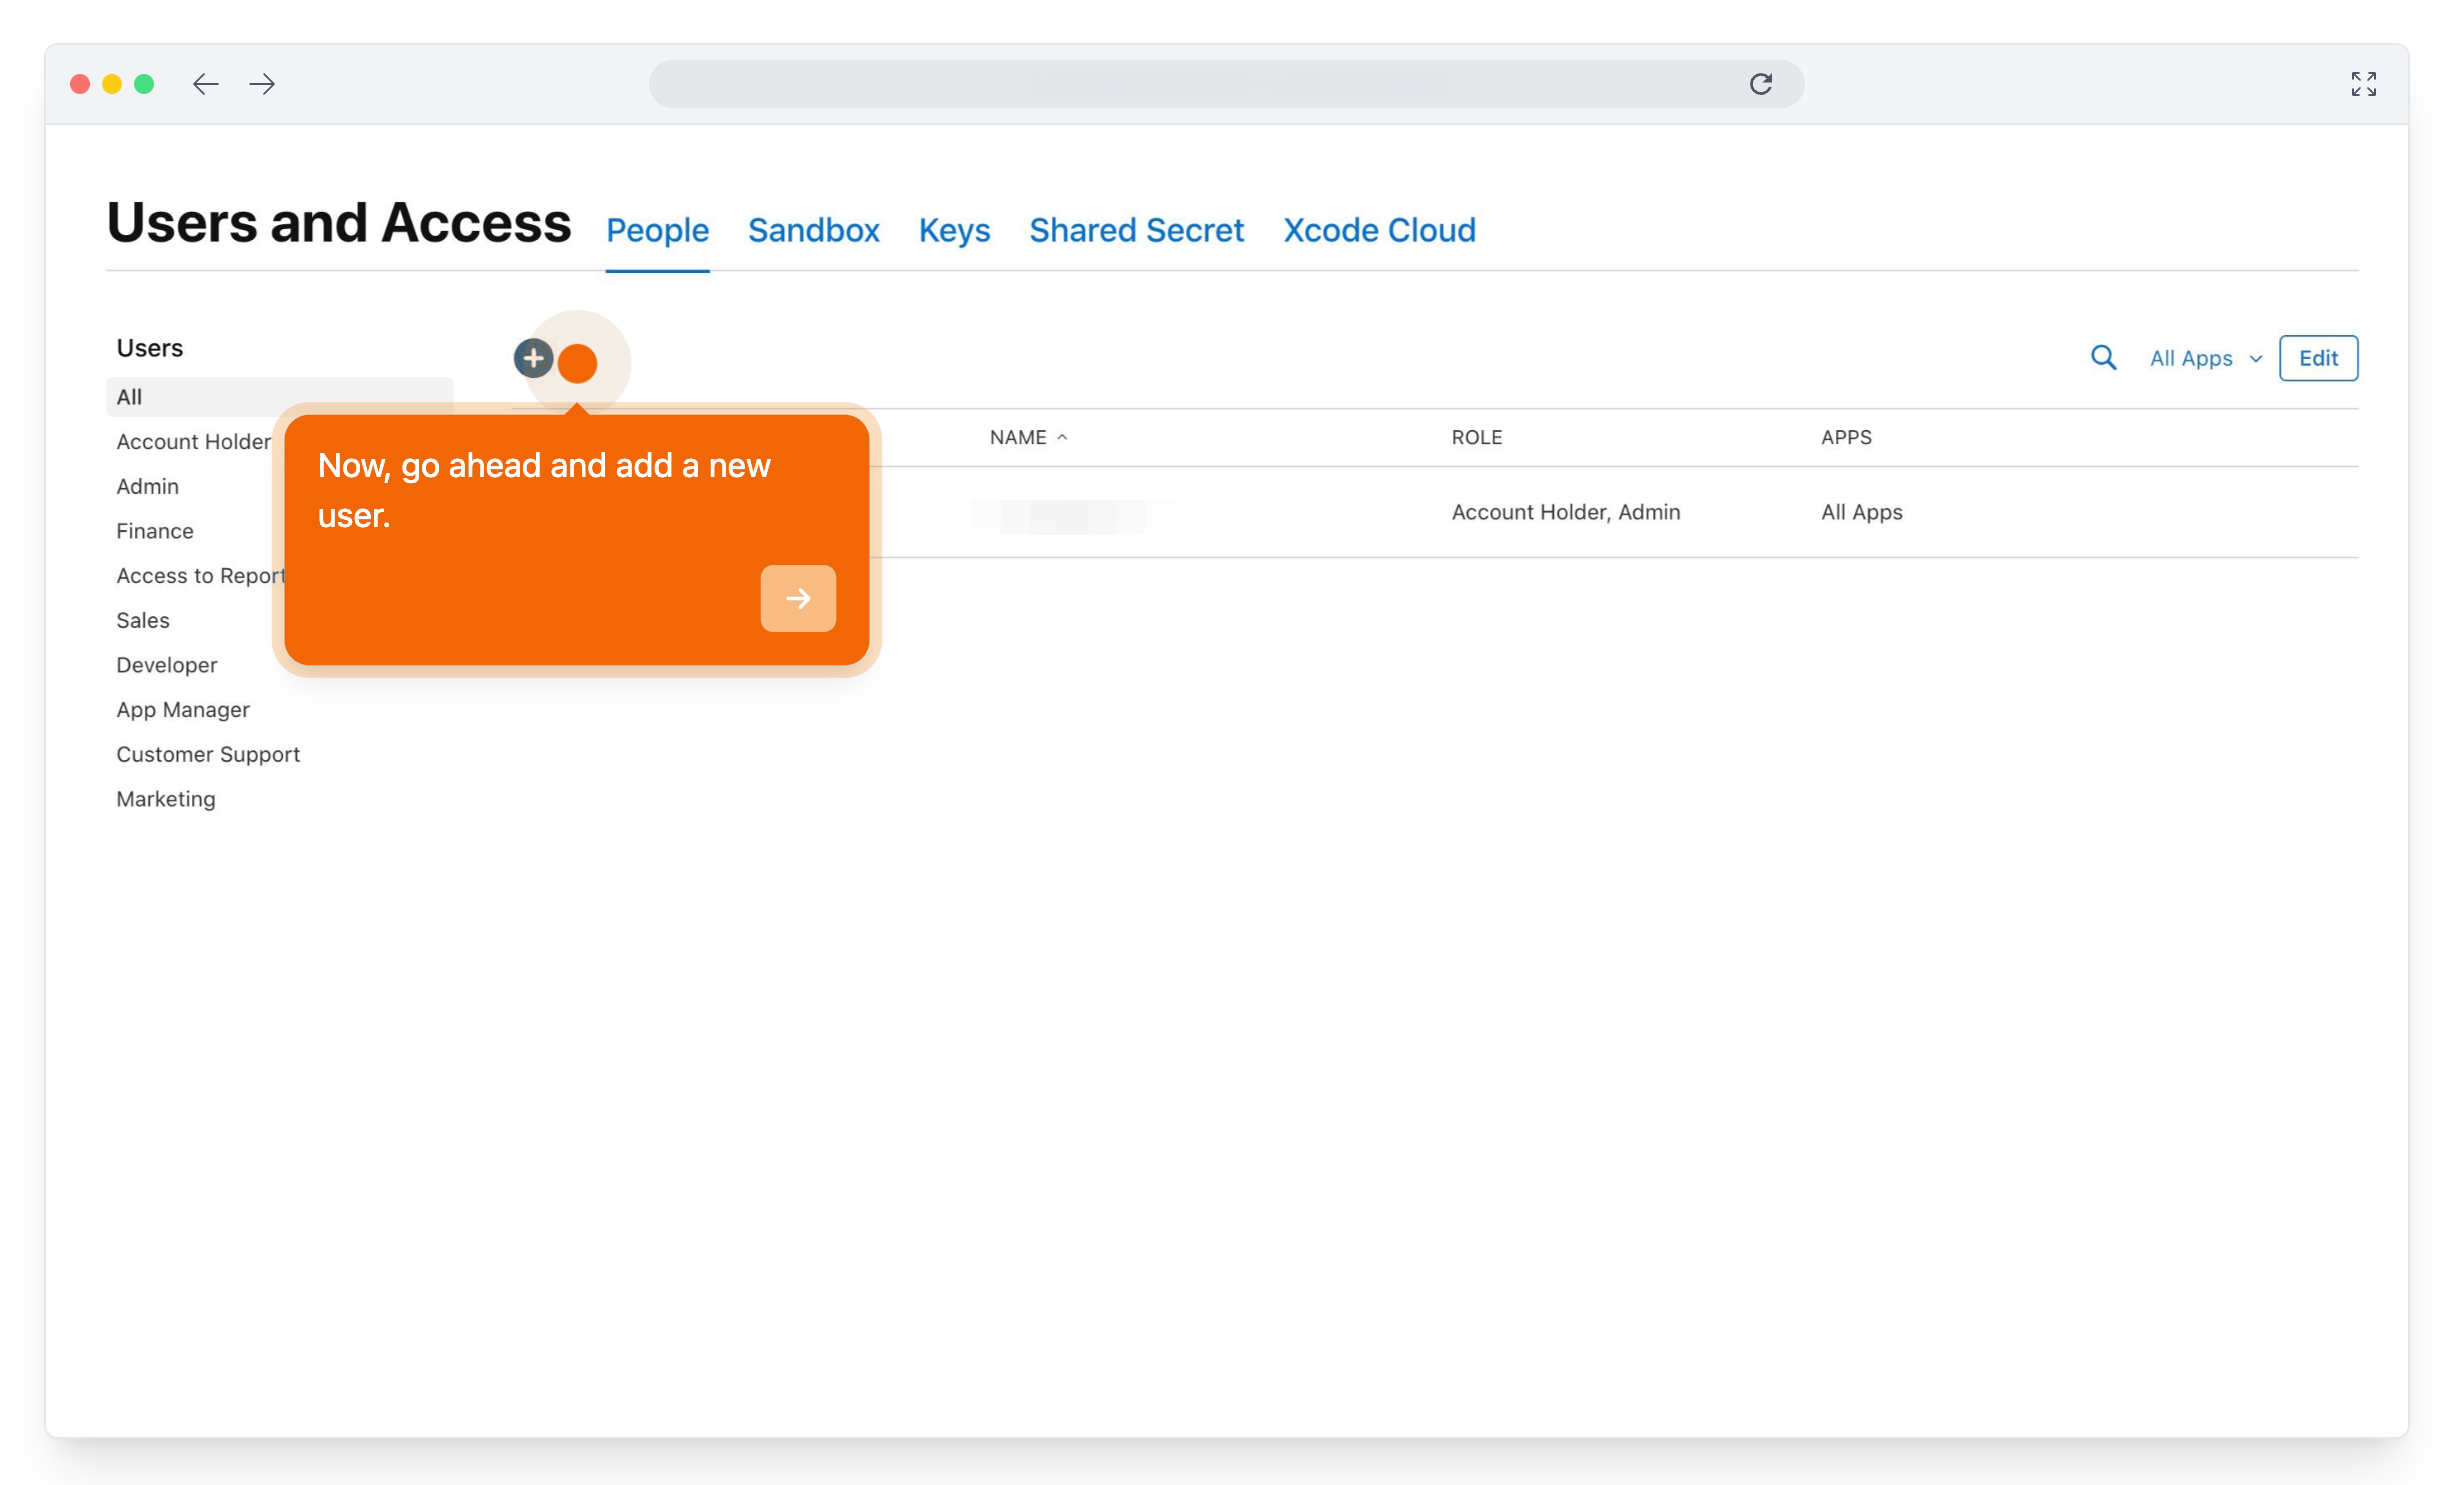
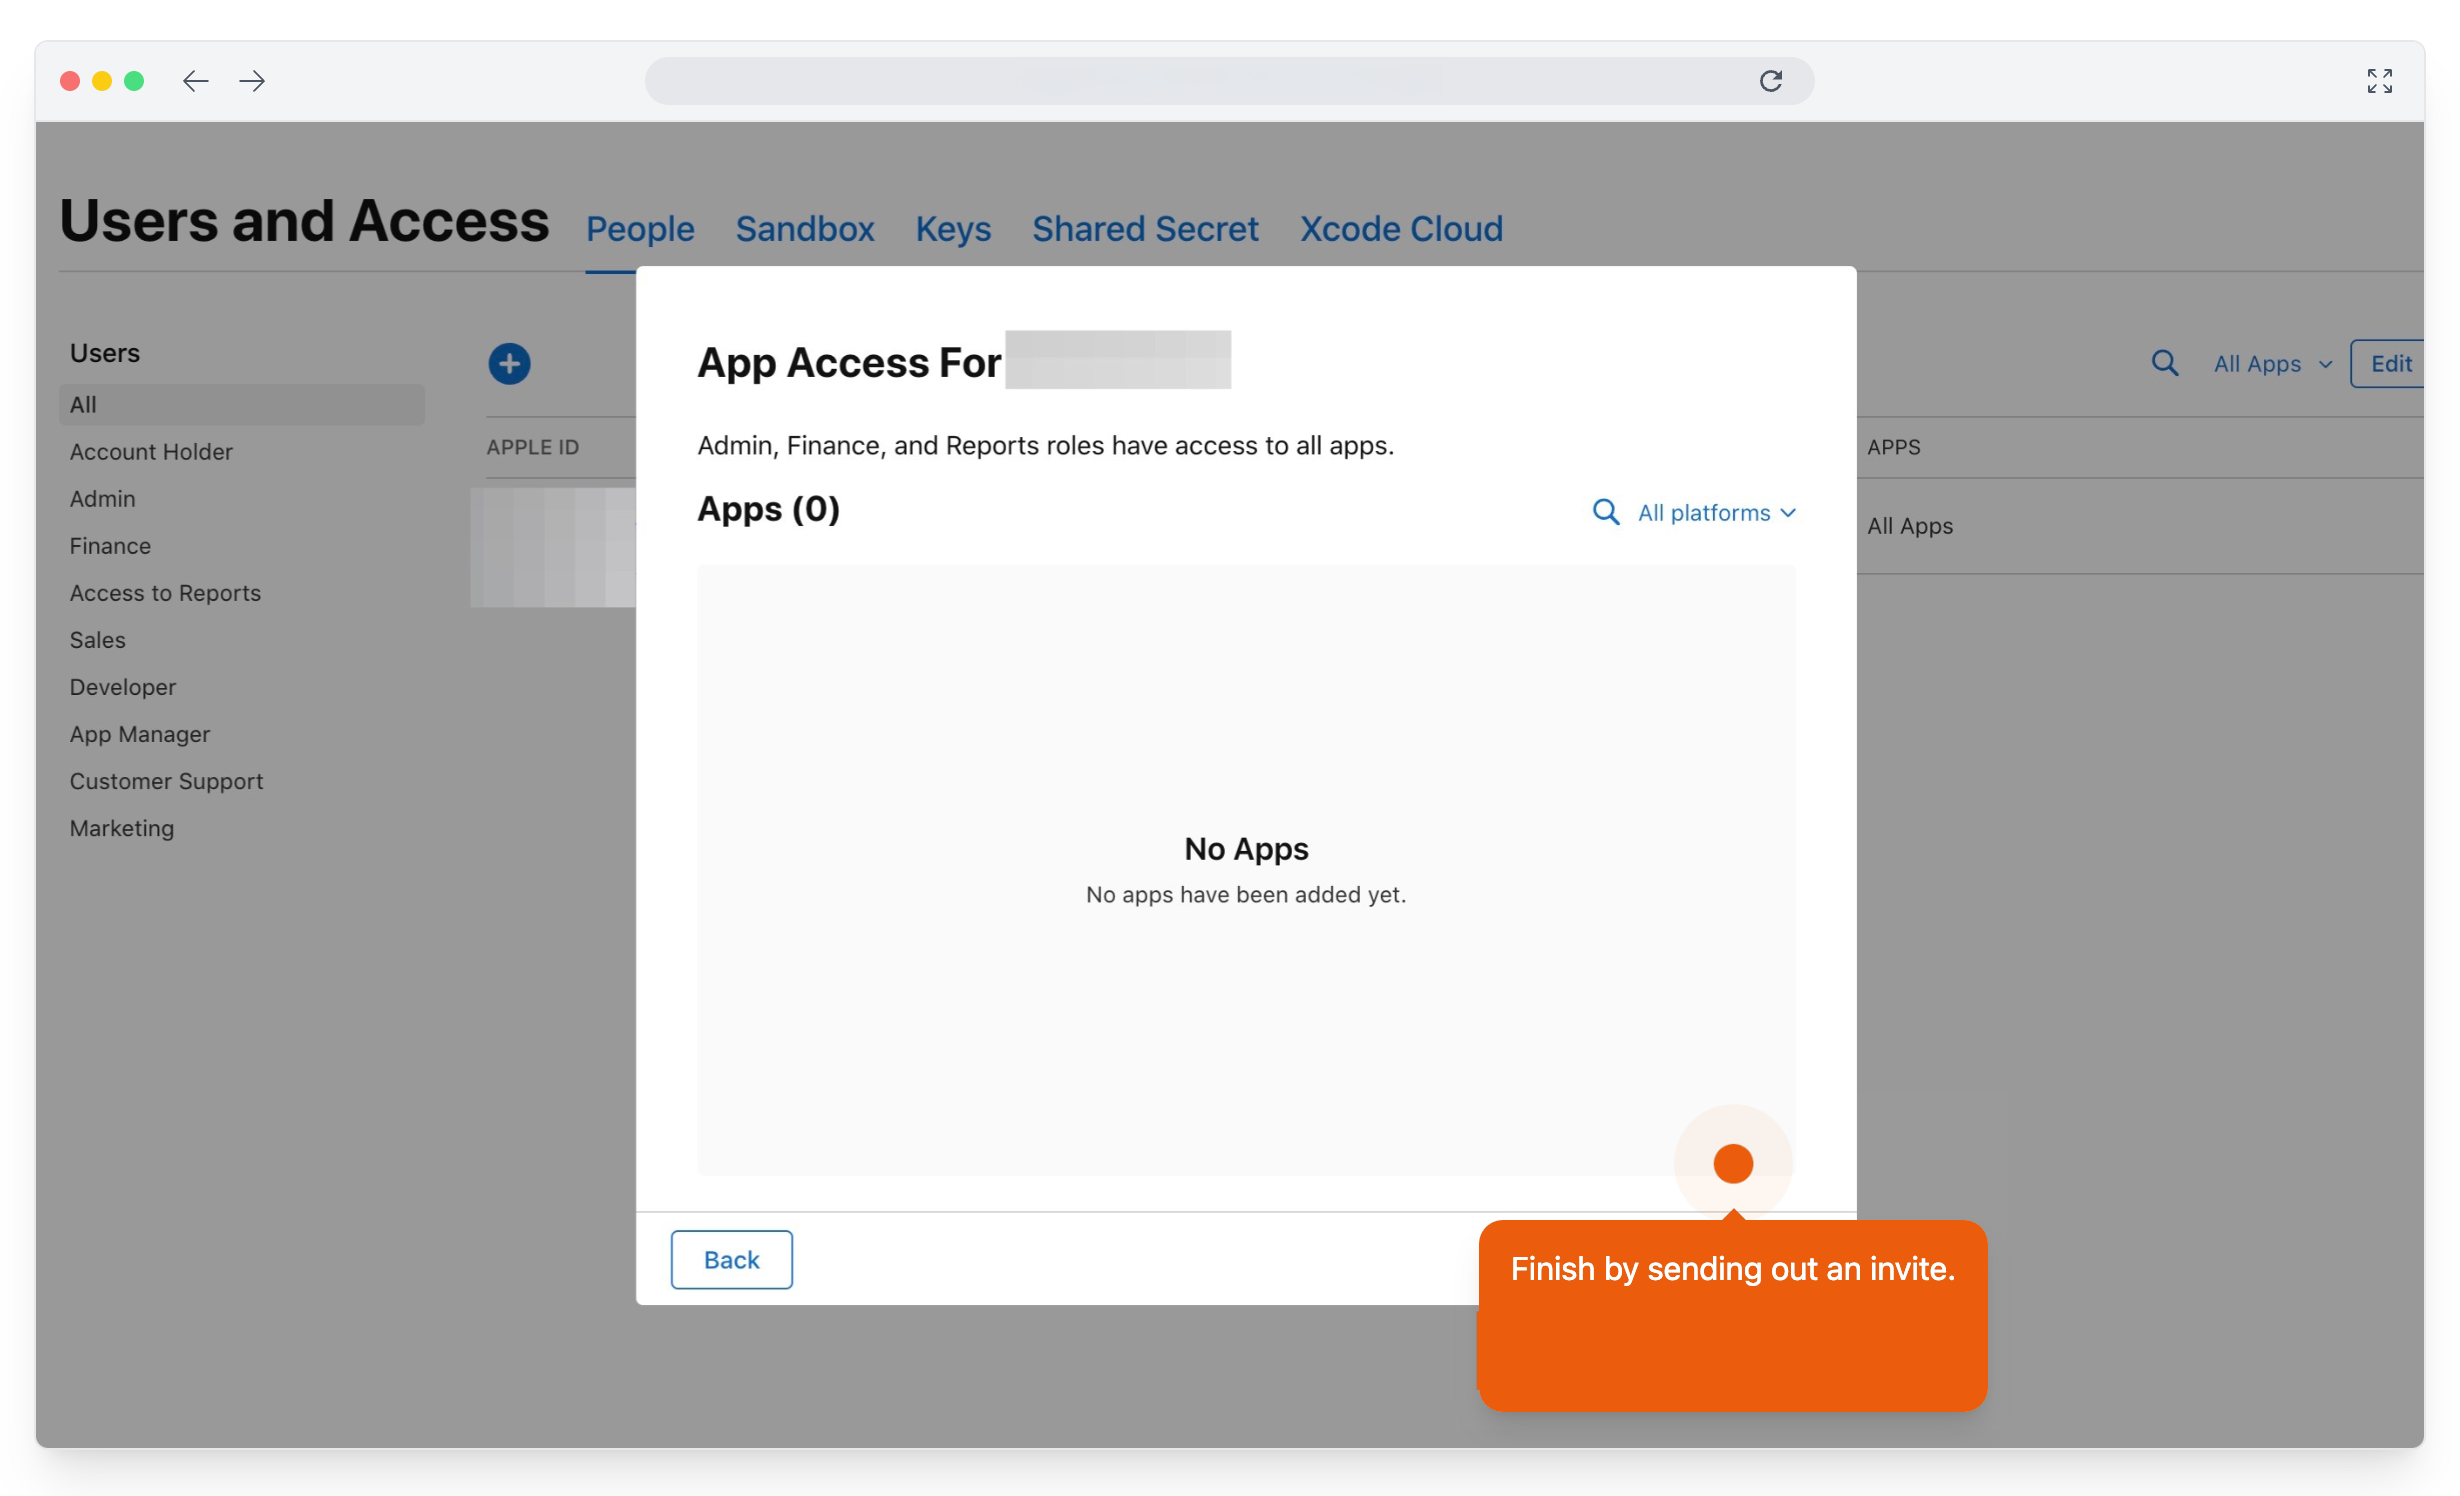
Then, in App Store Connect, open Users and Access, and add a new user: Scraler as the name, developer at scraler dot com as the email, and the Admin role. Then invite.
Create the API key
Next, the API key, under Integrations, App Store Connect API. The first time, Apple asks you to request access there: tick the box to agree to its terms, and submit. Then generate a key: name it Scraler, give it Admin access, and generate.
Download the key and copy the Issuer ID
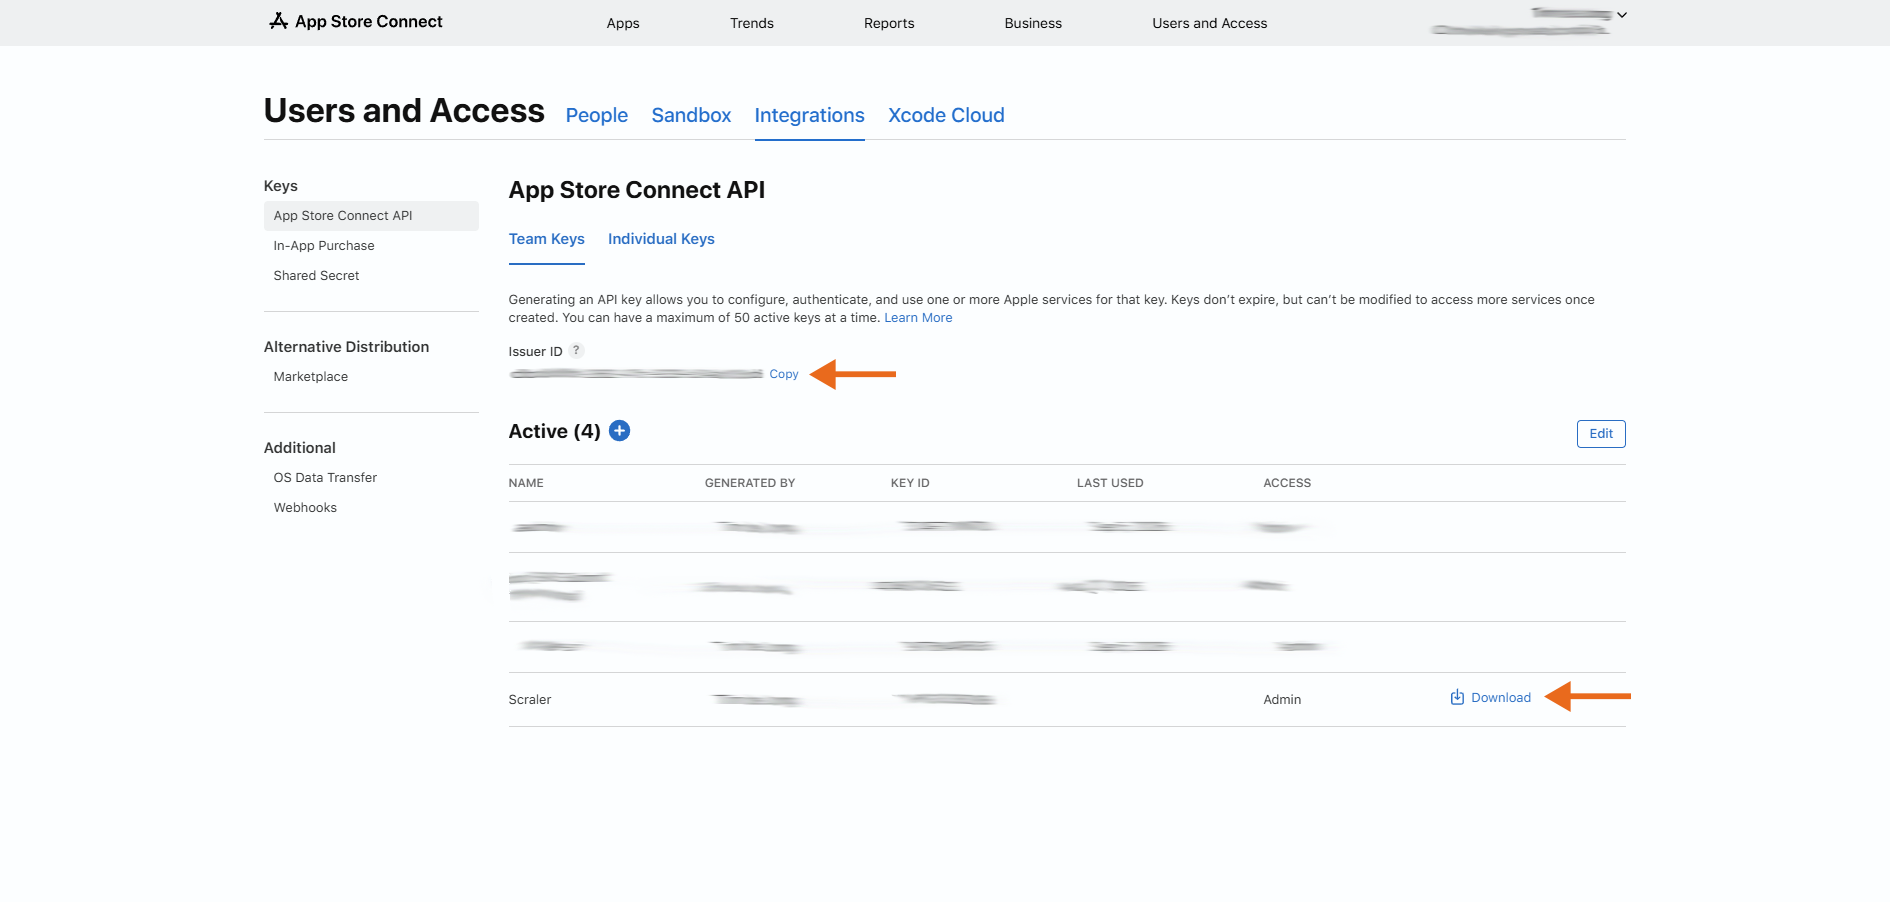
Download it. Apple lets you do that only once, so keep the file. And copy the Issuer ID above the list.
Add the key in Scraler
Back here, add the key file, paste the Issuer ID, and save.
Submit
Google Play is handled for you. Check it all, and submit.
Follow the review
From there we build, sign and submit your app, and this page follows every stage until it is live.
More details and screenshots
Publishing to the App Store and Google Play
A branded app in the stores is an Ultimate feature. In My App, click the store button next to Publish (its label shows your status) and work through four steps. Scraler builds and submits the app for you. You only provide the Apple side. Android needs nothing from you.
The four steps
- 1. Your app
- Icon, name, subtitle and description.
- 2. Screenshots
- Pick a style. The four screenshots are rendered from your app design.
- 3. Apple Developer Account
- Connect your Apple account so we can publish for you. The iOS section below walks through it.
- 4. Ready to submit
- Check it over, then send it to us.
After you submit
My App shows where your app is. The times are estimates.
iOS (App Store)
Apple requires each branded app to be published under the business's own Apple Developer account. That costs $99 per year, paid to Apple. You create the account and give Scraler access. We do the rest. No Apple account? Click Publish Android-only under the Apple step.
1. Create an Apple Account
You need an Apple ID. Skip this if you already have one.
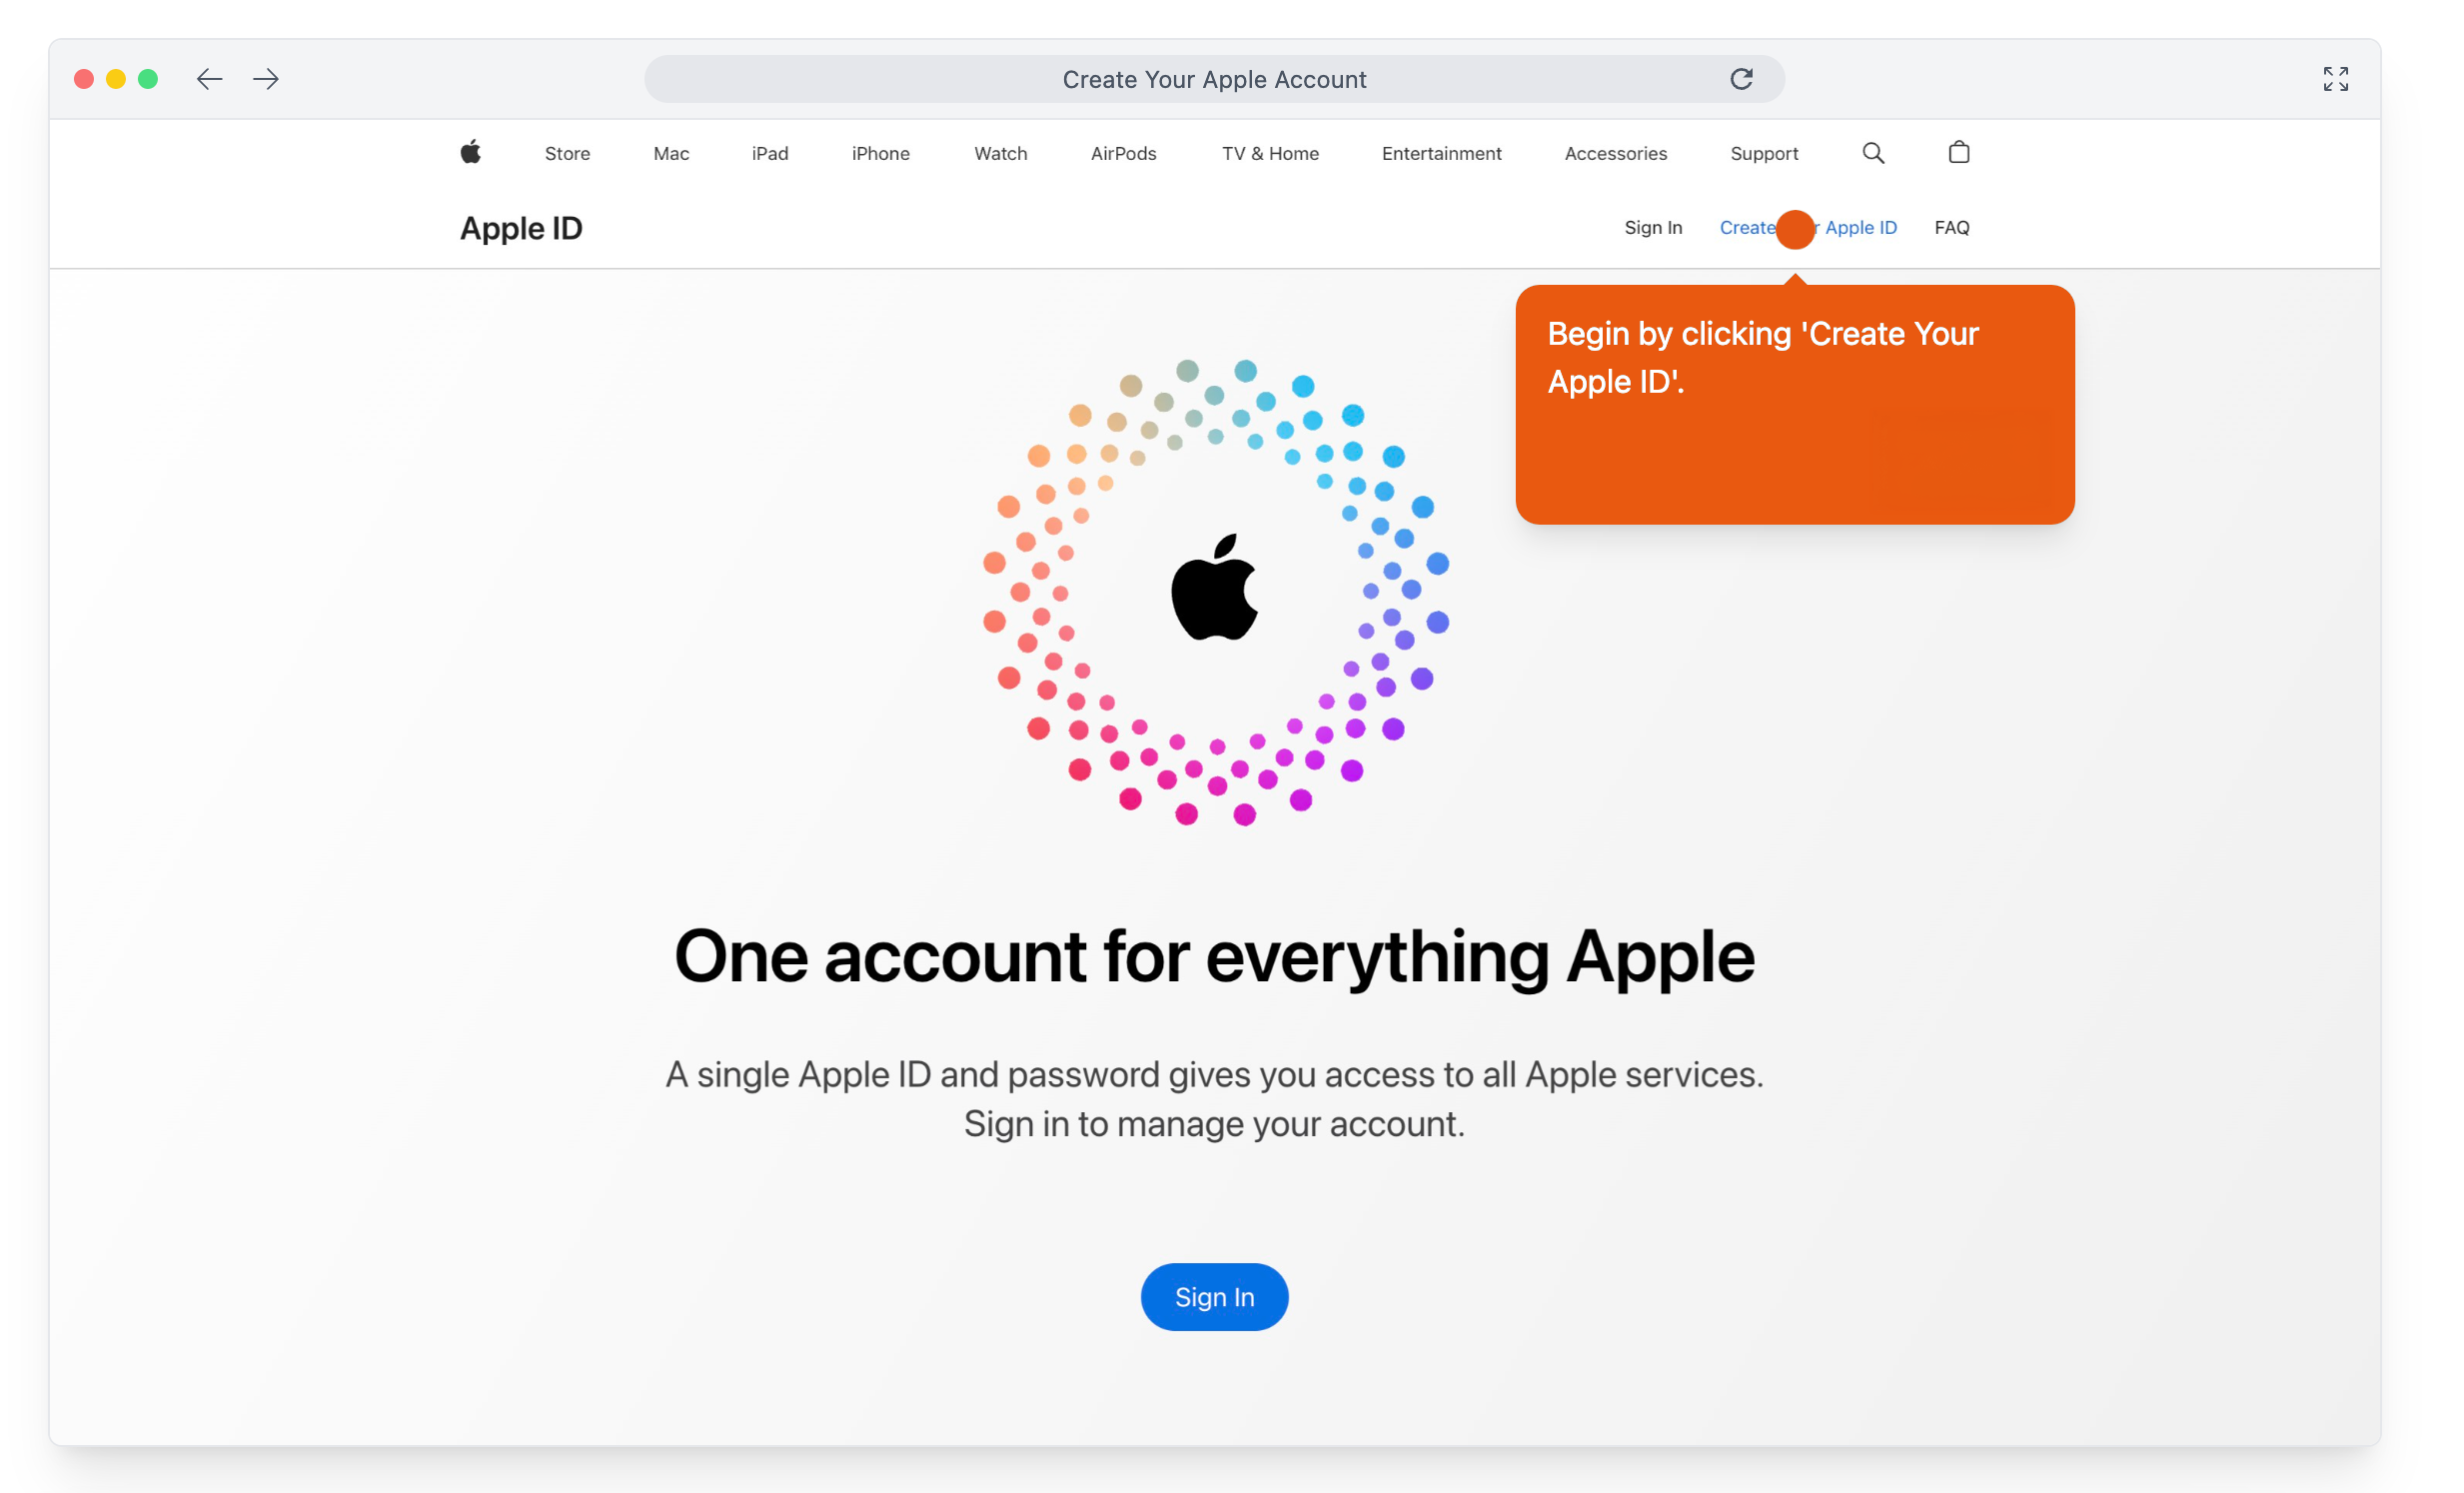
Go to appleid.apple.com and click Create Your Apple ID.
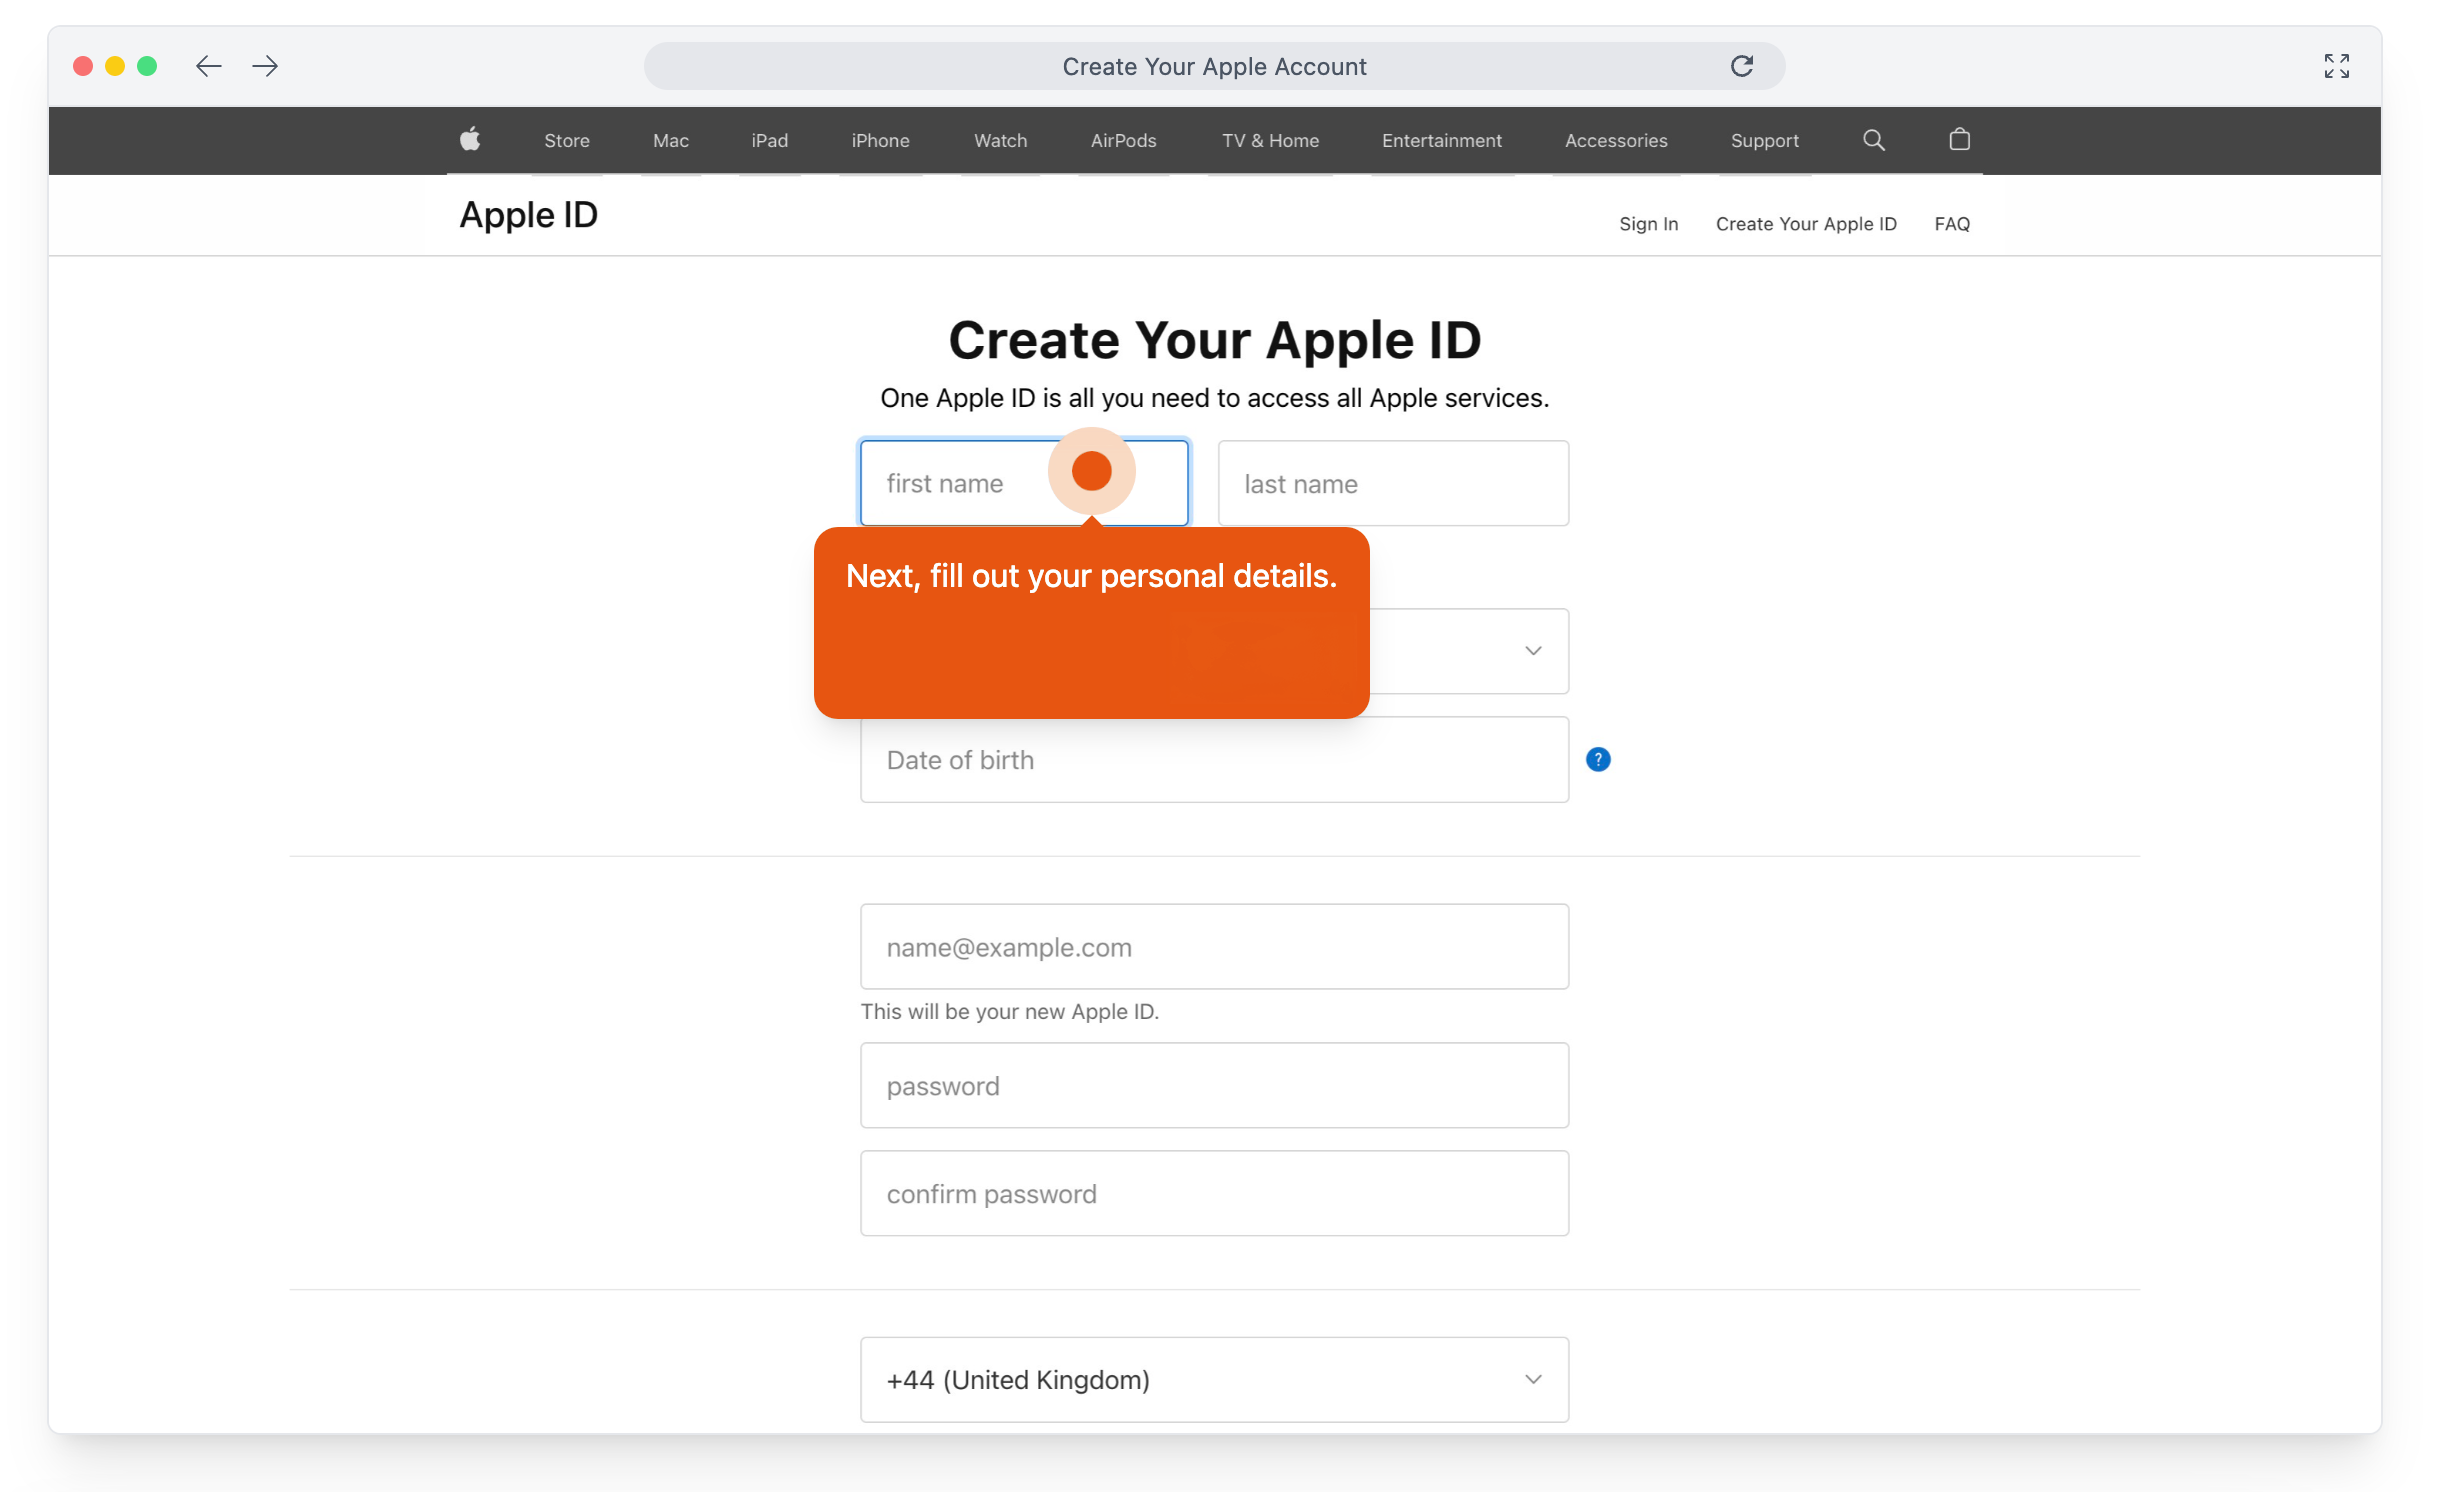
Enter your name, email address, date of birth and a password.
Enter the verification code Apple emails you and click Continue.
2. Enroll in the Apple Developer Program
Apple may take up to 2 business days to confirm your enrollment. Do not go on before the confirmation email arrives.
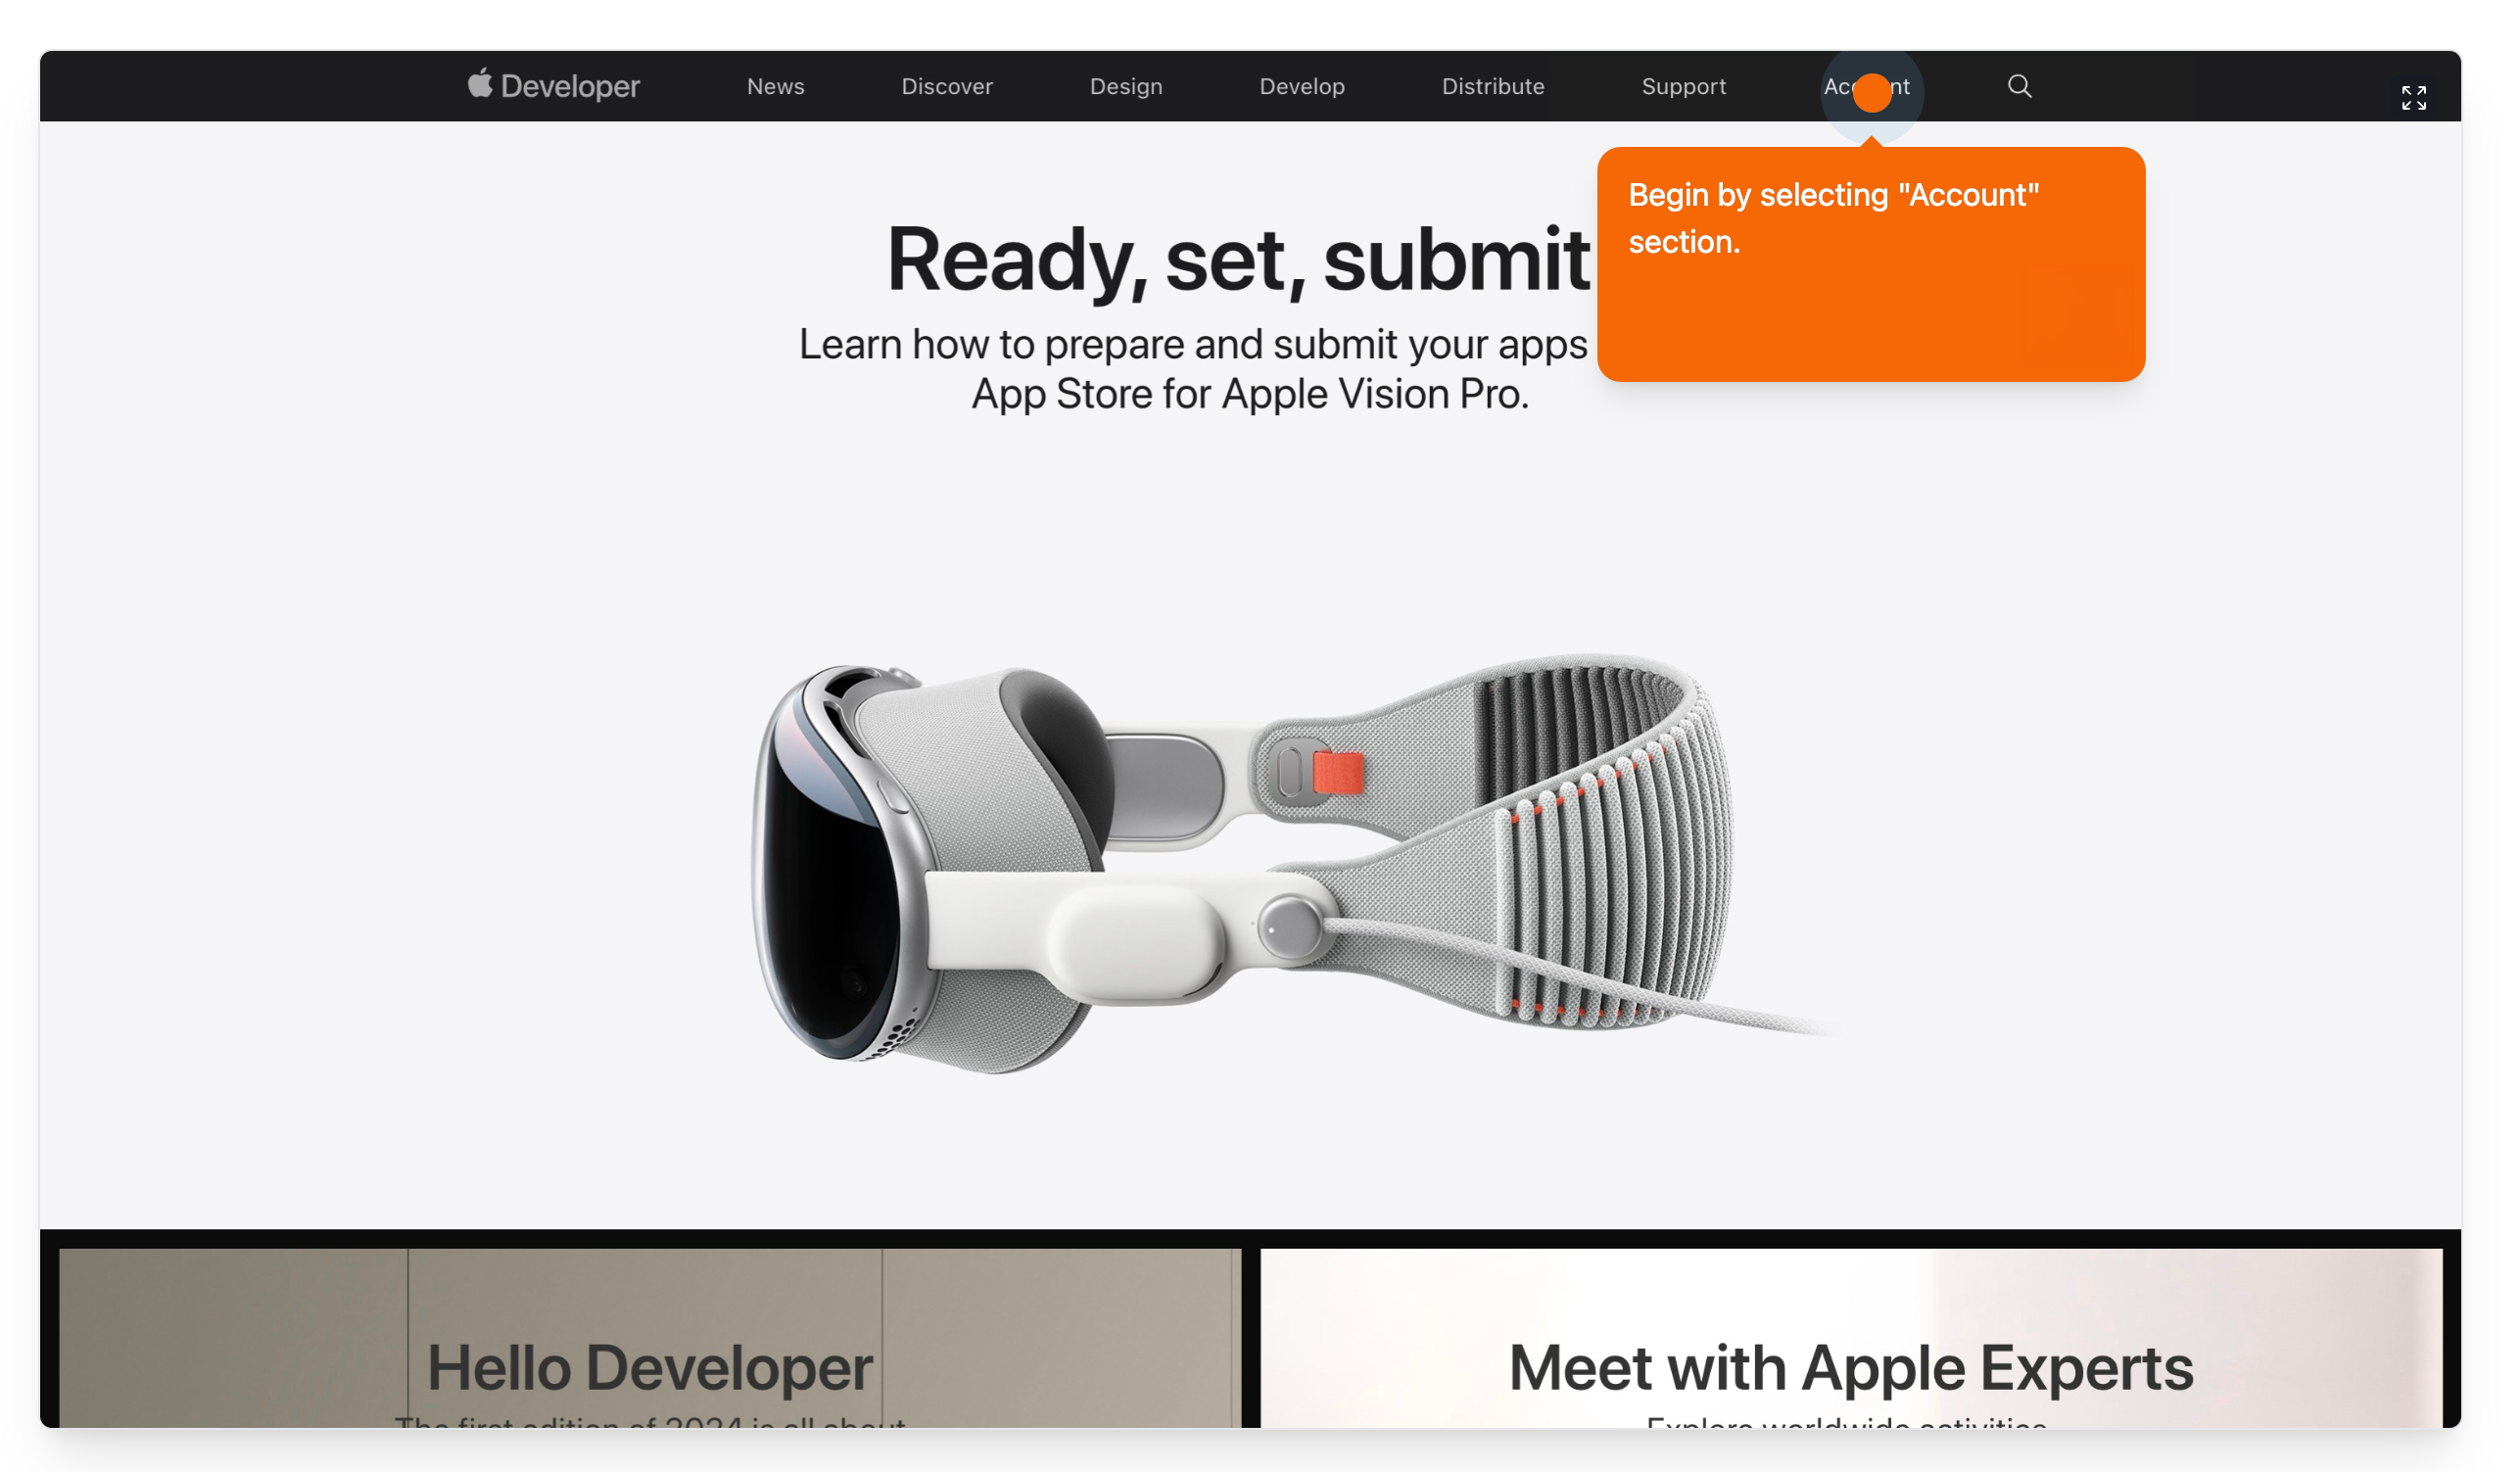
Go to developer.apple.com.
Review the terms and click Submit.
Click Enroll Today.
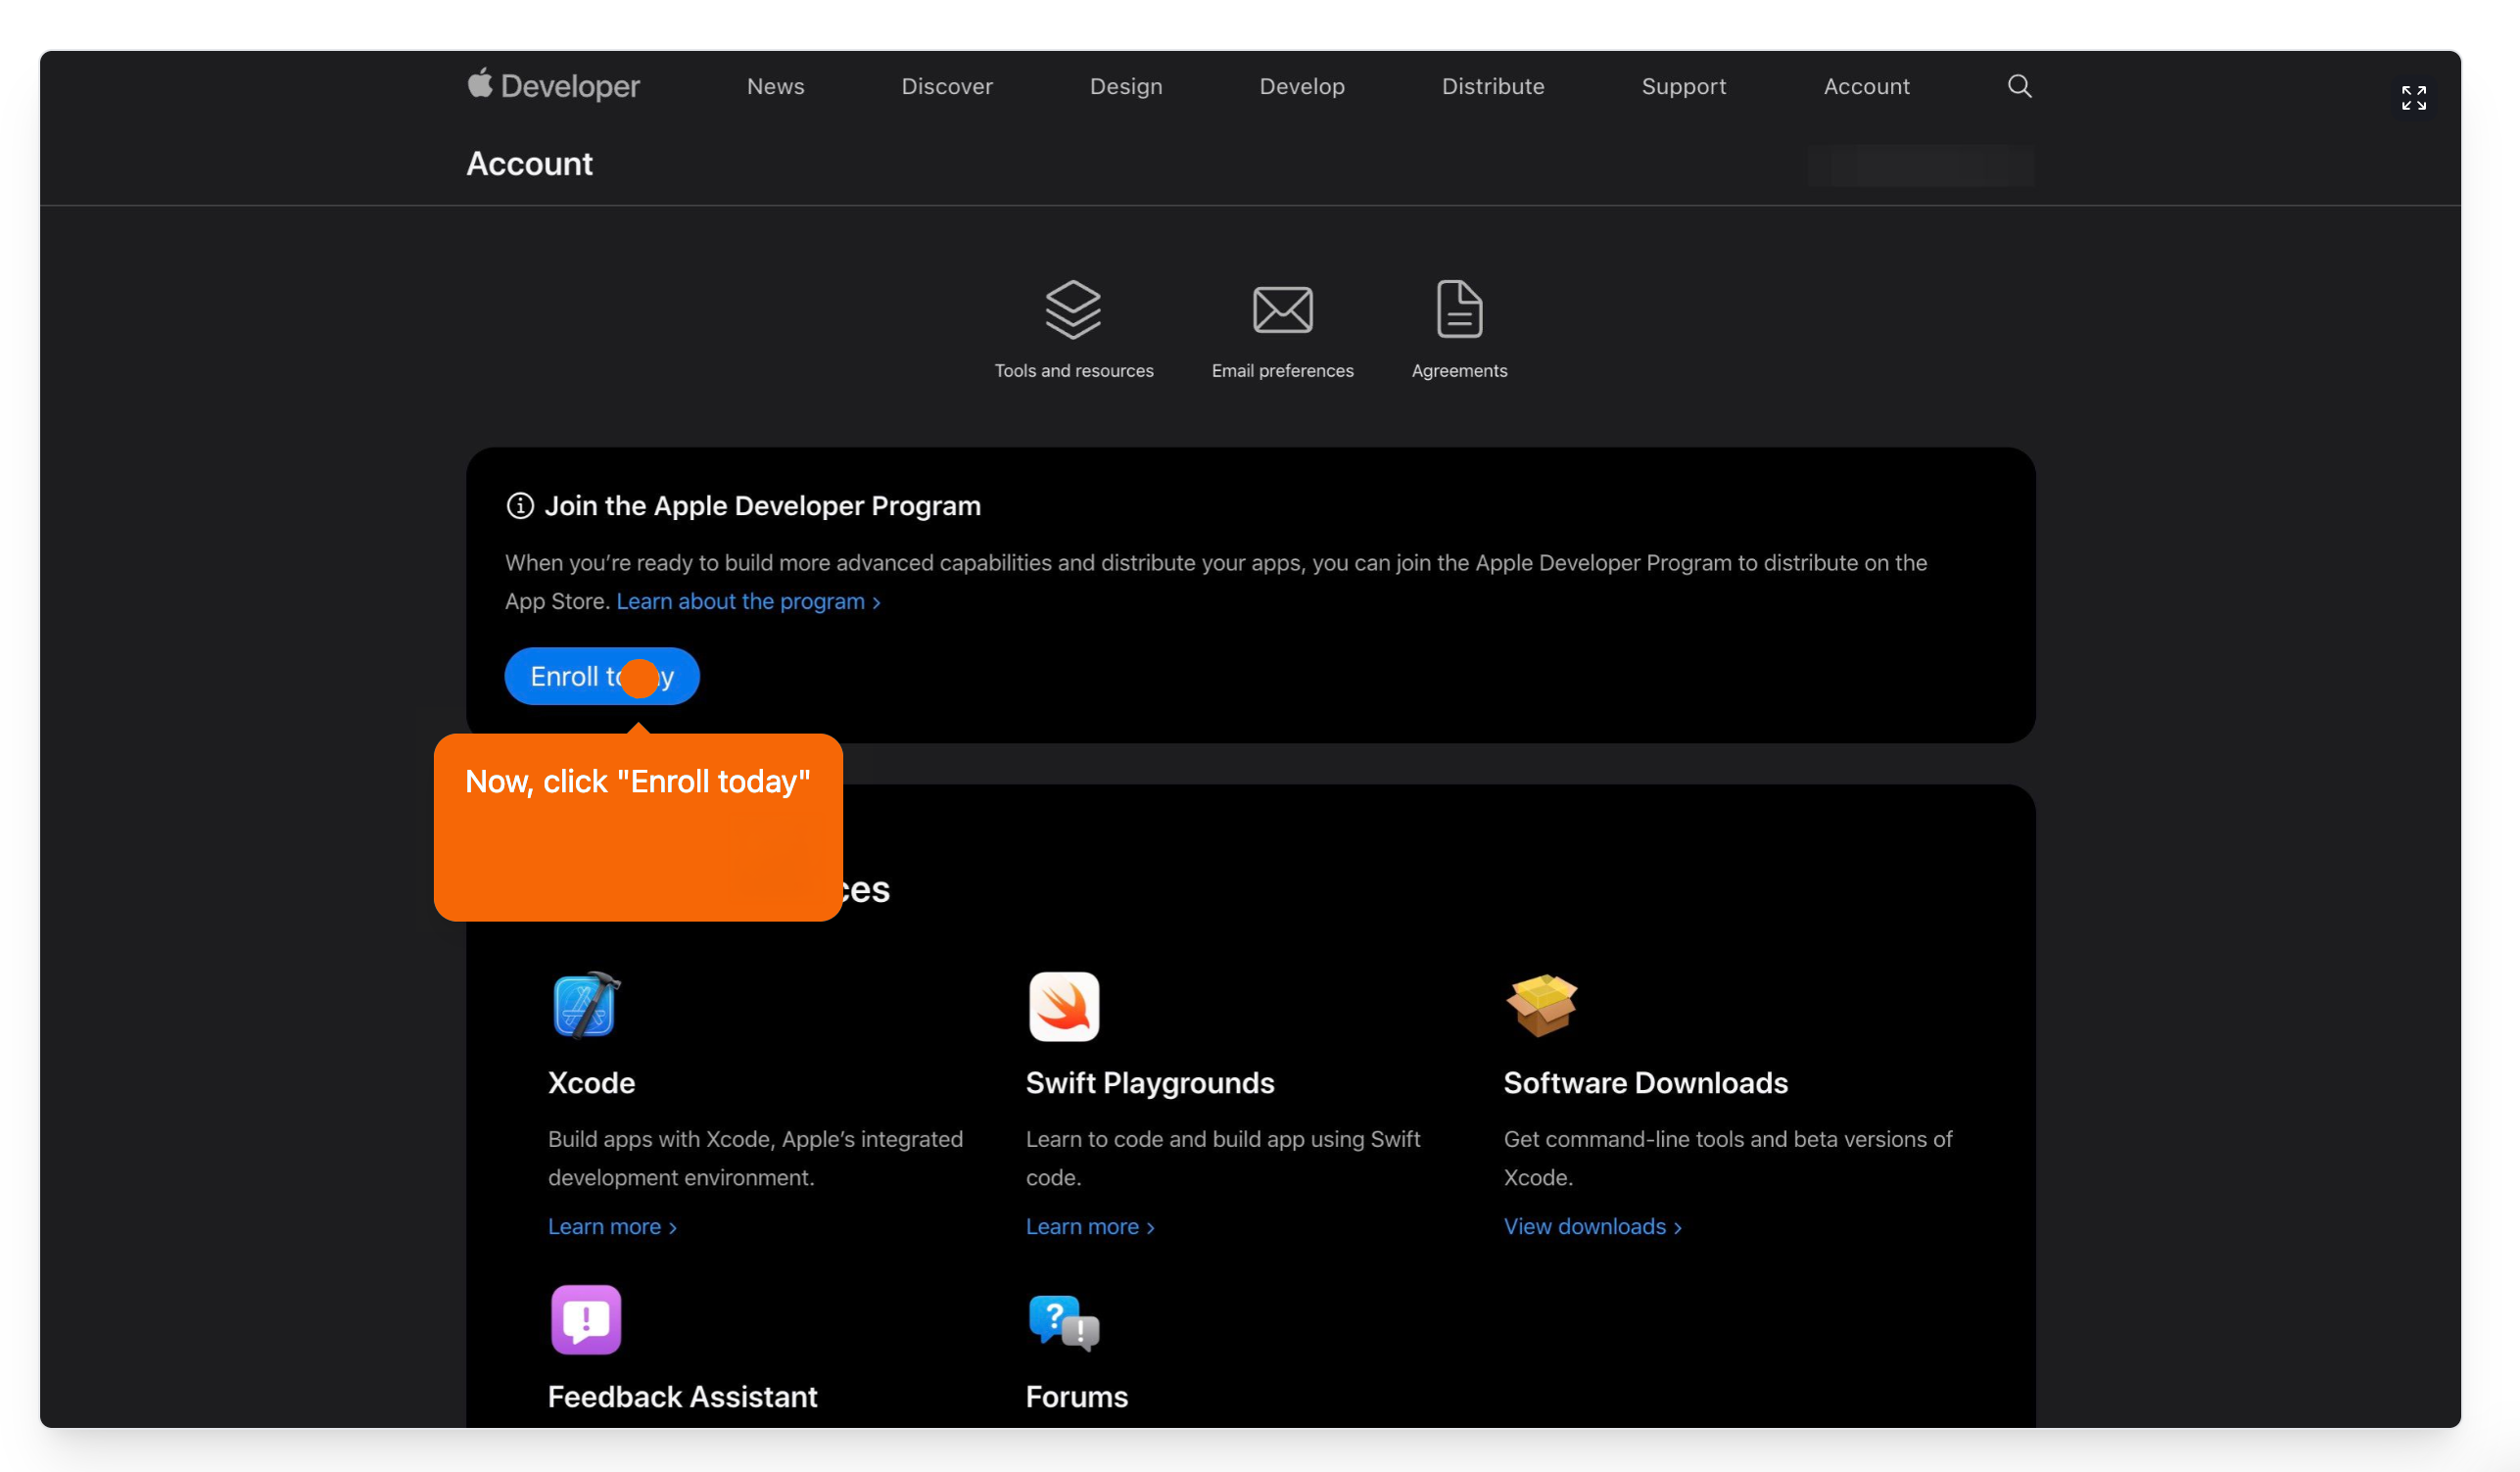
Follow the prompts to continue the enrollment.
Enter your personal information and click Submit.
Choose Individual / Sole Proprietor as the entity type.
Fill in your company information and click Continue.
Read the Apple Developer Program License Agreement, agree and click Continue.
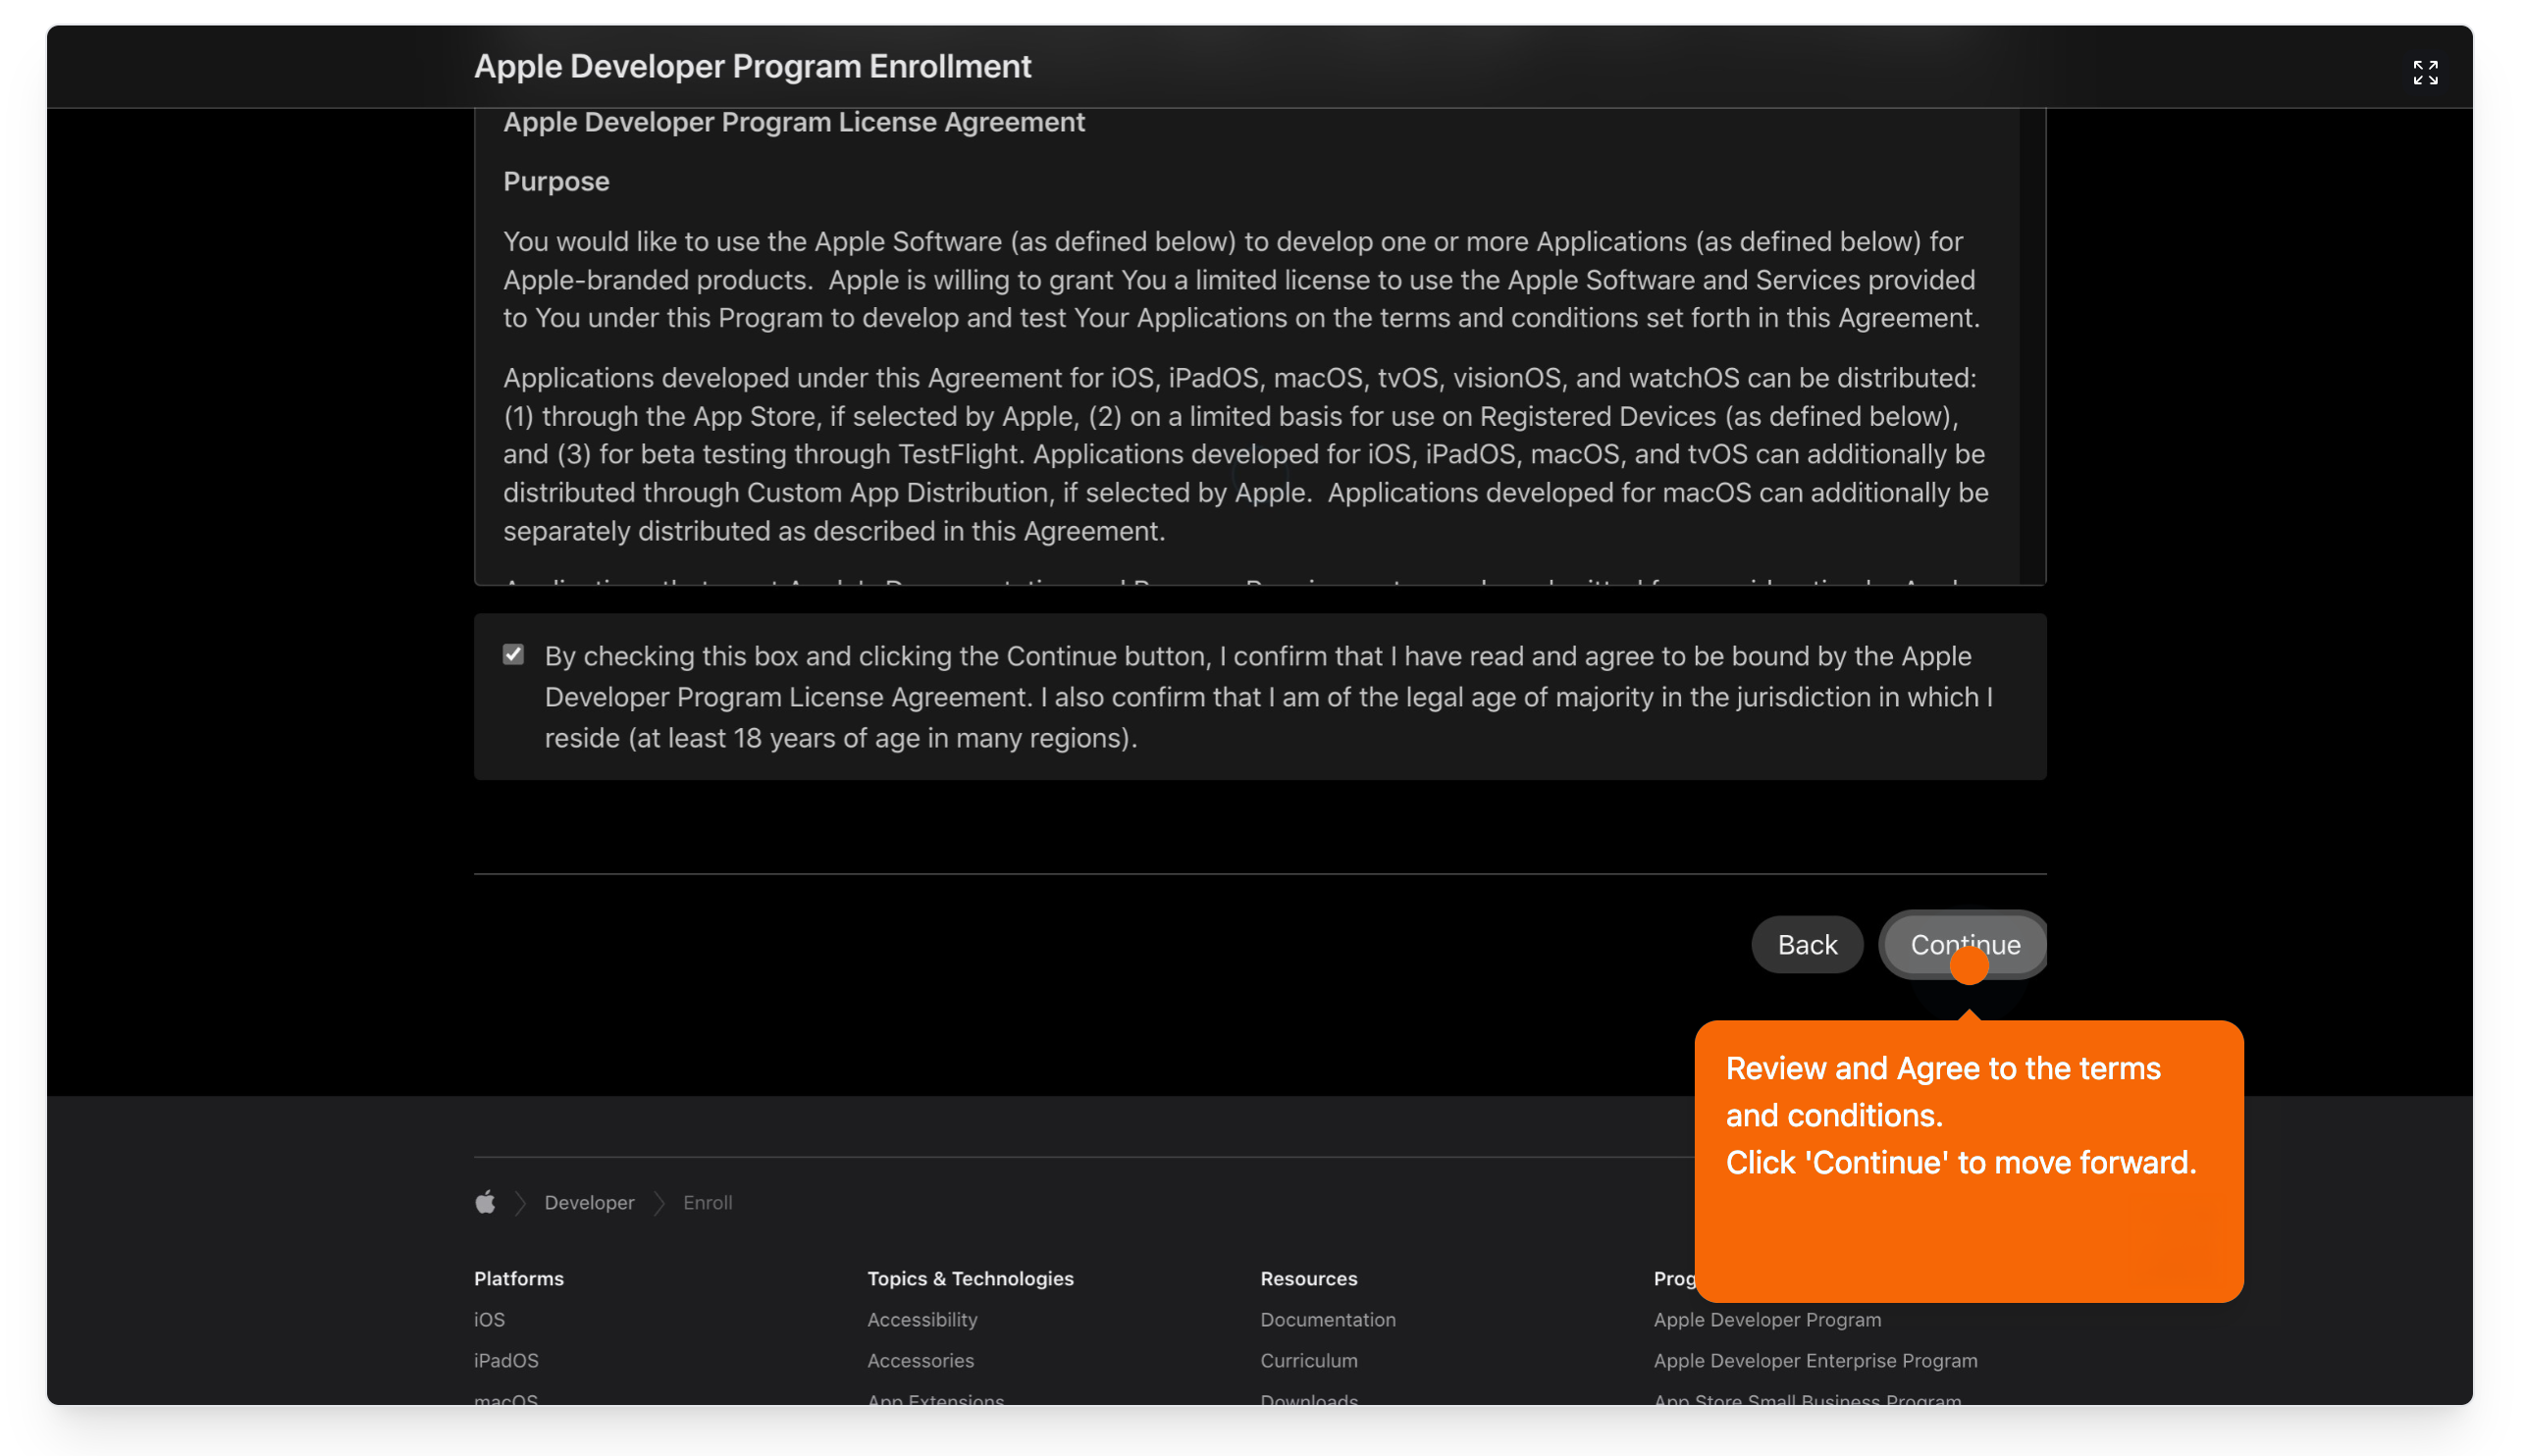
Click Purchase.
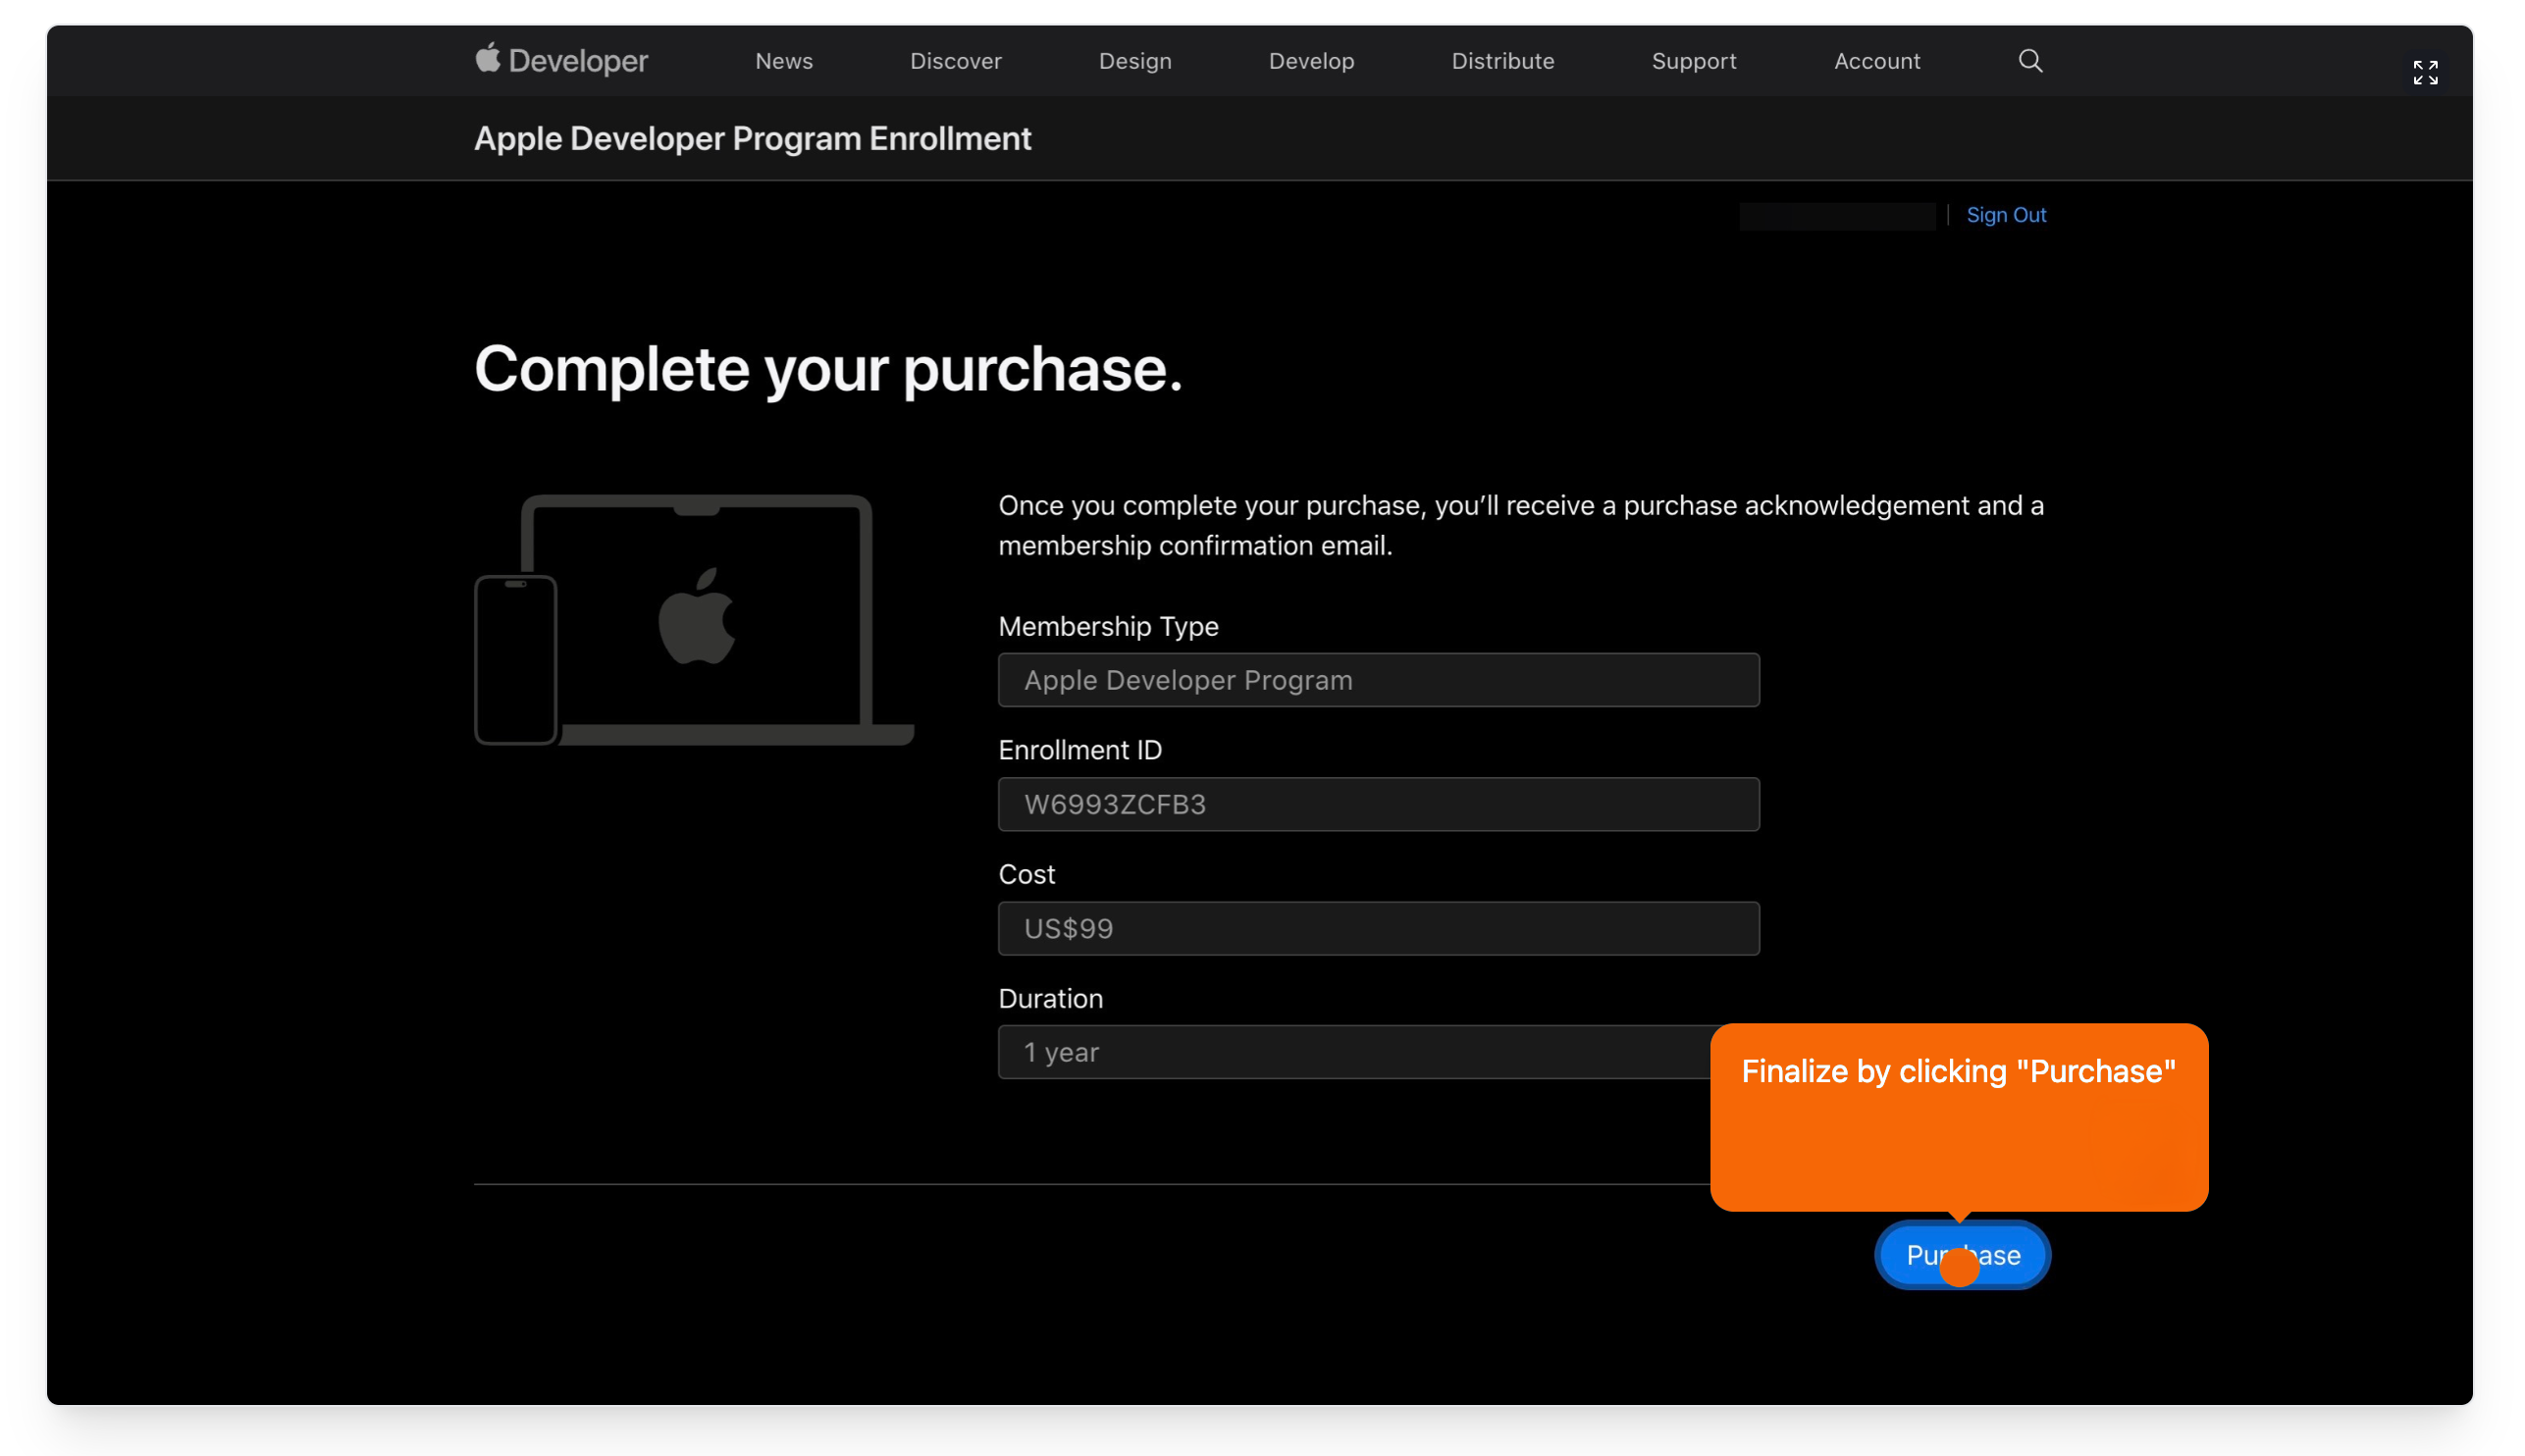
Enter your payment details and complete the order ($99 per year).
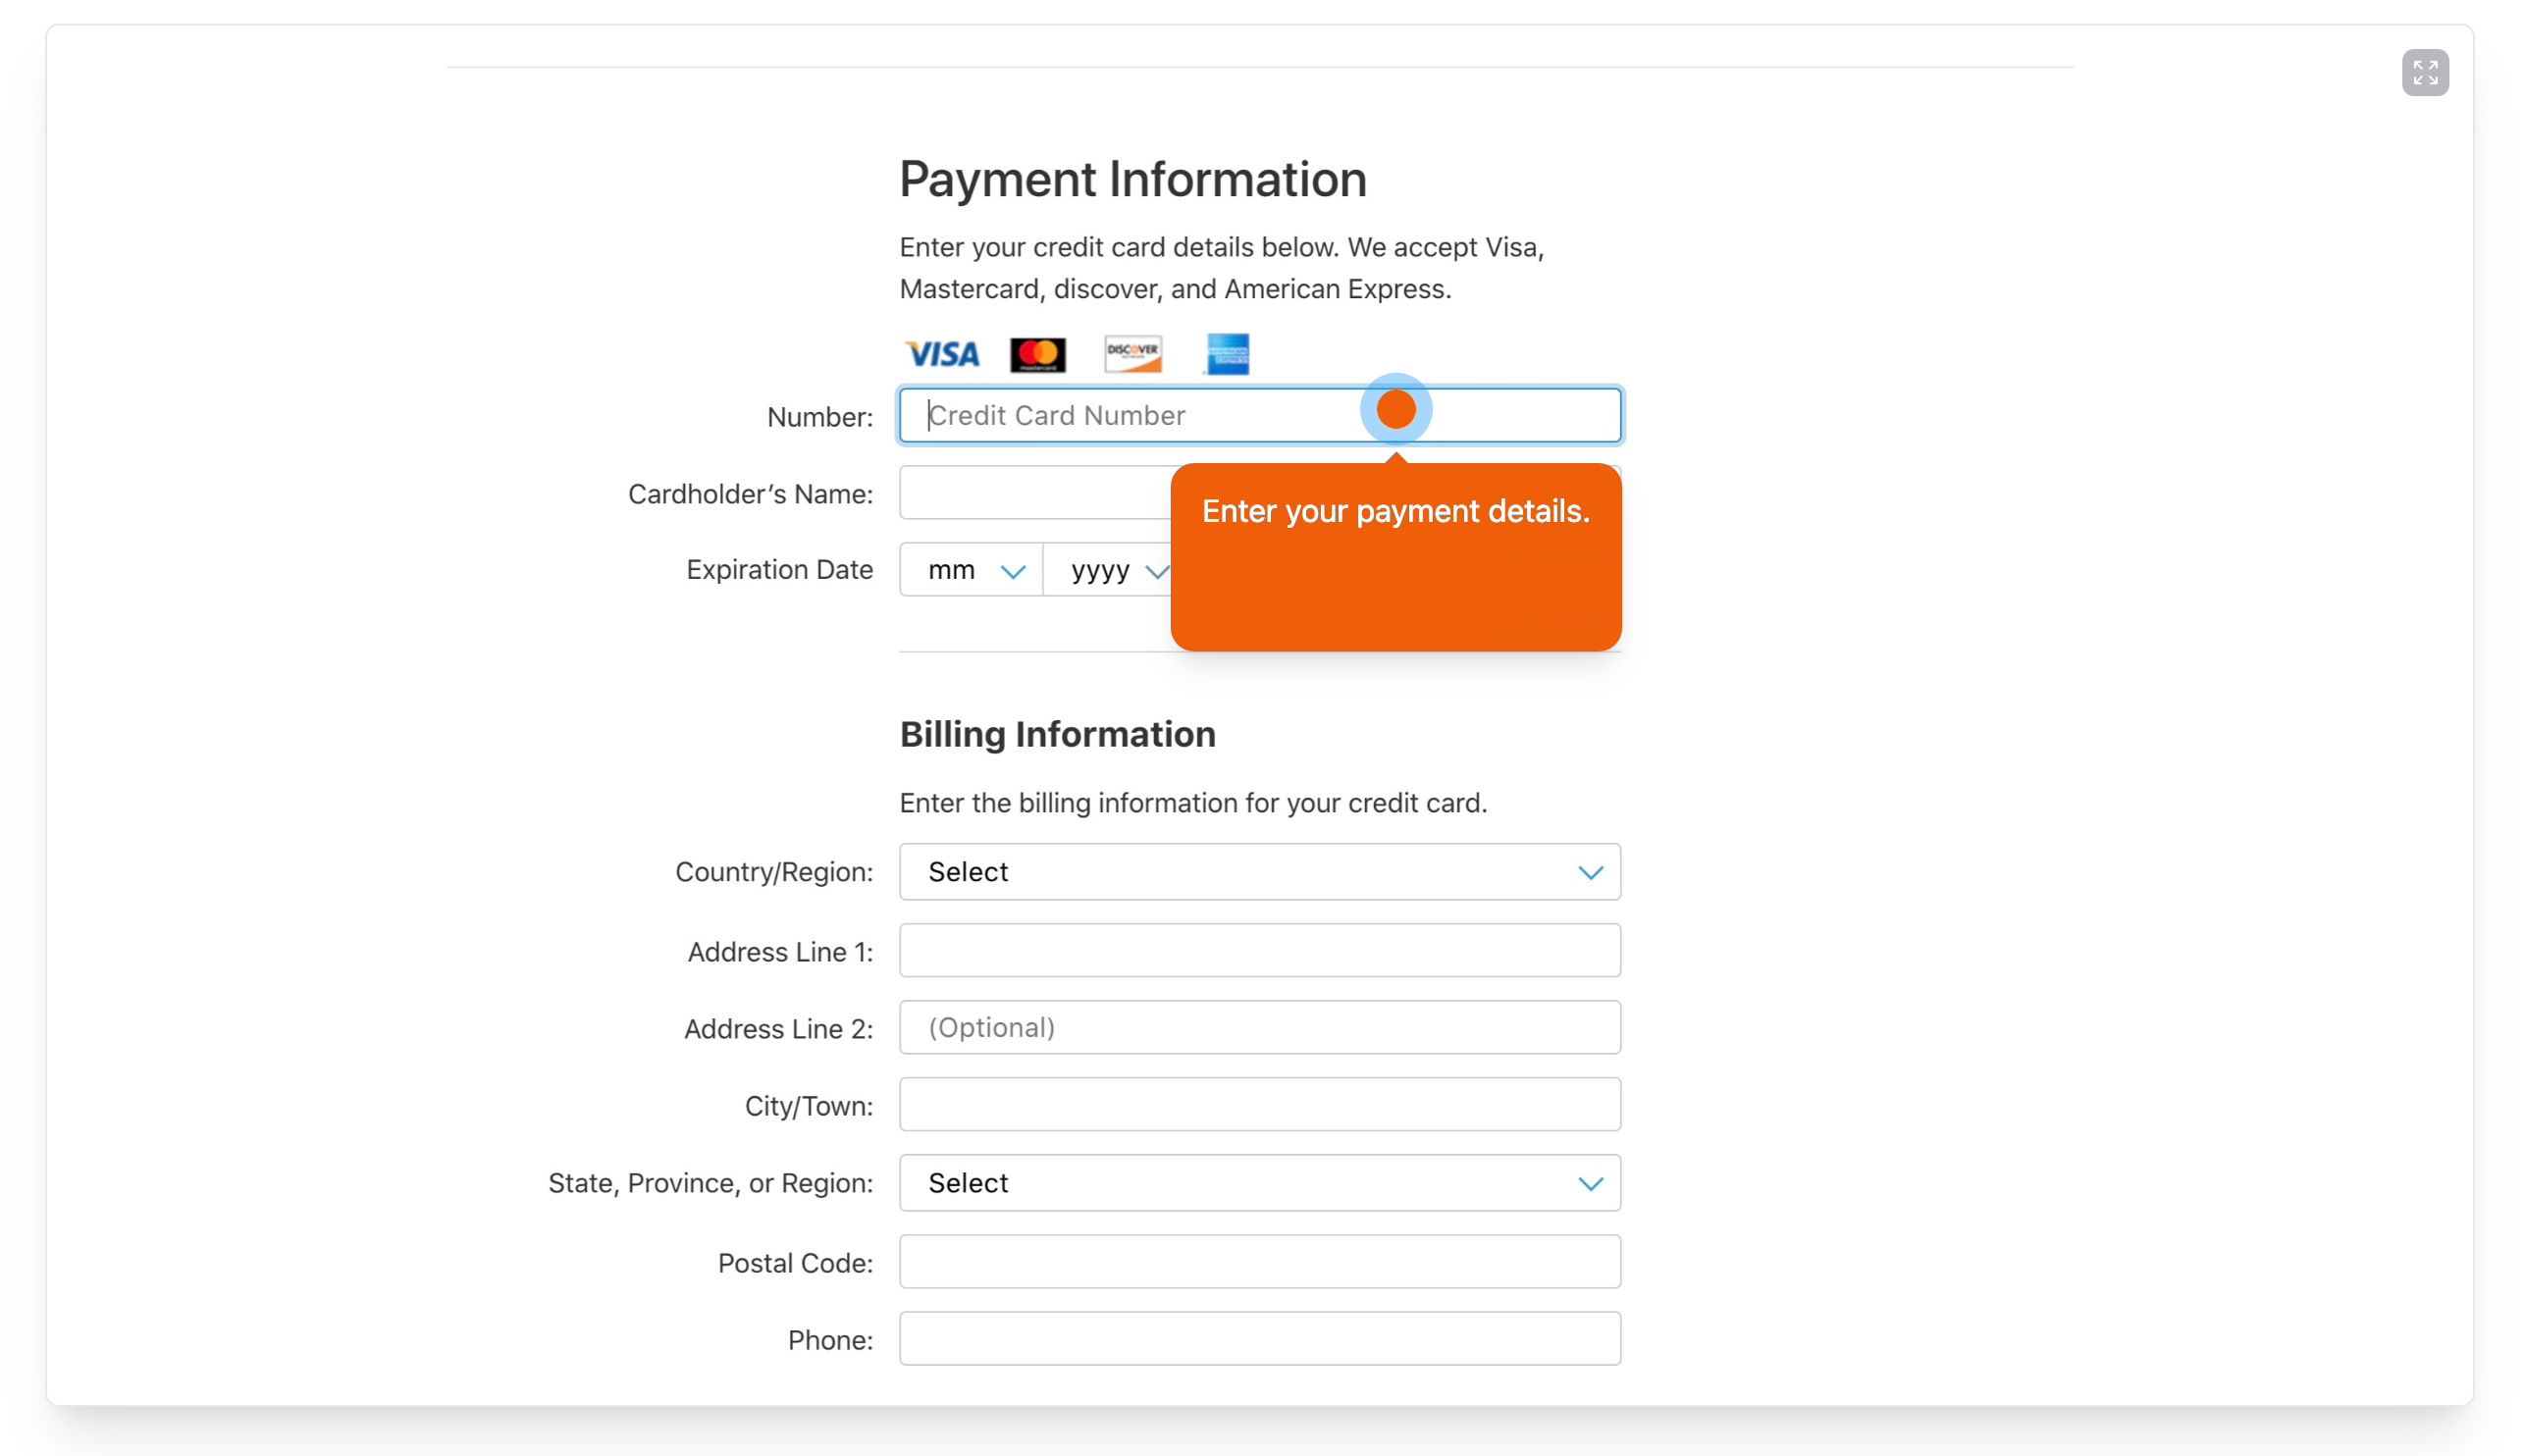
Apple emails a confirmation, usually within 2 business days.
3. Complete business compliance
Apple needs your business details on file before an app can be released.
Log in to App Store Connect with your Apple Developer account.
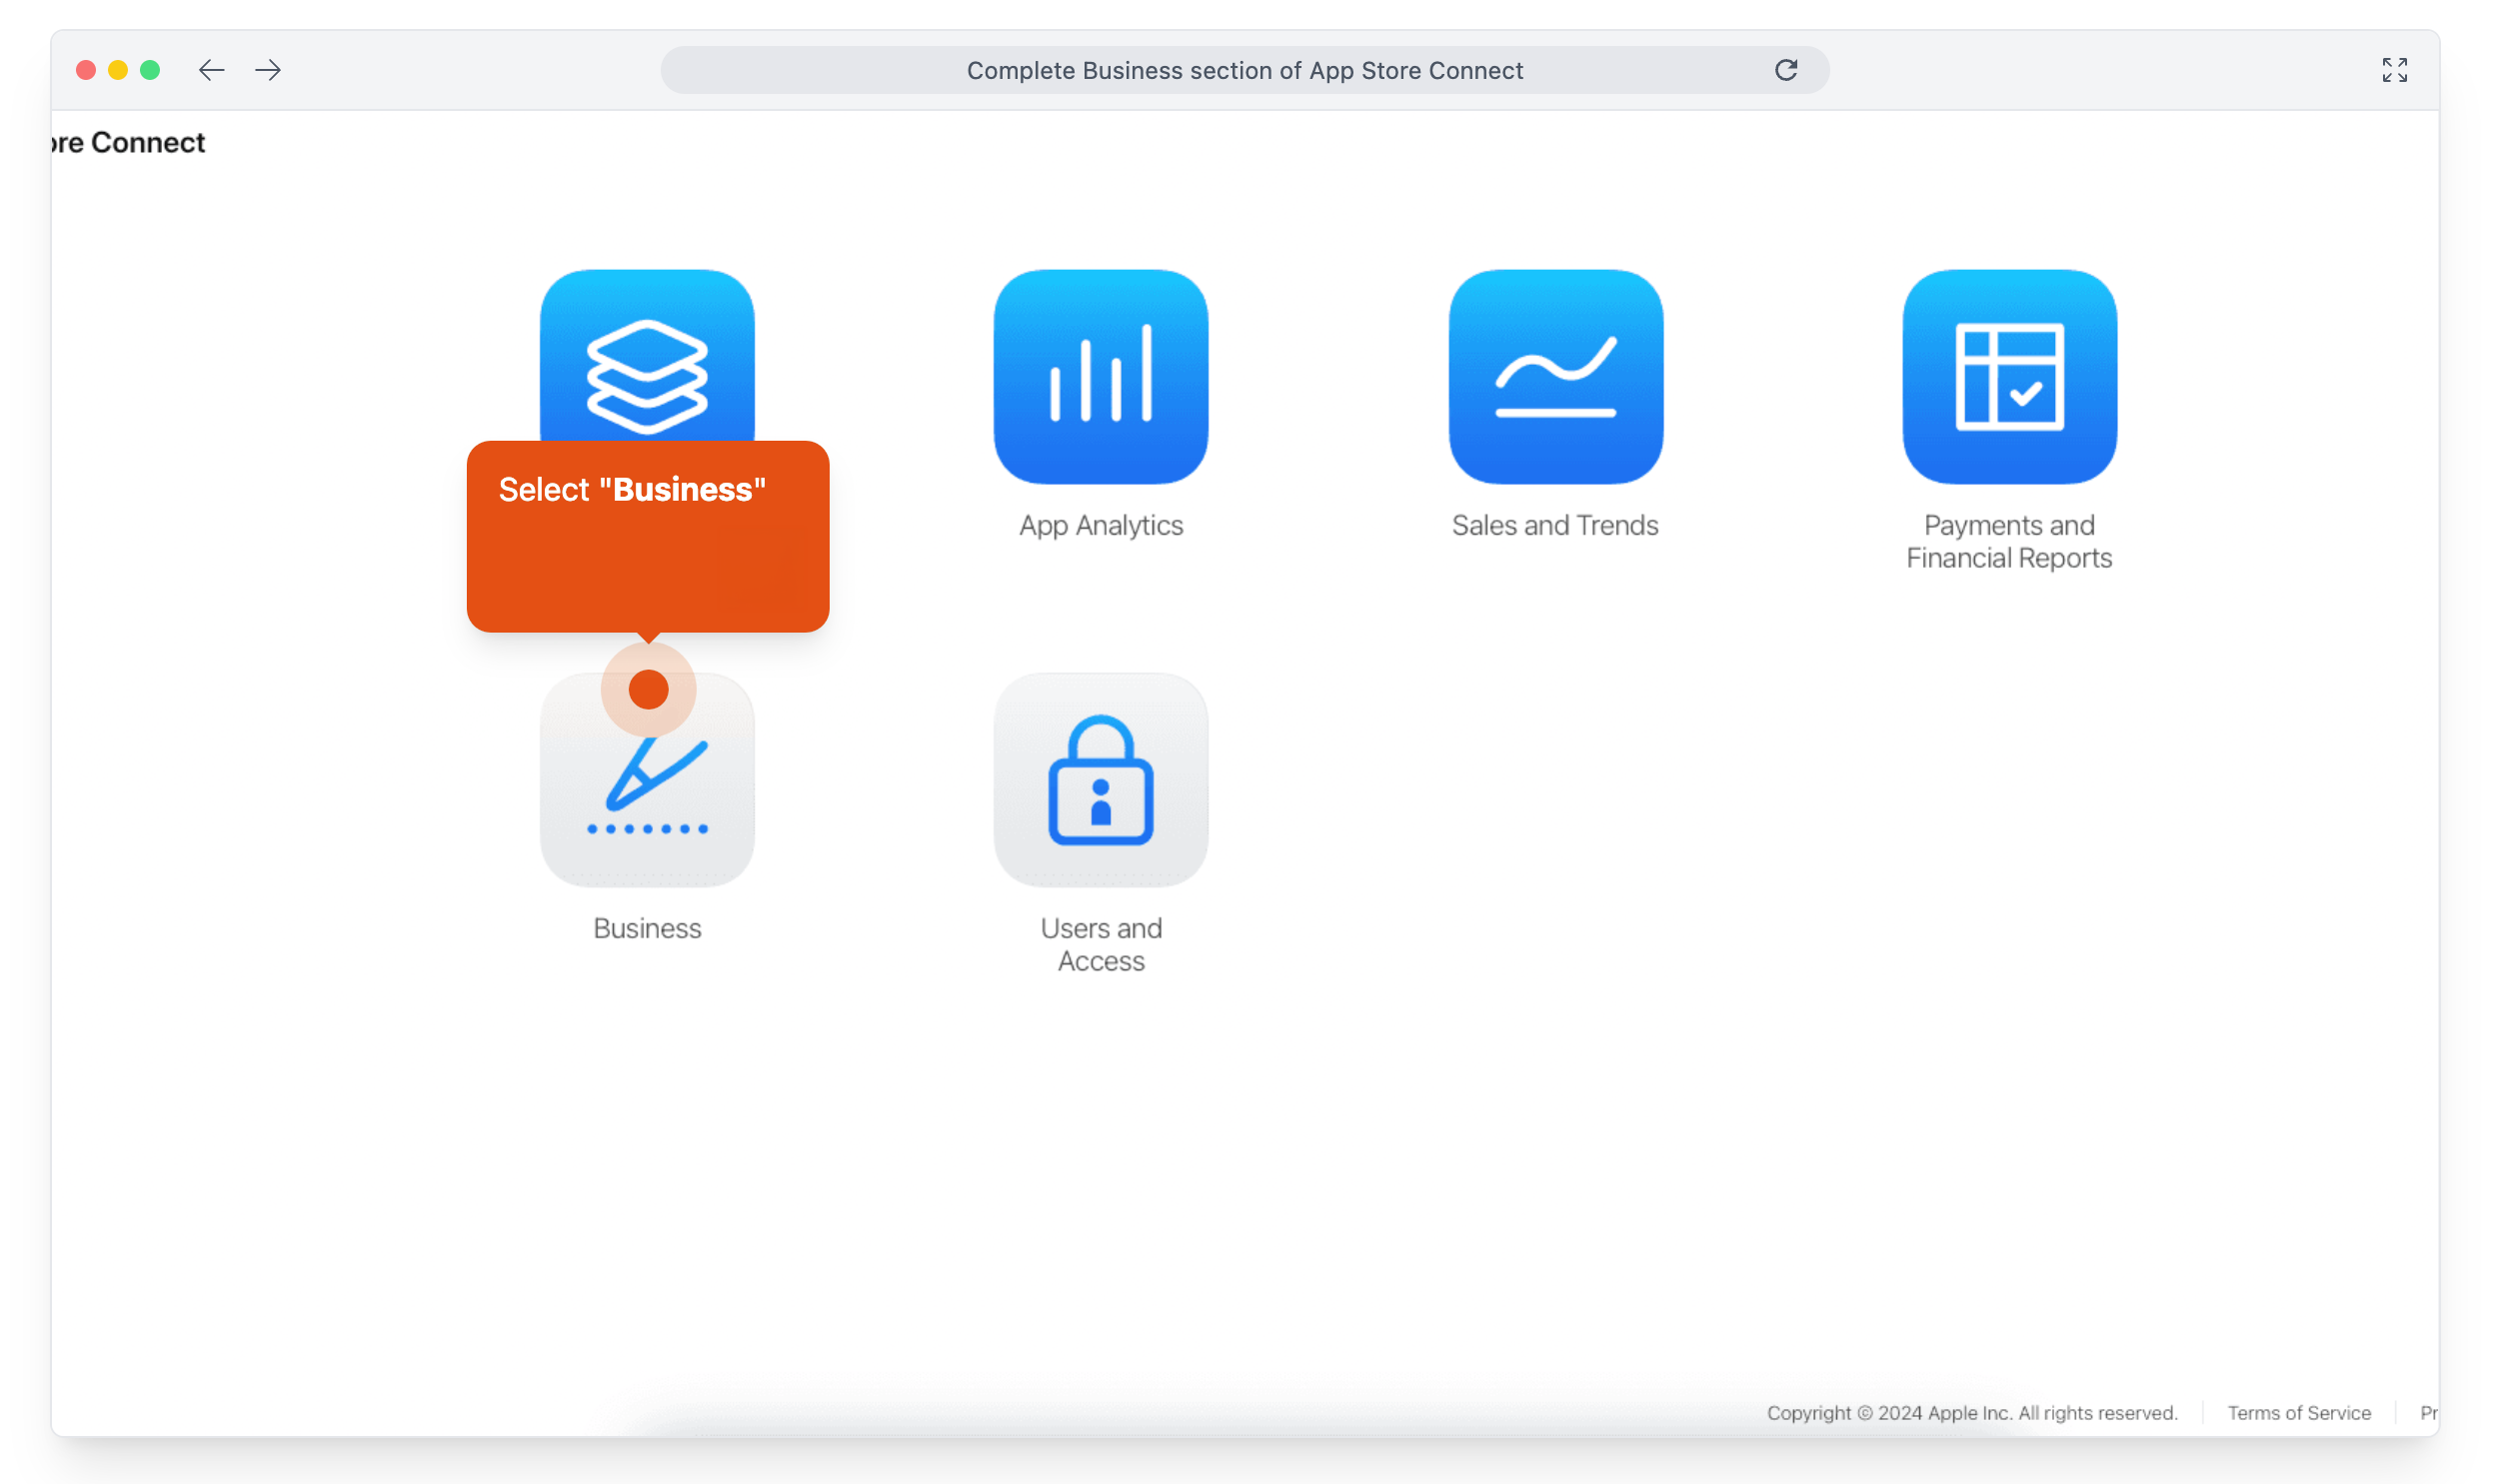
Open Business in the main menu.
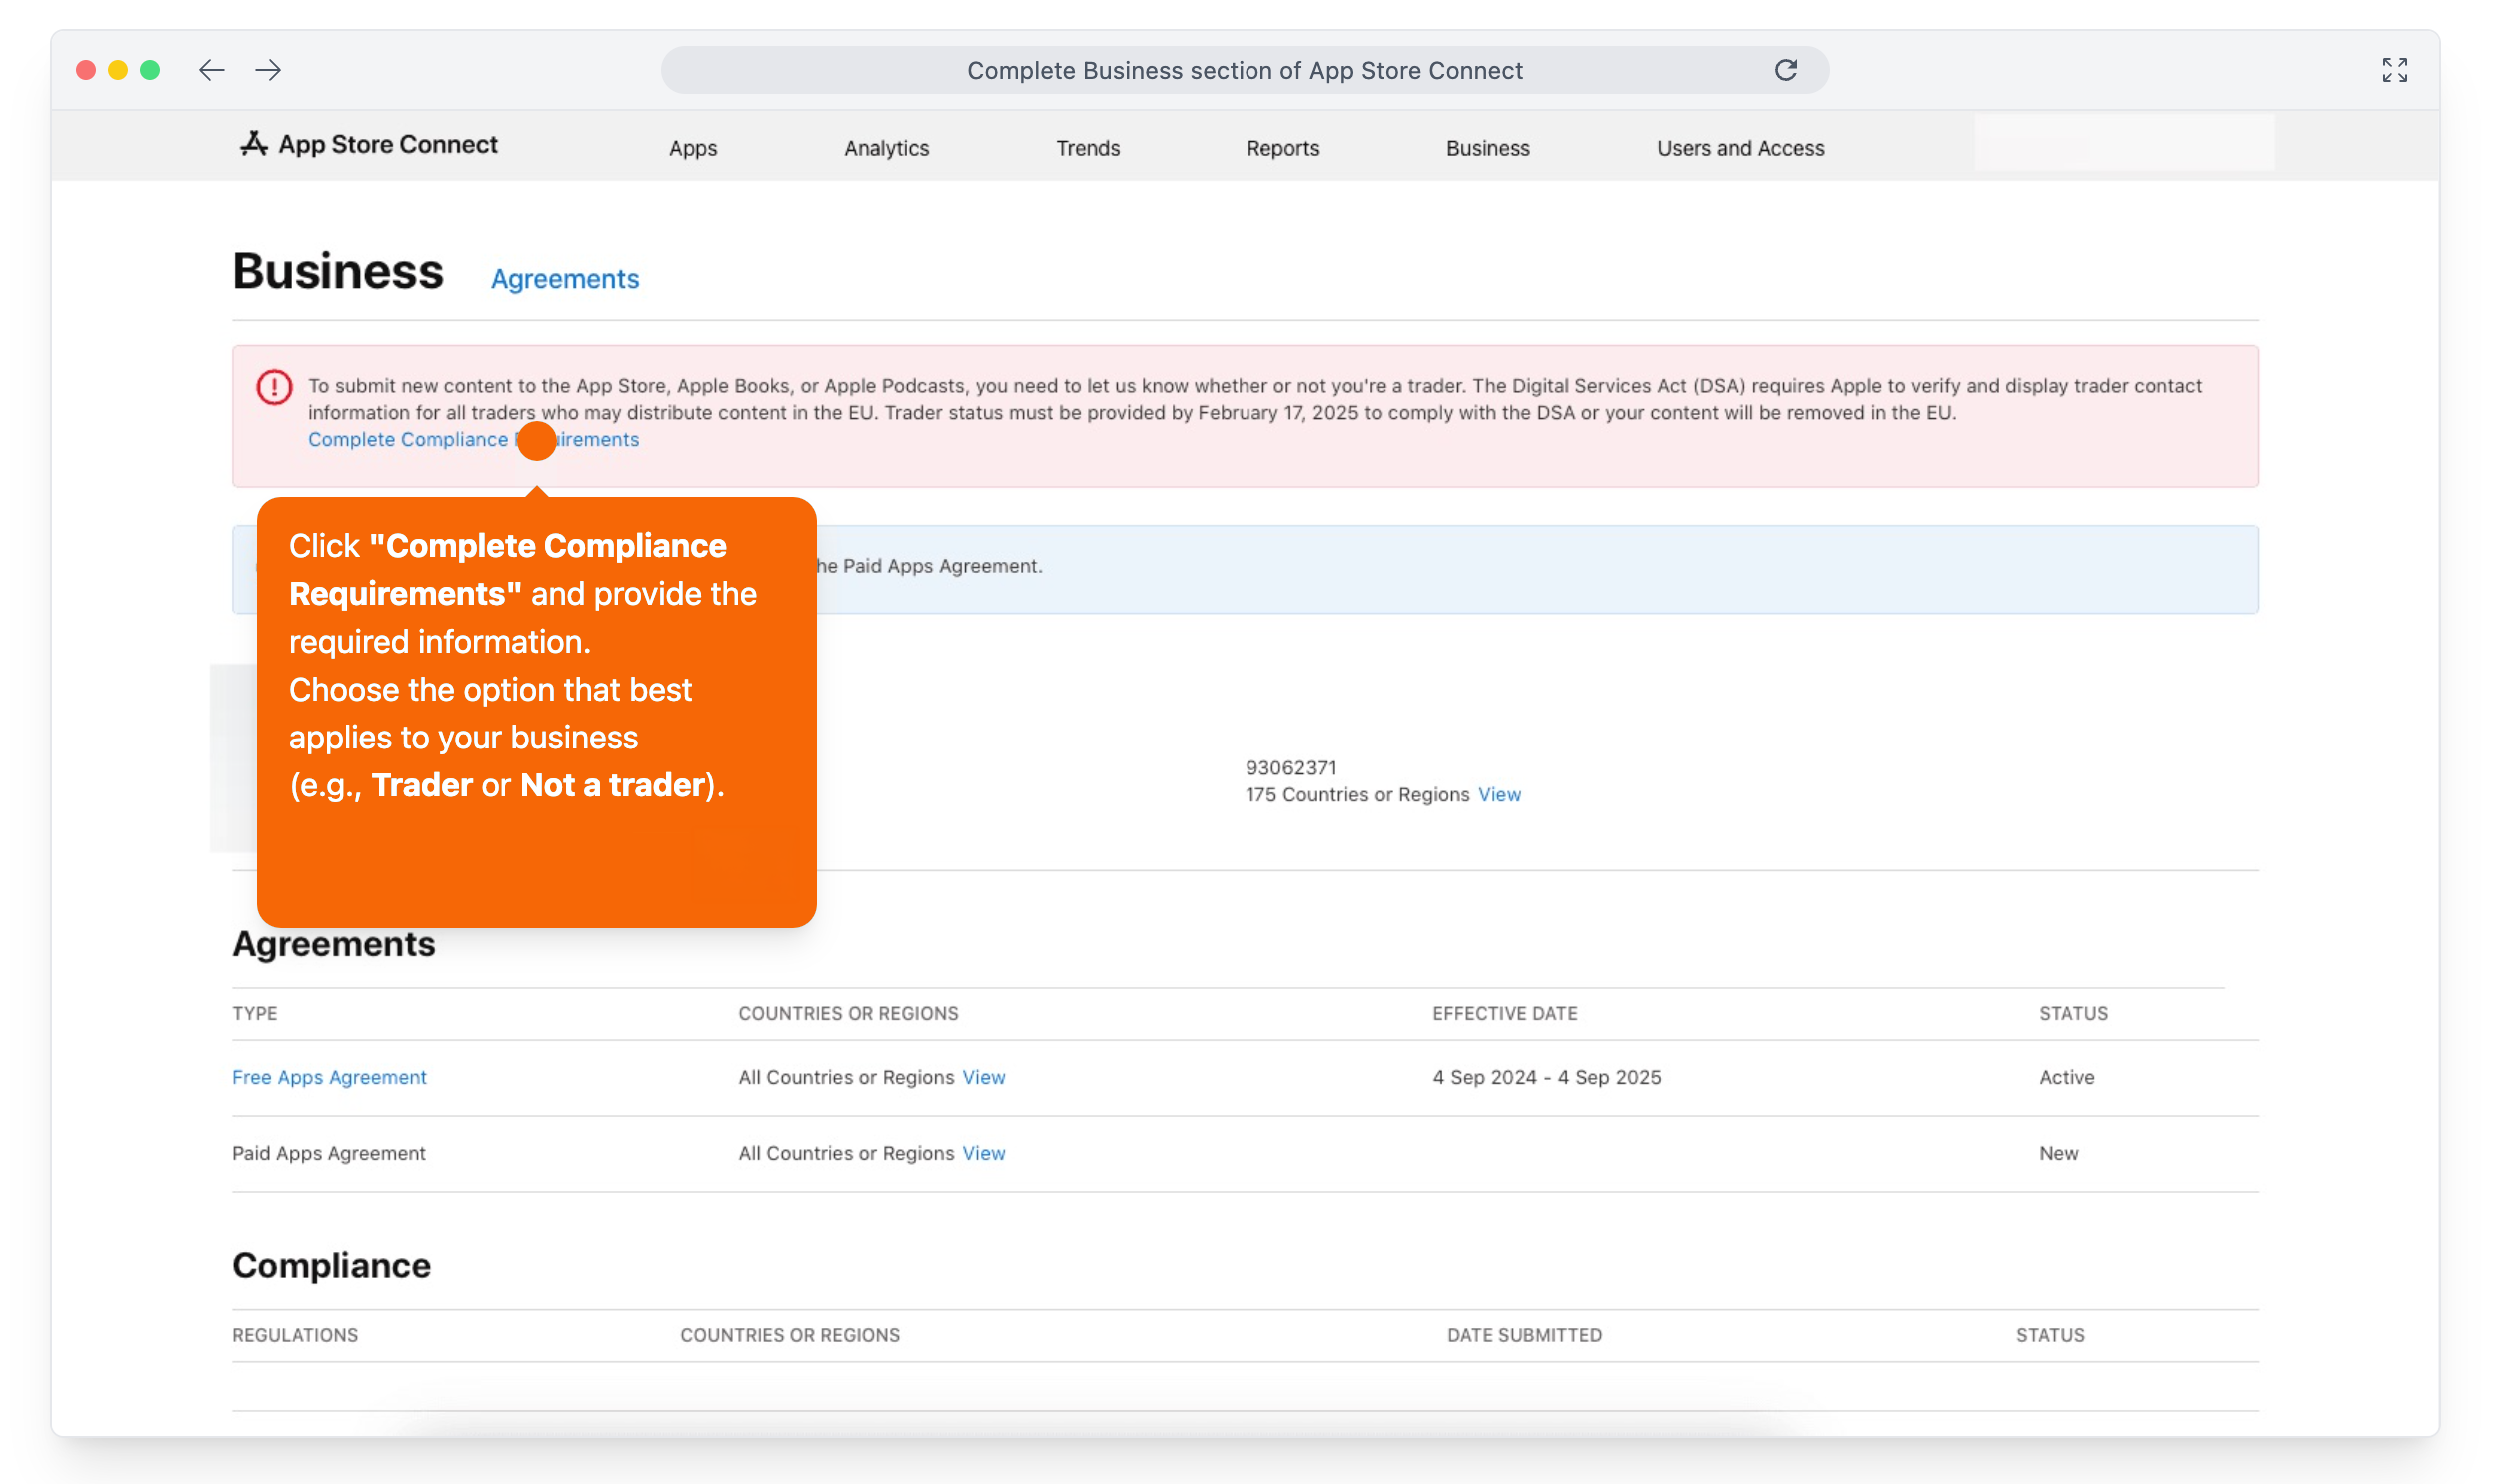
Click Complete Compliance Requirements and choose Trader or Not a Trader.
Under Add New Legal Entity, enter your business address and click Add.
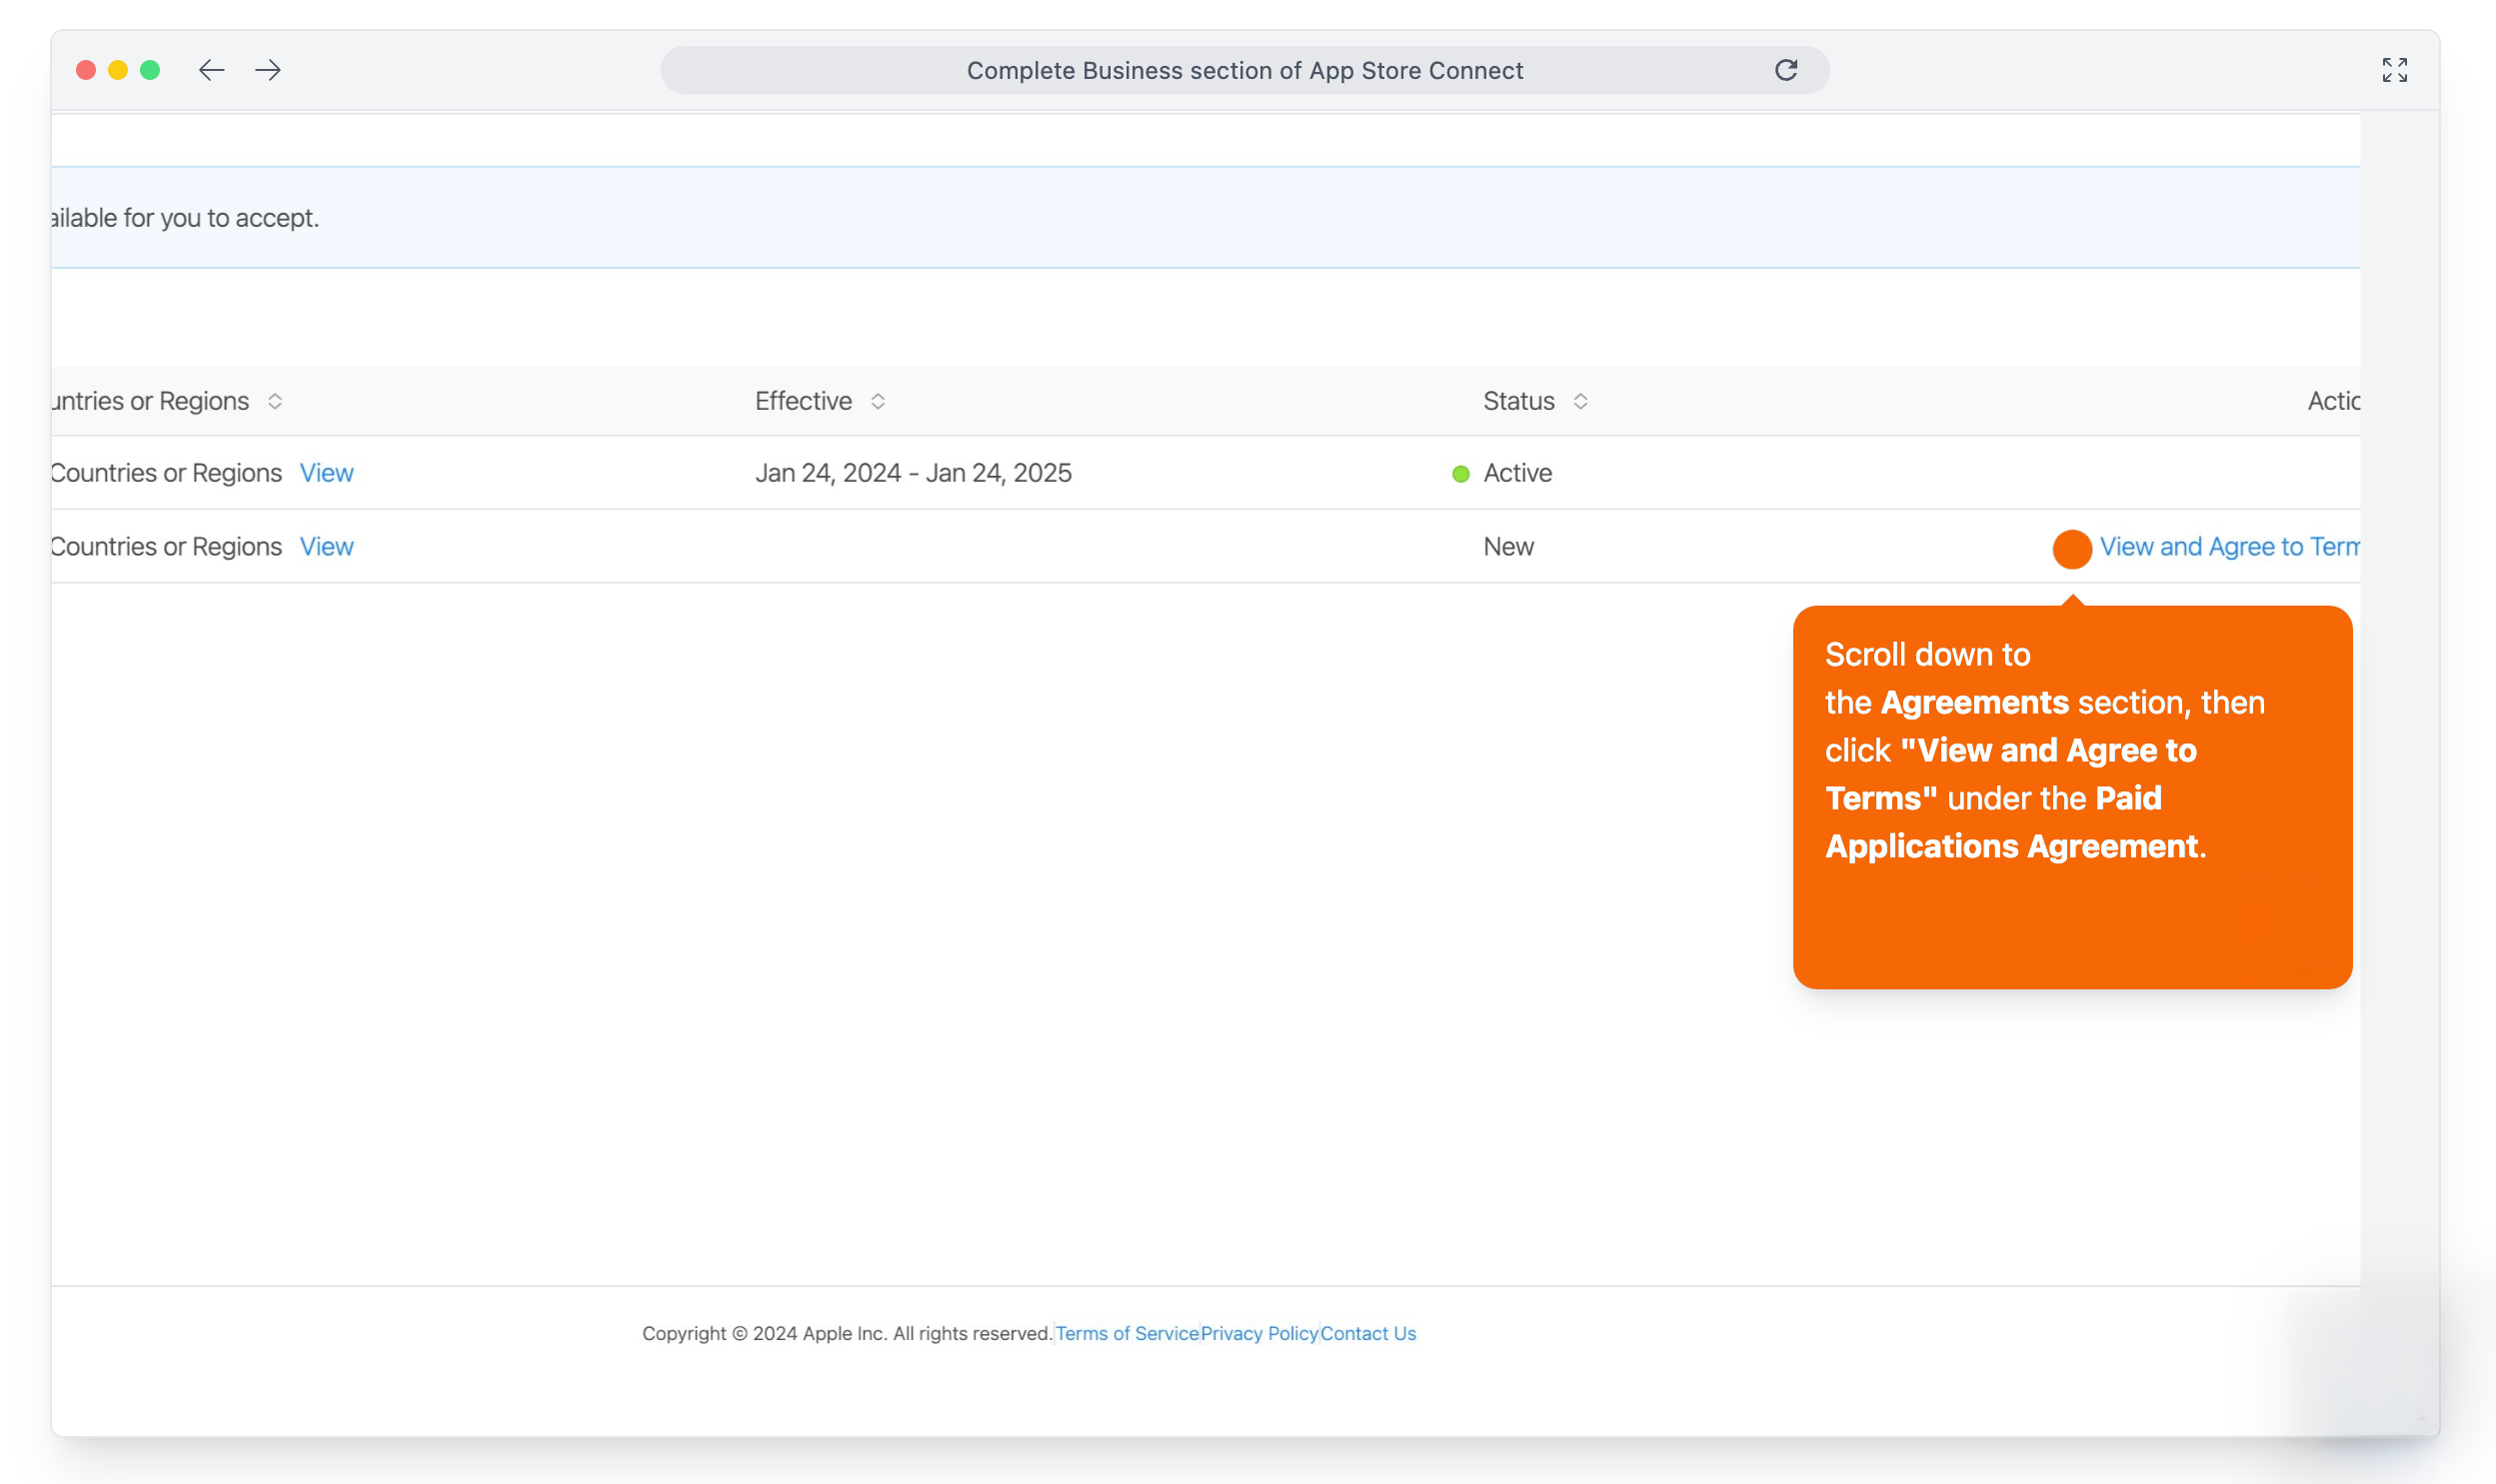
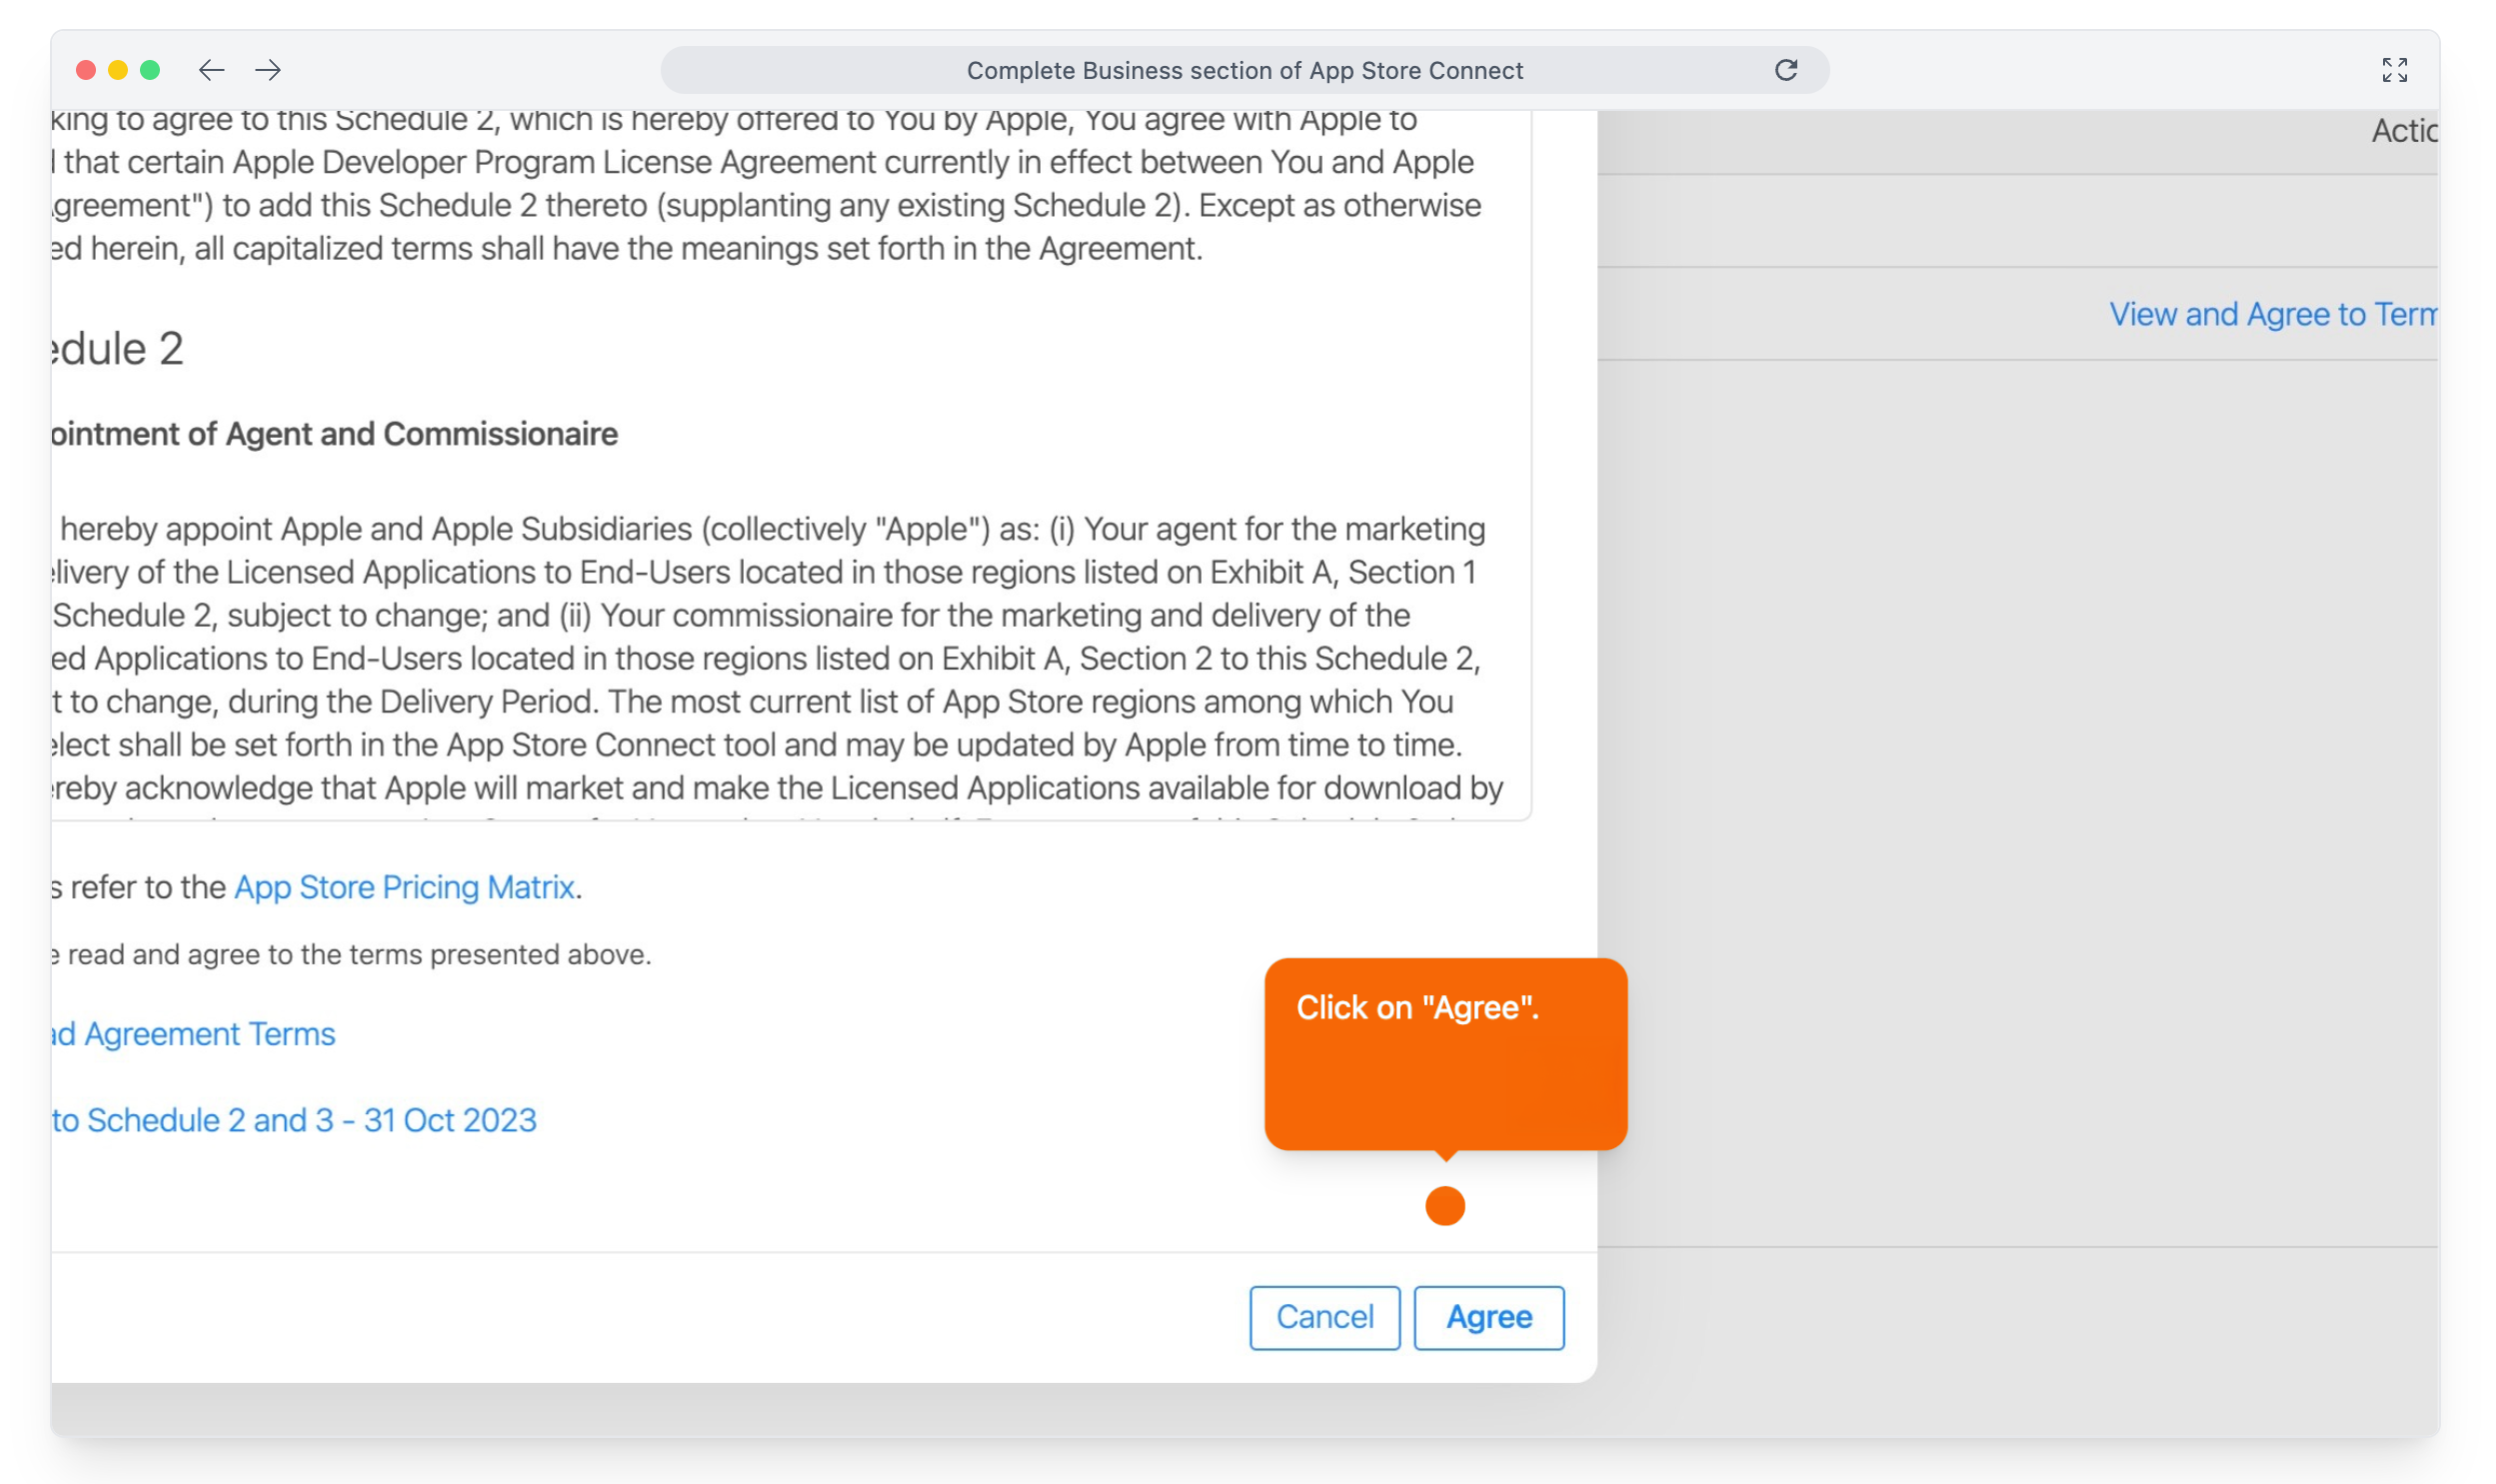
Click View and Agree to Terms to accept the Paid Applications Agreement.
Enter your banking details under Bank Accounts.
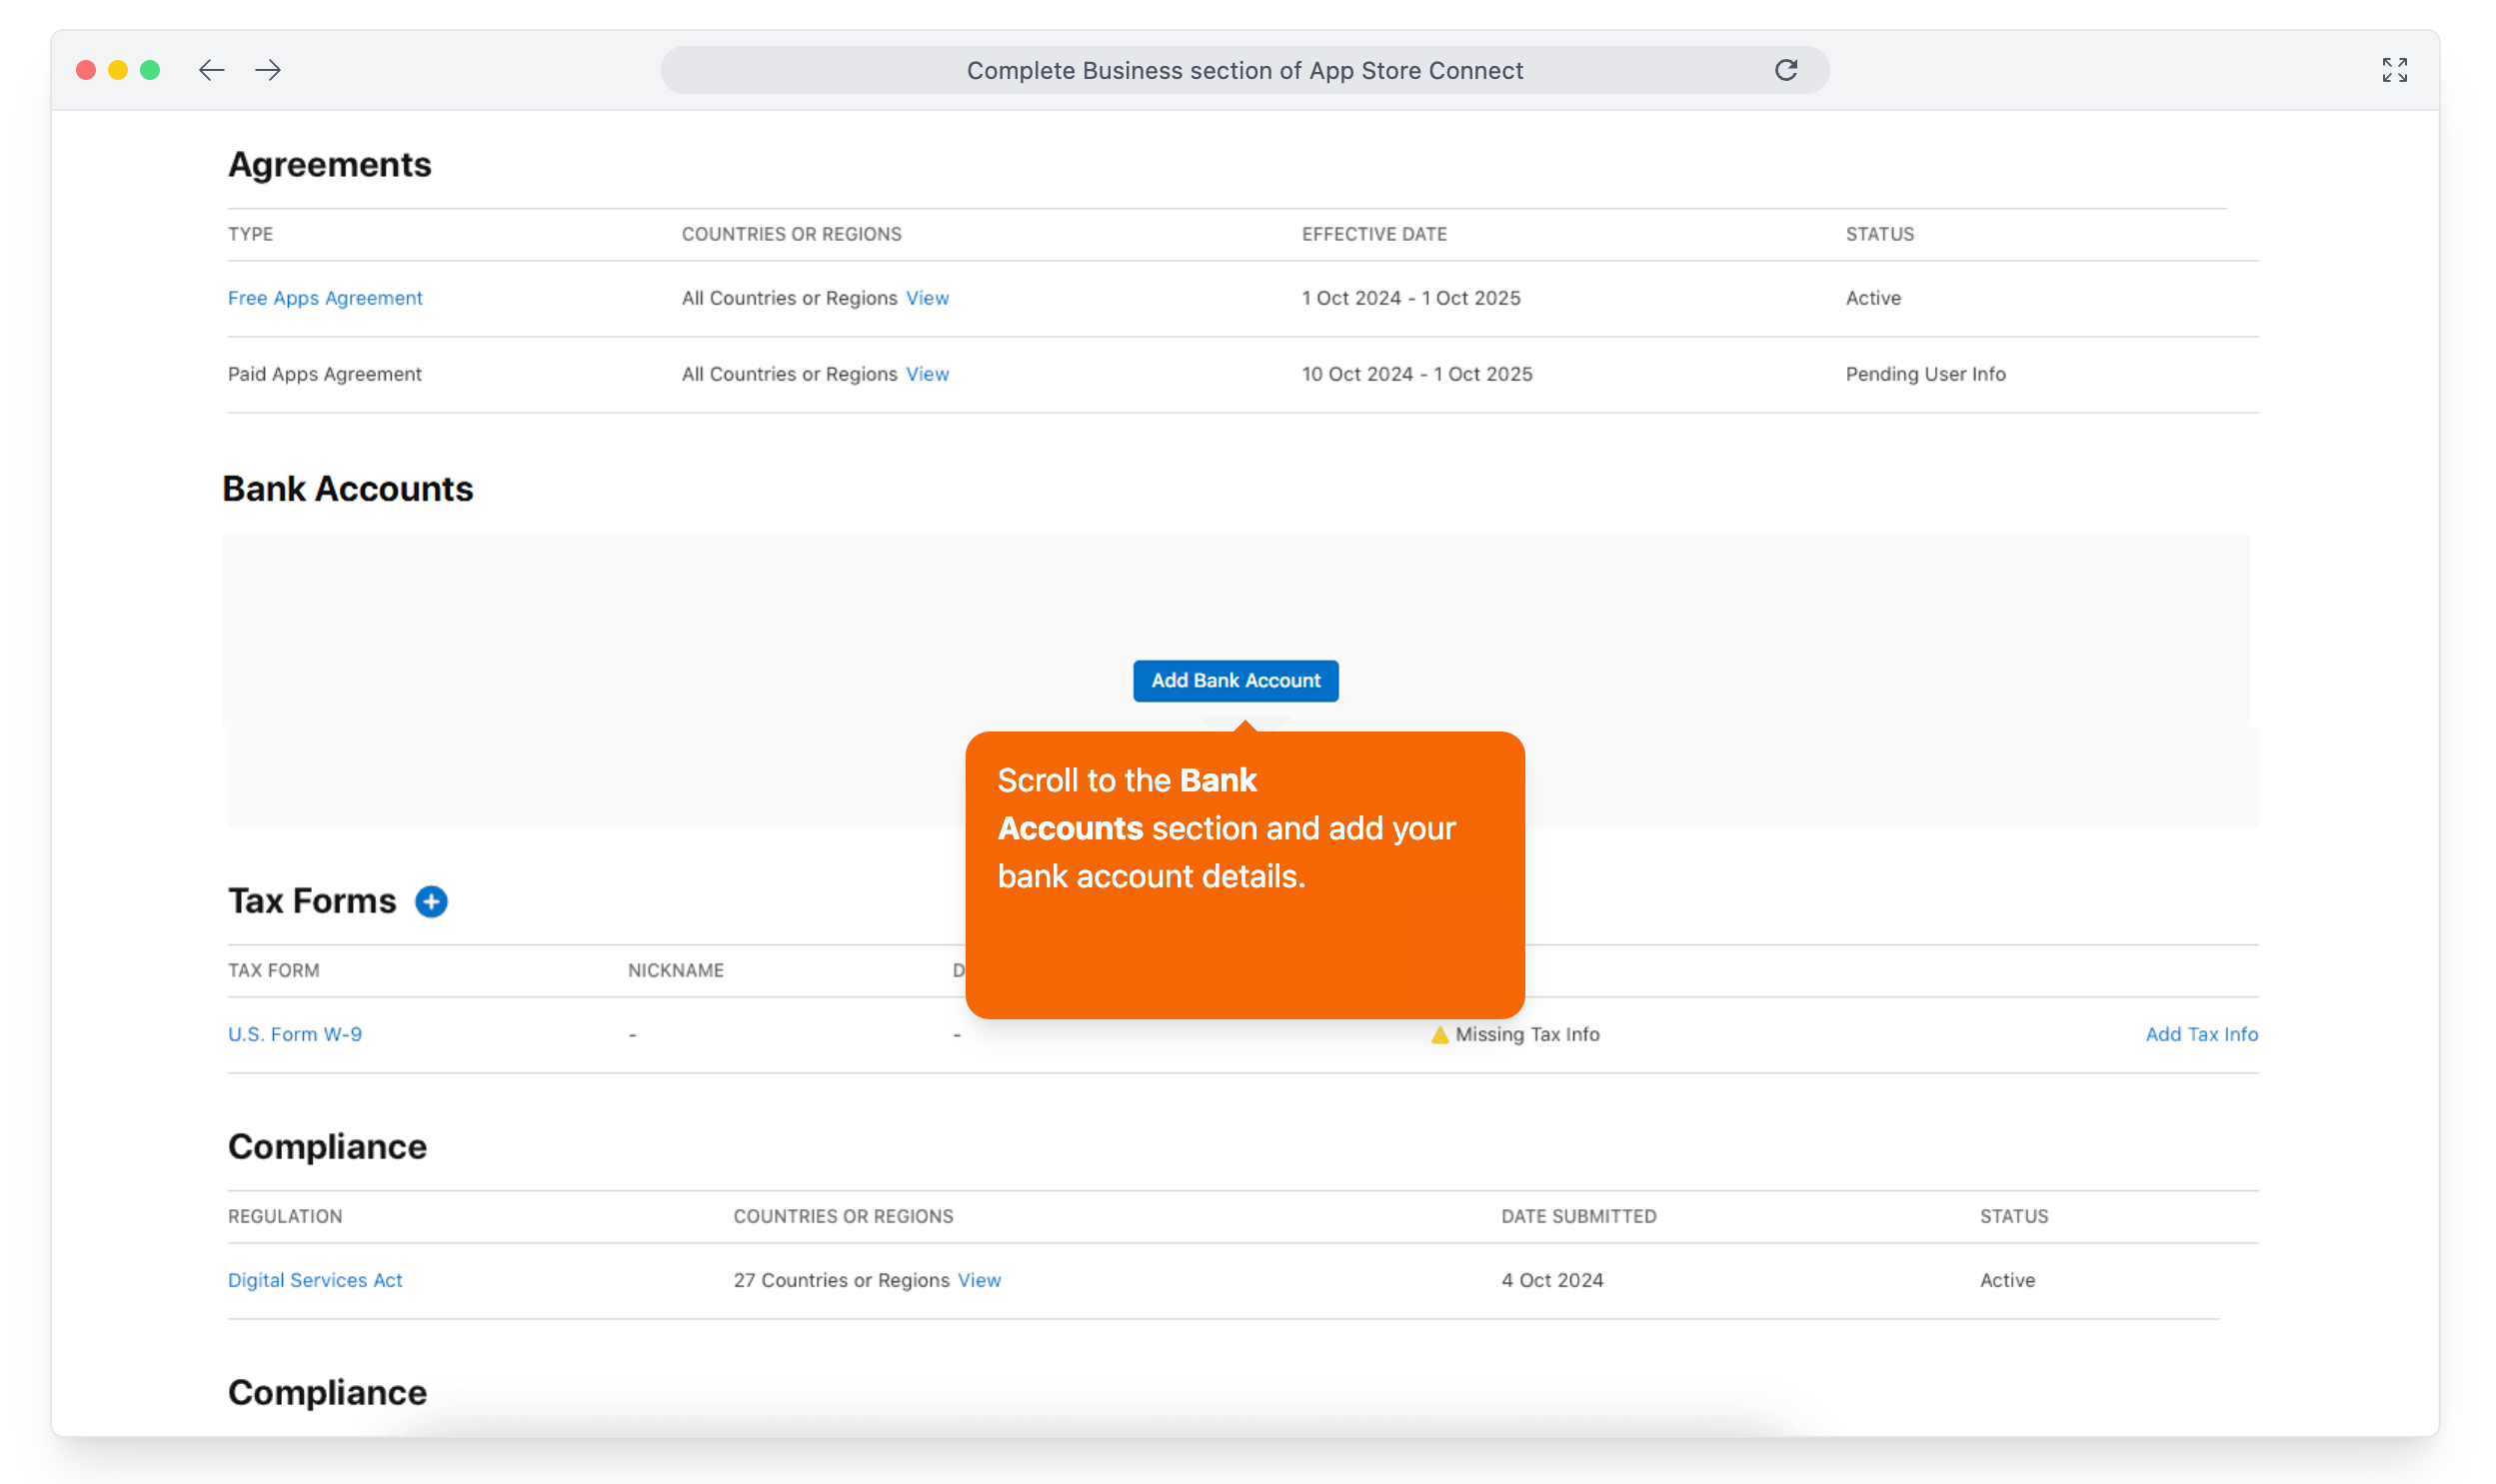
Complete the forms under Tax Forms.
4. Invite Scraler as Admin
Admin access lets Scraler create your app listing, upload builds, manage screenshots and submit your app for review. Scraler never changes your account settings or billing.
In App Store Connect, open Users and Access.
Click the + button to add a user.
Enter developer@scraler.com.
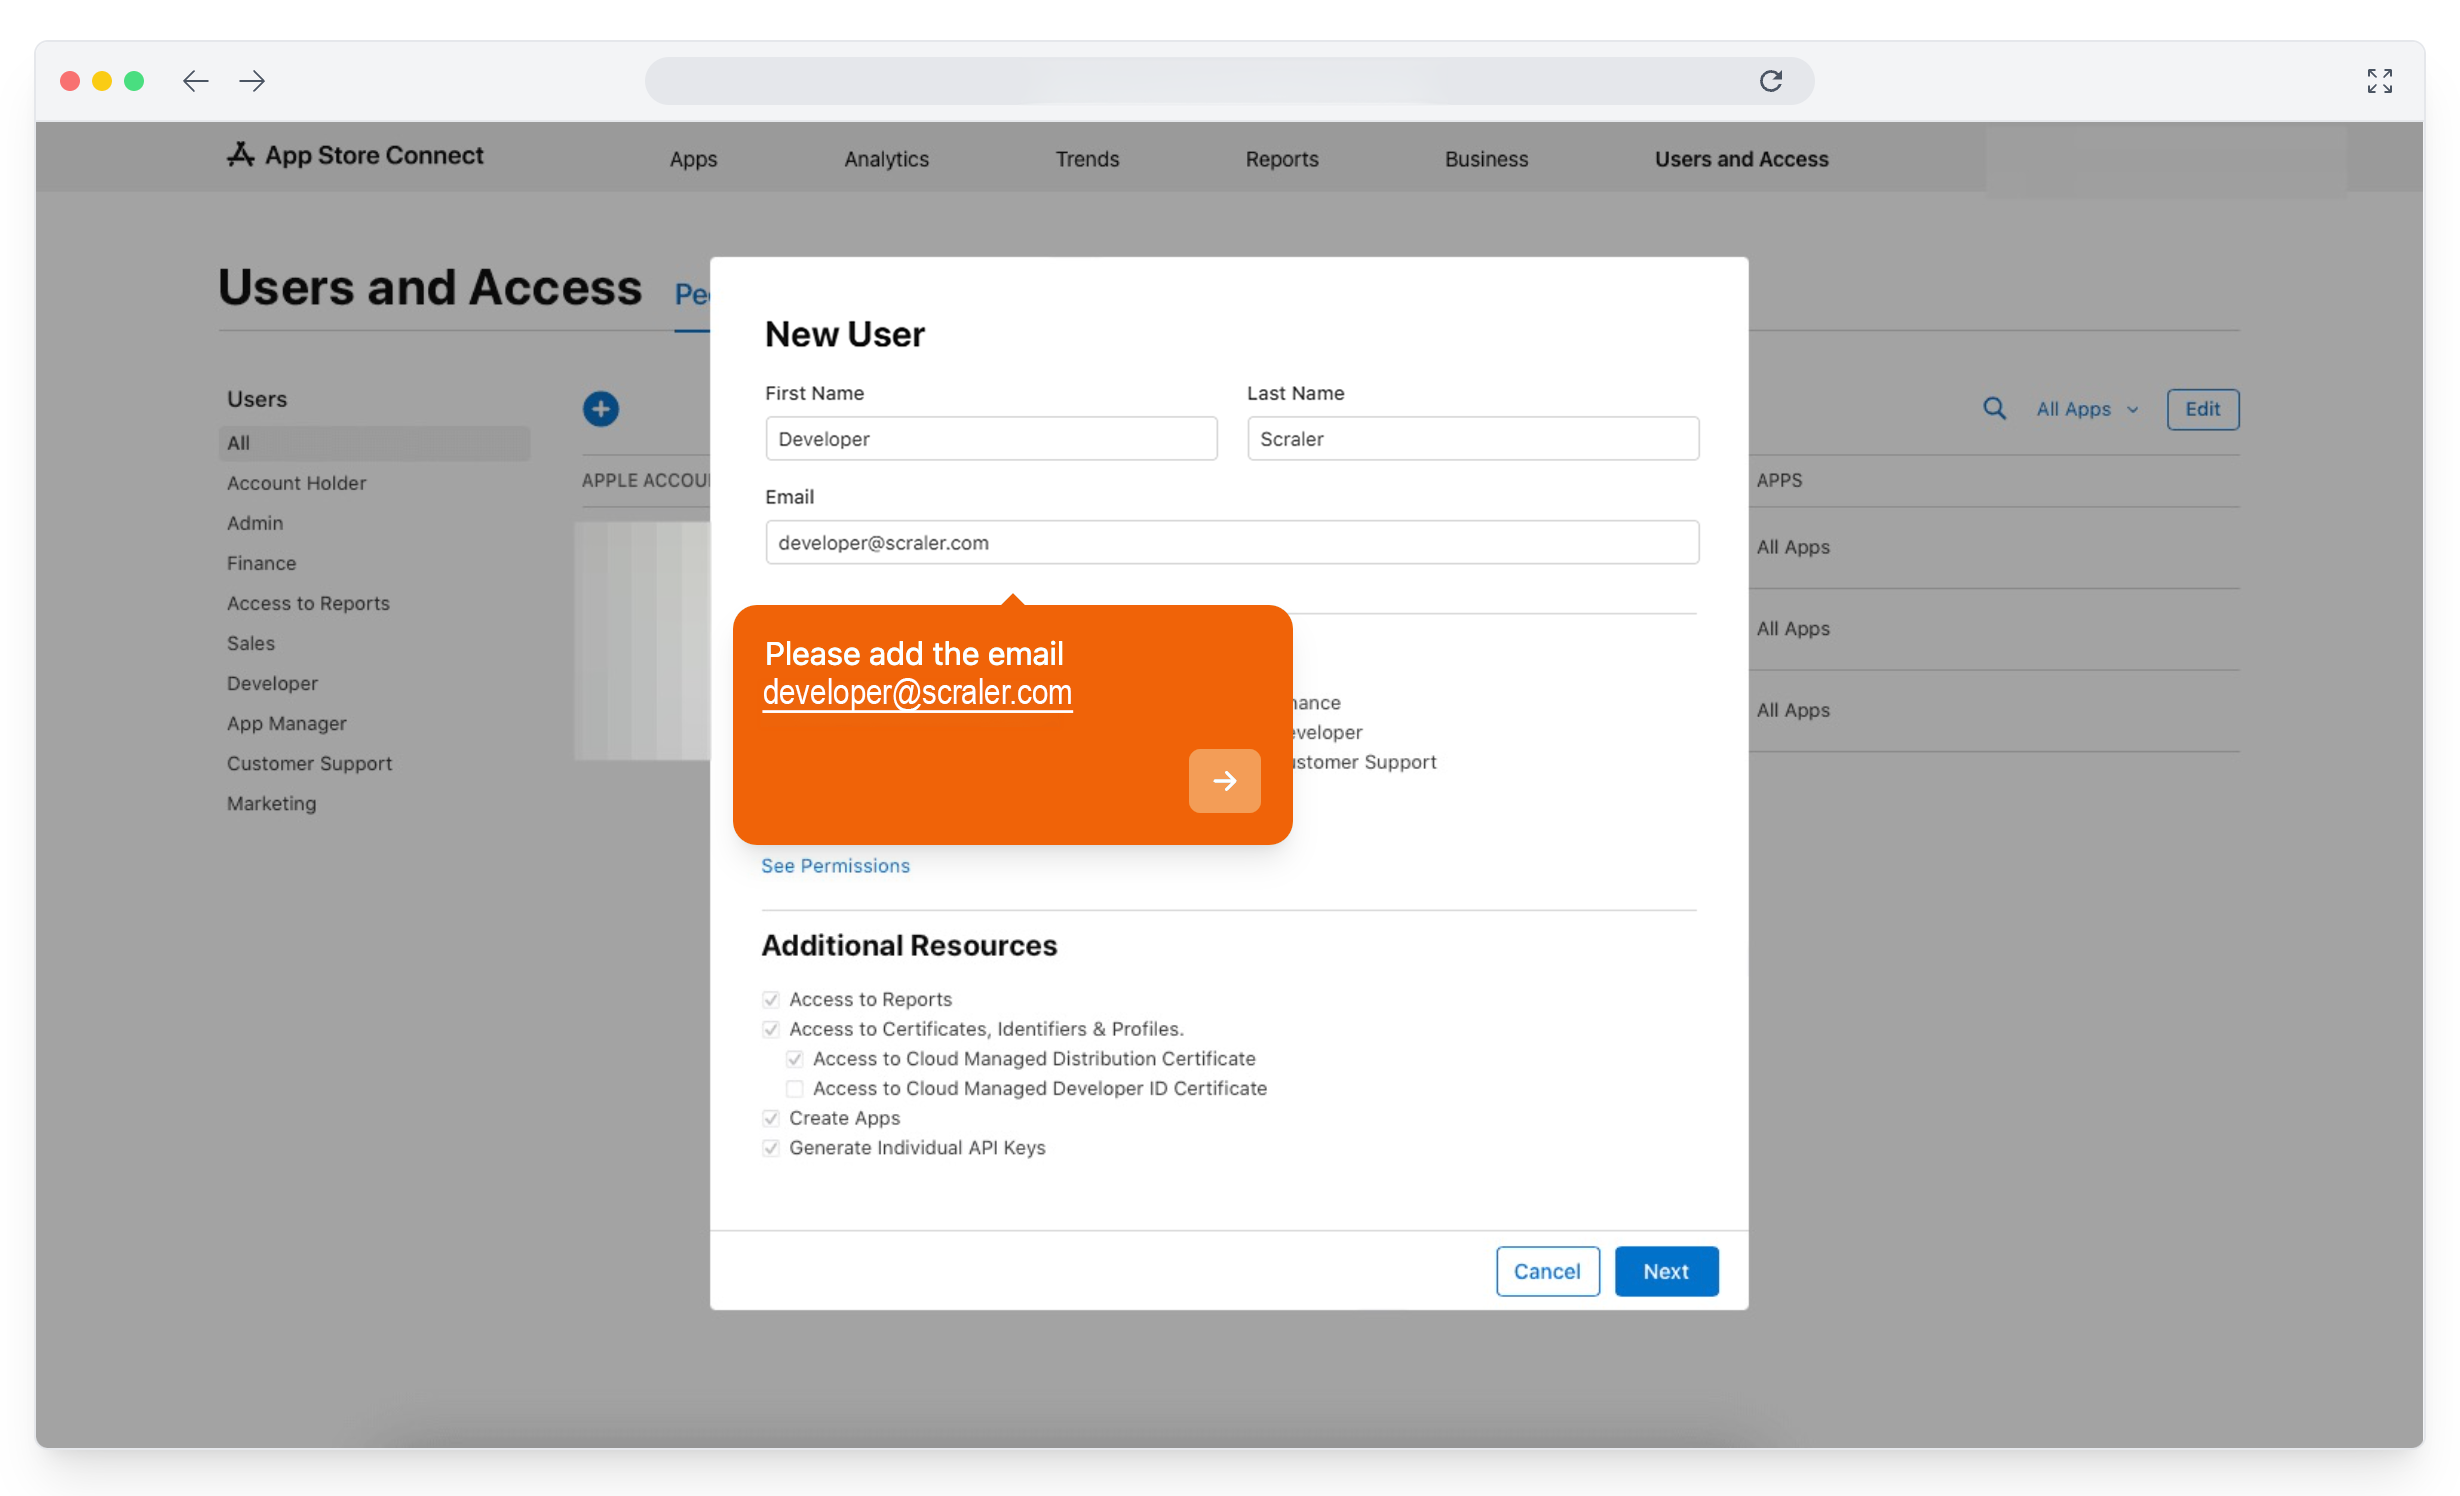
Tick Admin.
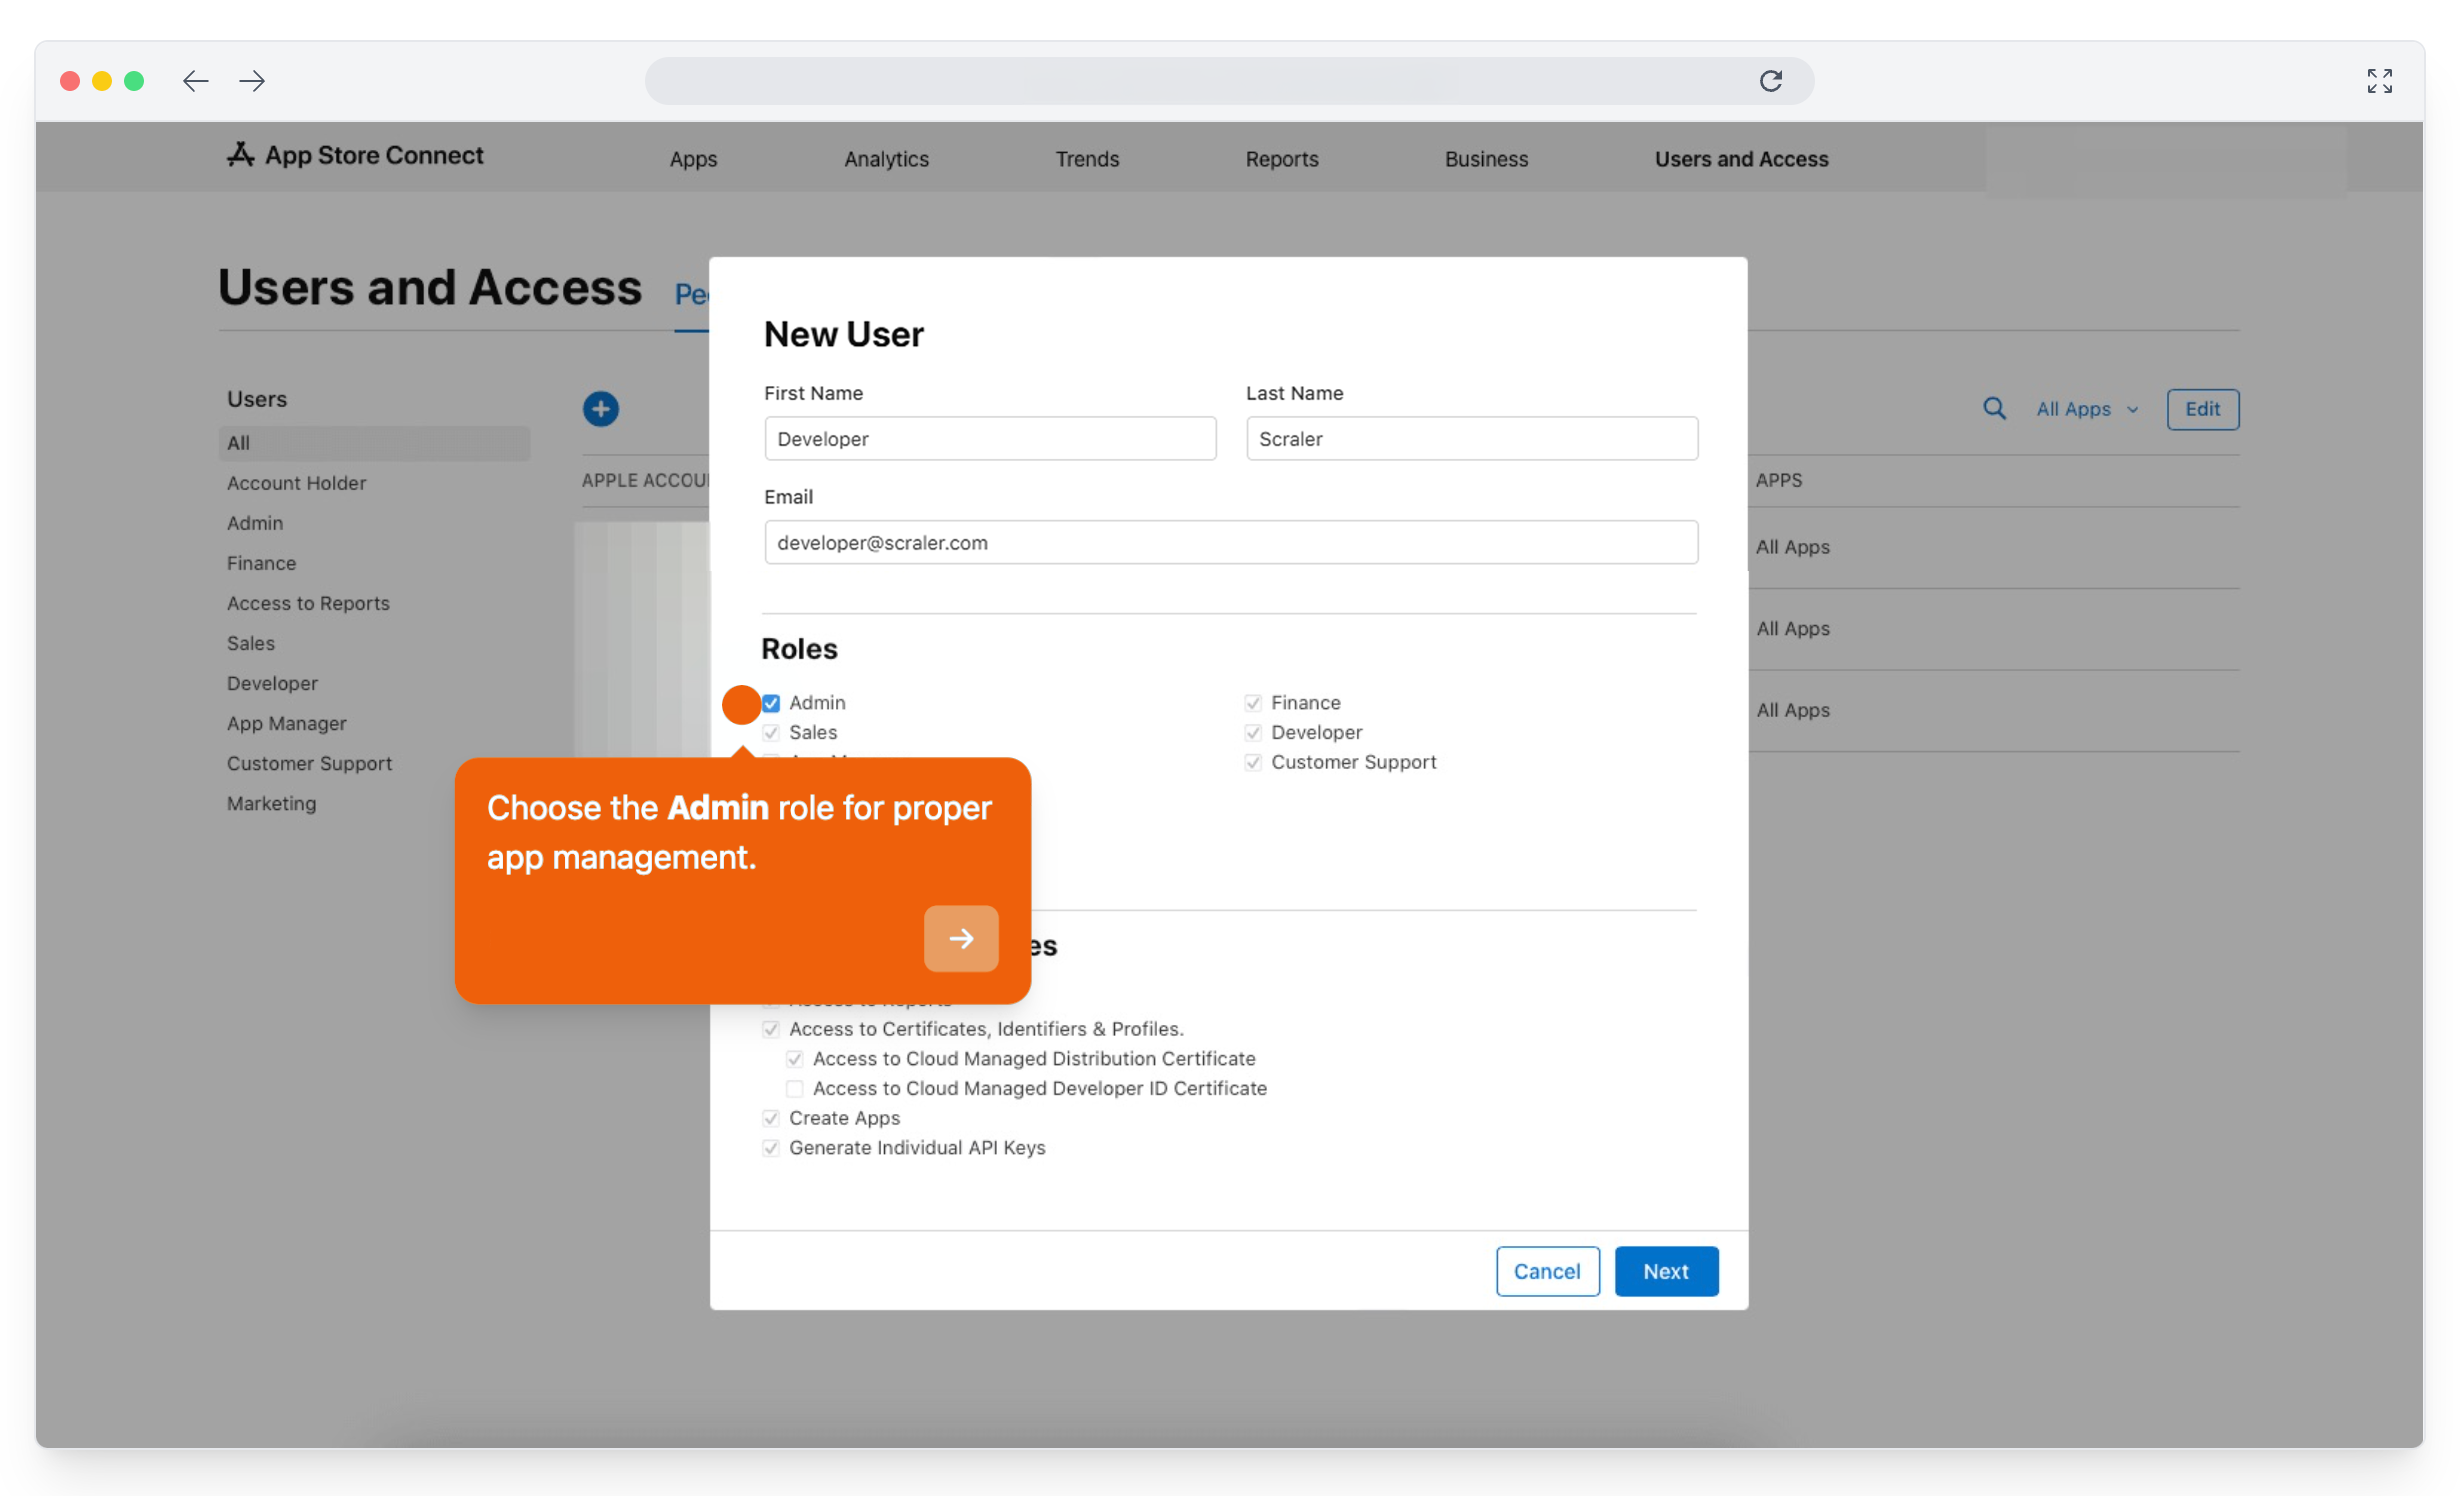
Click Next.
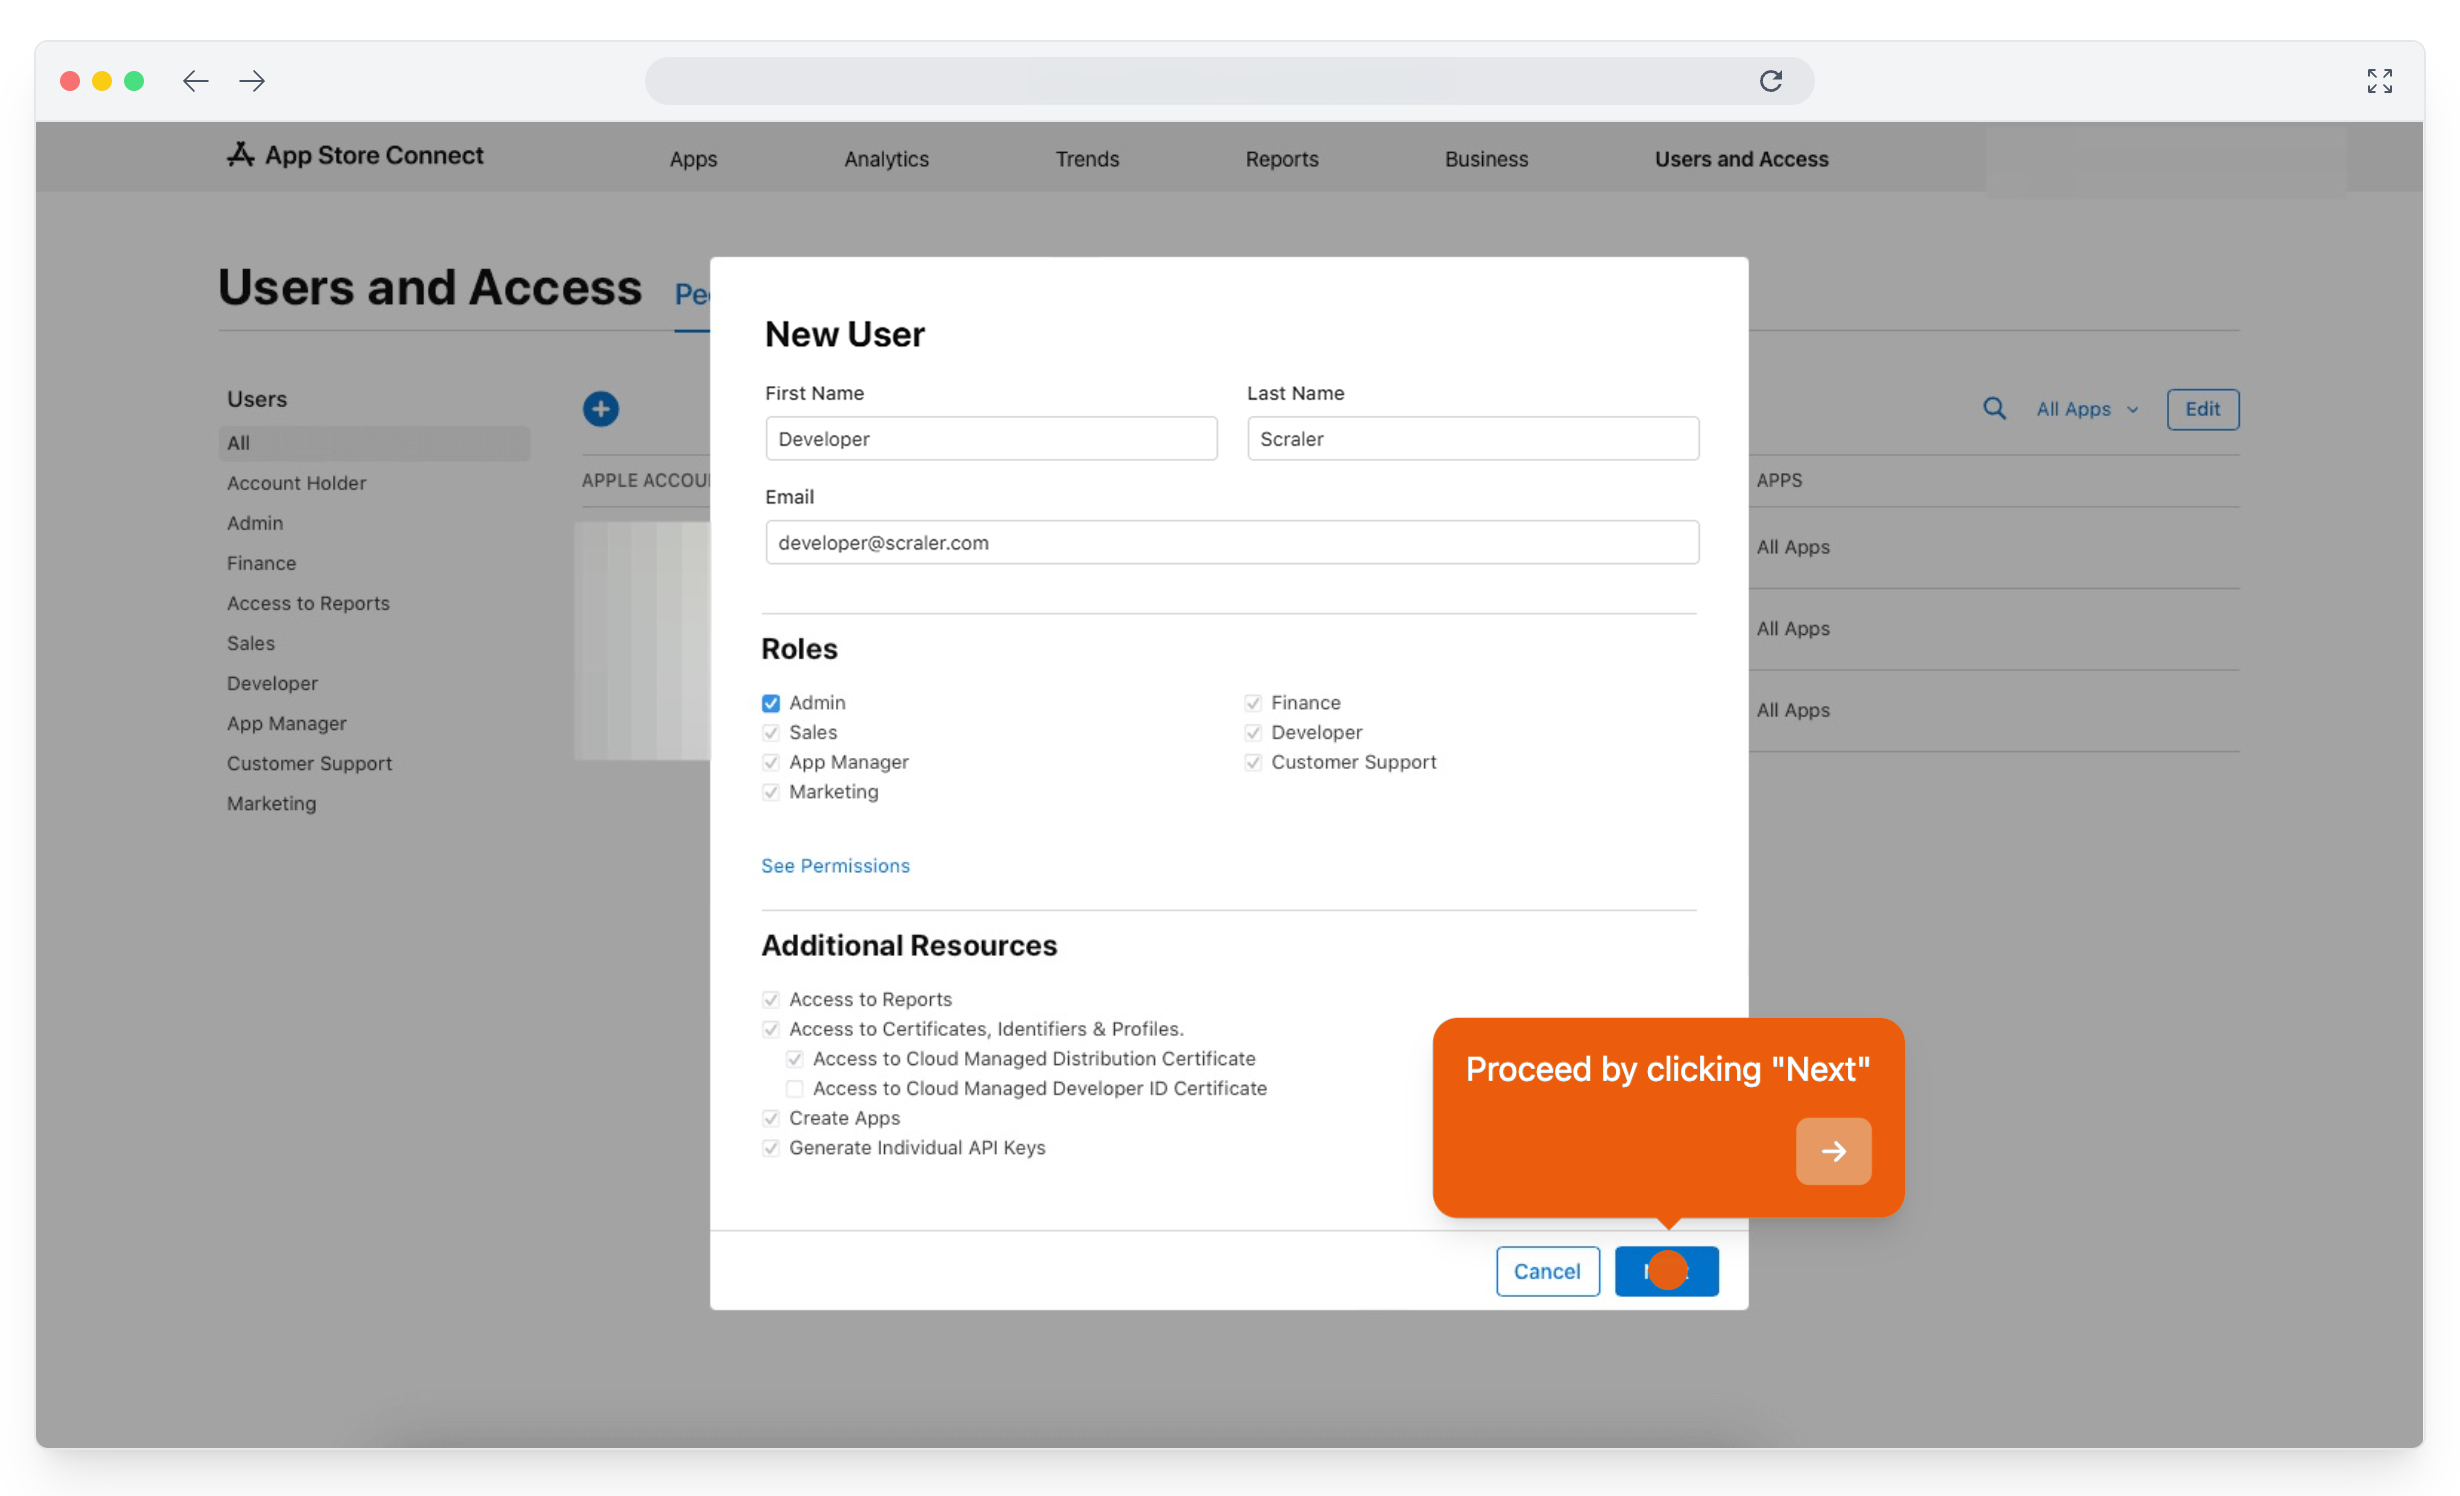
Send the invitation. Scraler gets an email and joins your team.
5. Create an API key
The invite lets us work in your account by hand. The API key lets our build system upload and submit your app automatically, so every update ships without waiting on anyone.
In App Store Connect, open Users and Access, then Integrations. With App Store Connect API selected, click the + next to Active. The first time, Apple may ask you to click Request Access and agree to its terms.
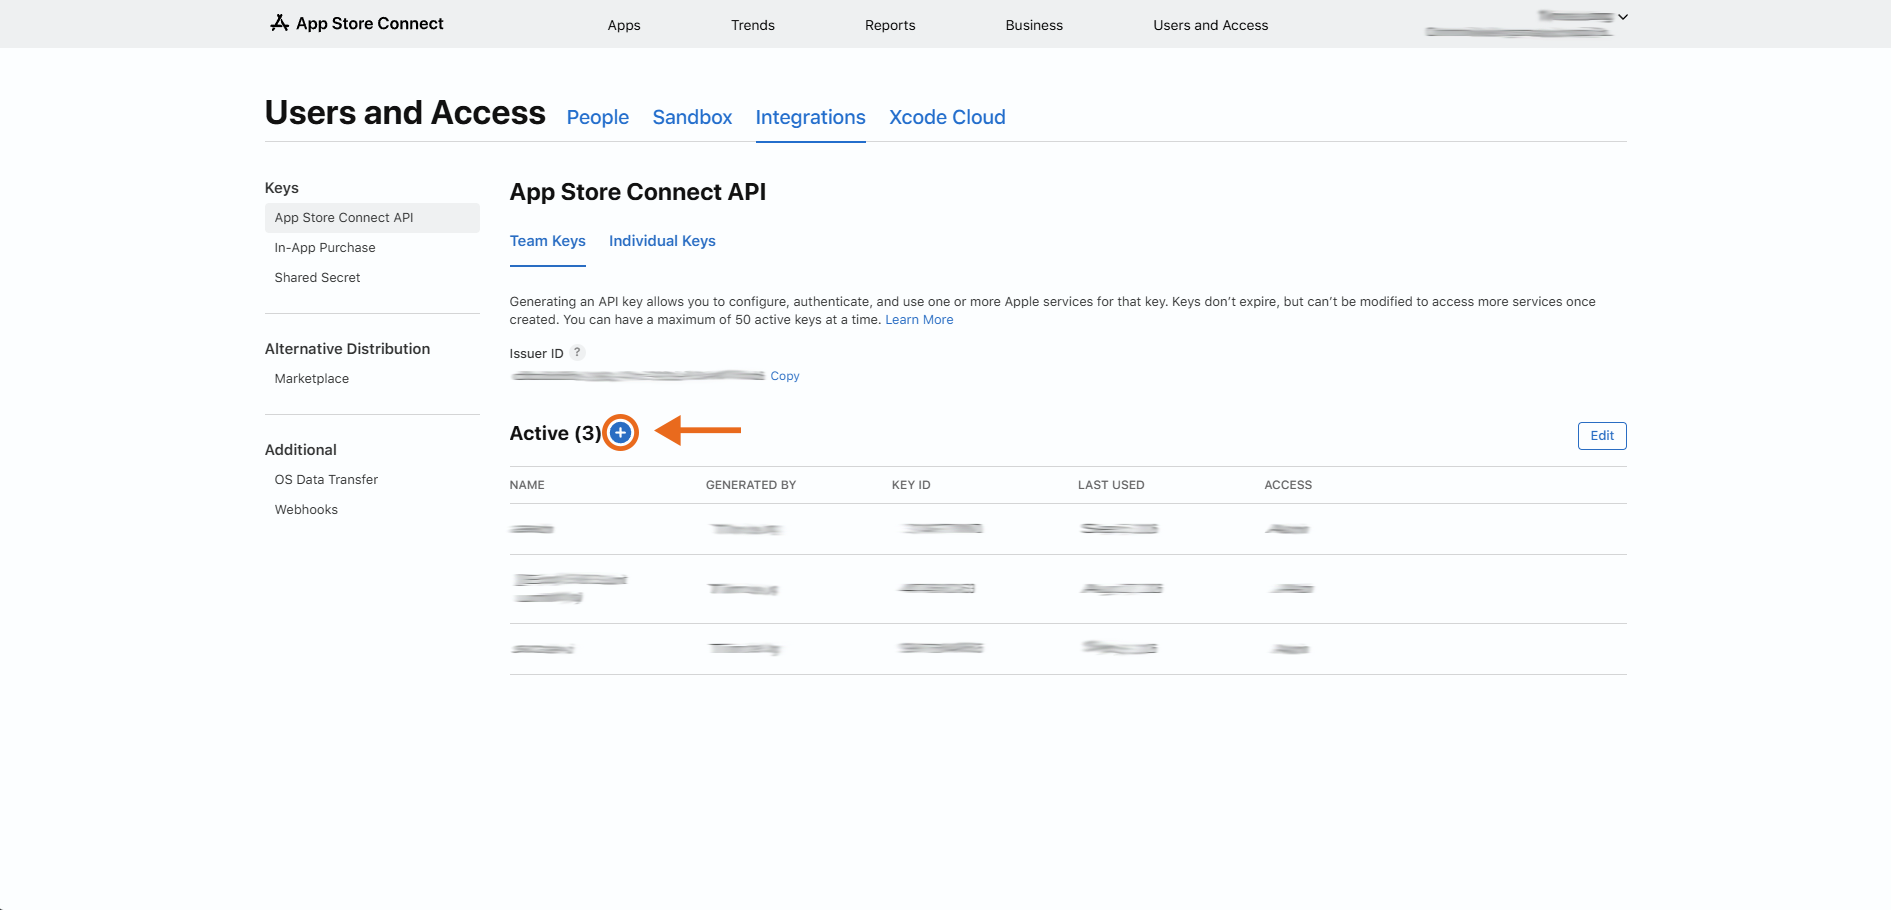
Name the key Scraler.
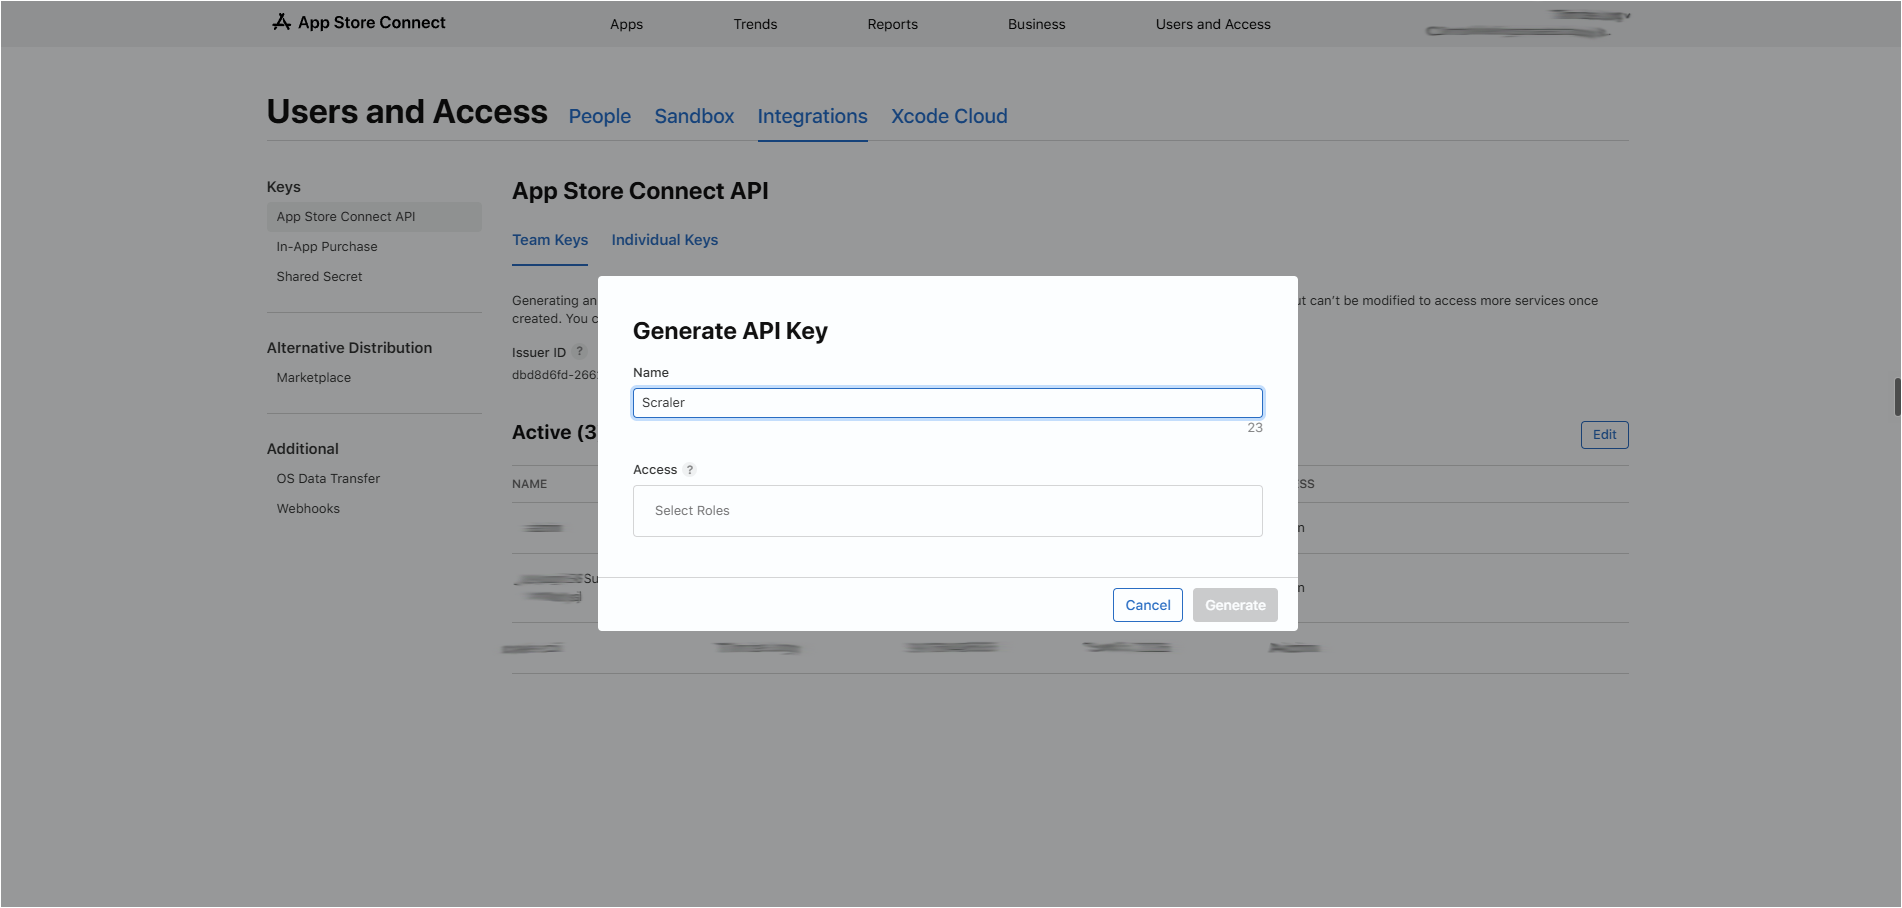
Under Access, choose Admin, then click Generate.
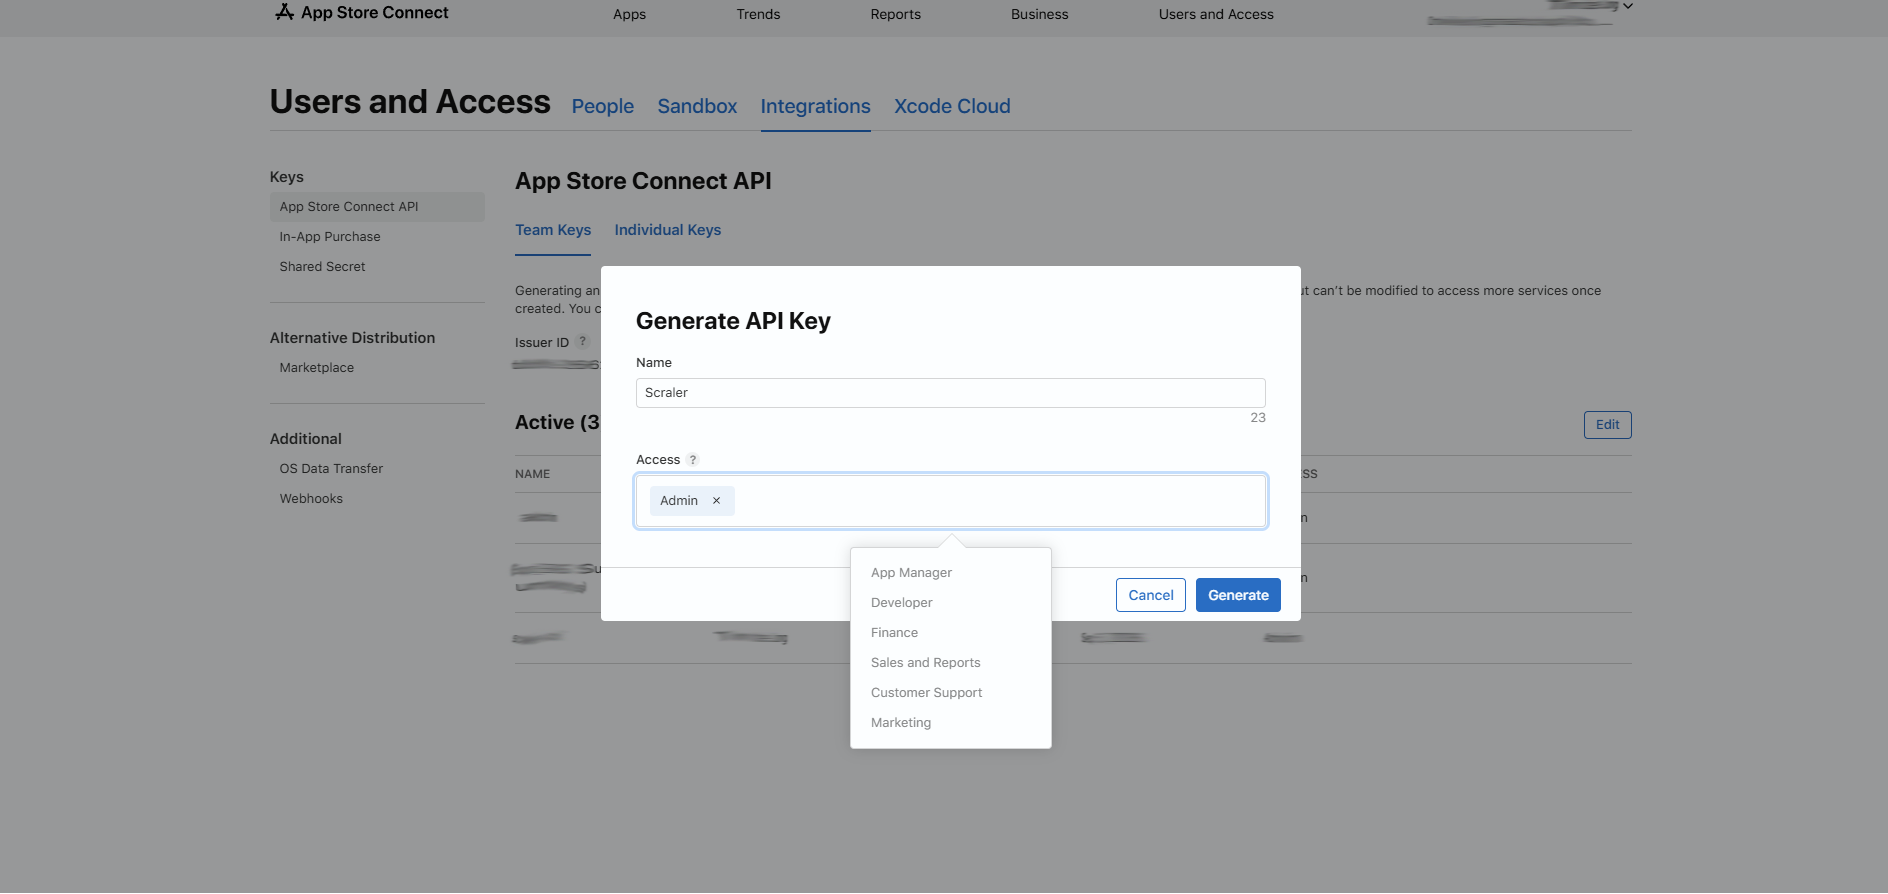
On the new Scraler row click Download and keep the AuthKey_XXXX.p8 file. Apple only offers it once. Then click Copy next to the Issuer ID above the list.
In Scraler, go to the Apple Developer Account step. Enter your Apple Developer email and team name exactly as shown under Membership details in your Apple Developer account. Upload the .p8 file, paste the Issuer ID and click Save key. Scraler checks the key with Apple right away.
Android (Google Play)
Nothing to set up. Scraler publishes your app on Google Play under its own Play Console. Your icon, name, colors and screenshots stay yours. You need no Google account, no DUNS number and no $25 fee.
How it works
You finish the store steps in My App. Android needs nothing from you.
Scraler builds and signs your Android app with your name, icon and colors.
Scraler publishes it on Google Play under its own Play Console. The publisher name on the listing is Scraler.
Your clients search for your app name in the Play Store and install it.
Apple's rules (App Store Guideline 4.3) require white-label apps to be published under each business's own developer account. Google Play has no such rule, so Scraler ships Android for you.
Want to own the Play listing later? Contact support and we will help you move the app to your own developer account.