Everything you need to set up your account, manage clients, and run your fitness business with Scraler.
Follow these 5 steps to get up and running.
Go to Settings and fill in your trainer profile. This is what your clients see.
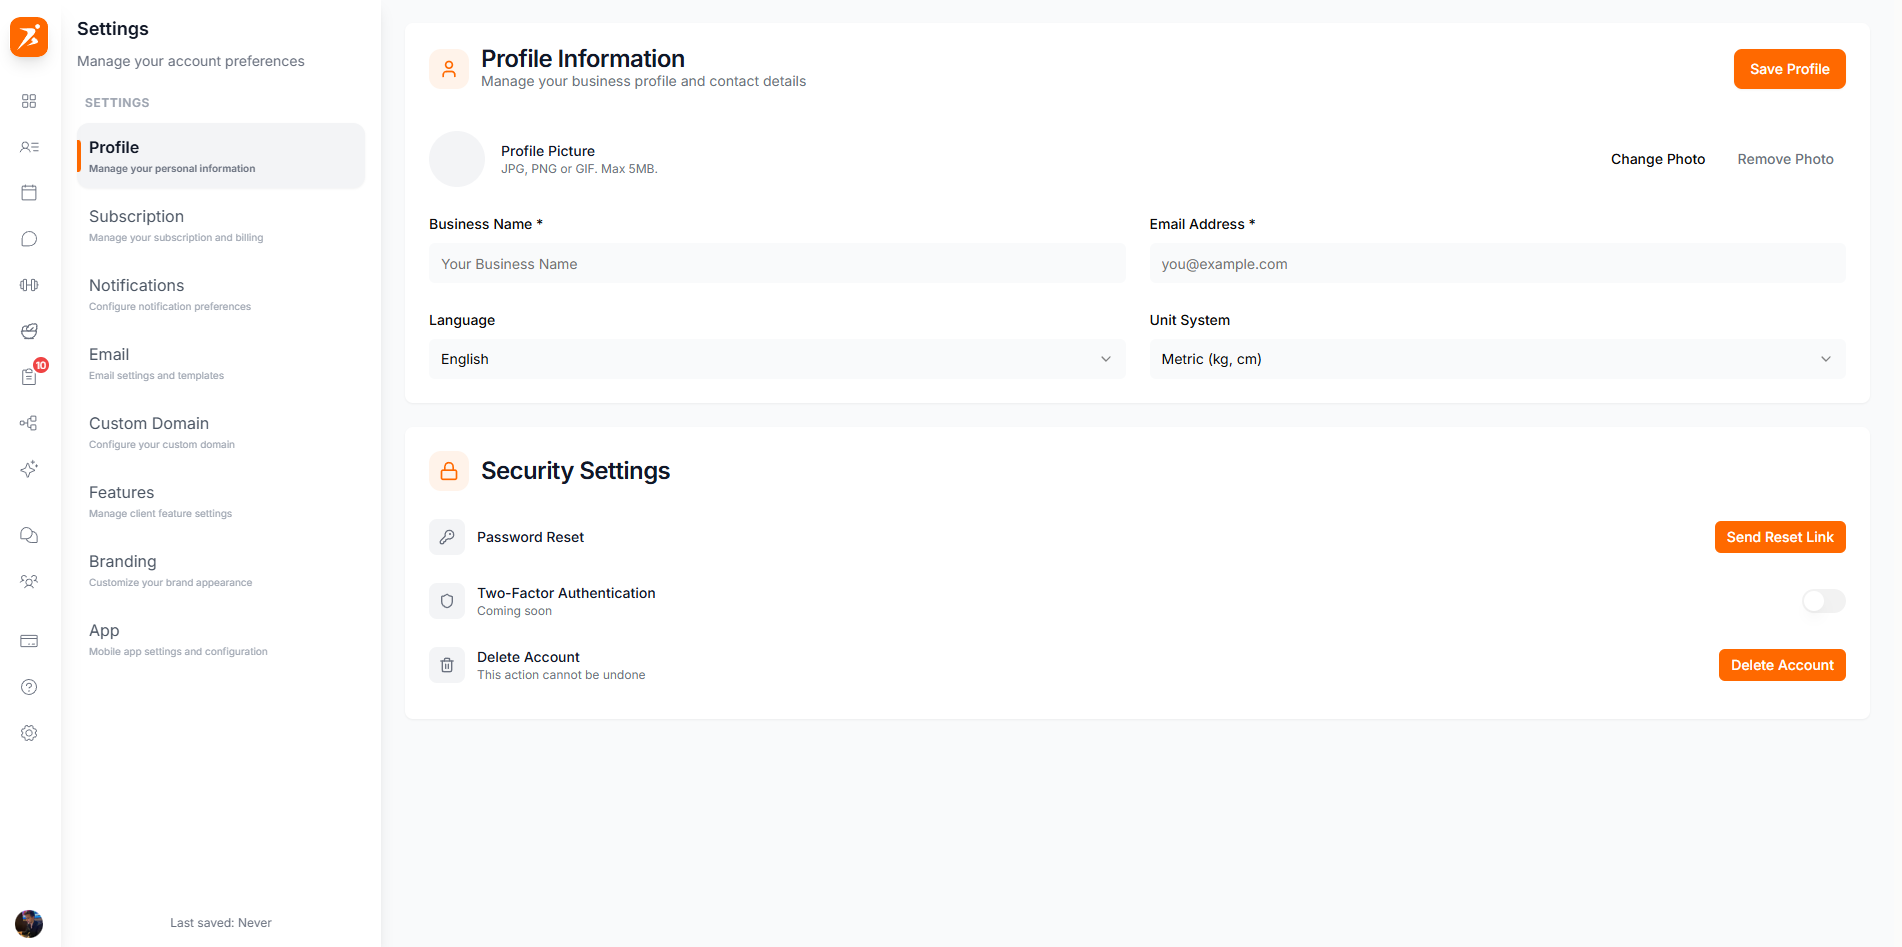
Screenshot: Profile settings
Show: profile settings page with photo upload, business name, certifications, bio, phone and location fields
public/docs/profile-settings.png
Profile Photo
A professional headshot so clients recognize you.
Business Name
Shows on your subdomain and in emails.
Certifications
Display your professional qualifications.
Bio
A short description of your training style.
You can also upload a logo and pick brand colors in Settings. These show up on your client portal and emails.
Go to Settings and click Connect Stripe. This lets you accept payments from clients.
Business Details
Your business name, address, and type.
Bank Account
Where your payouts will go.
ID Verification
Passport or driver's license.
Tax Info
VAT number if applicable.
Go to Clients and click Add Client. You only need their name and email.
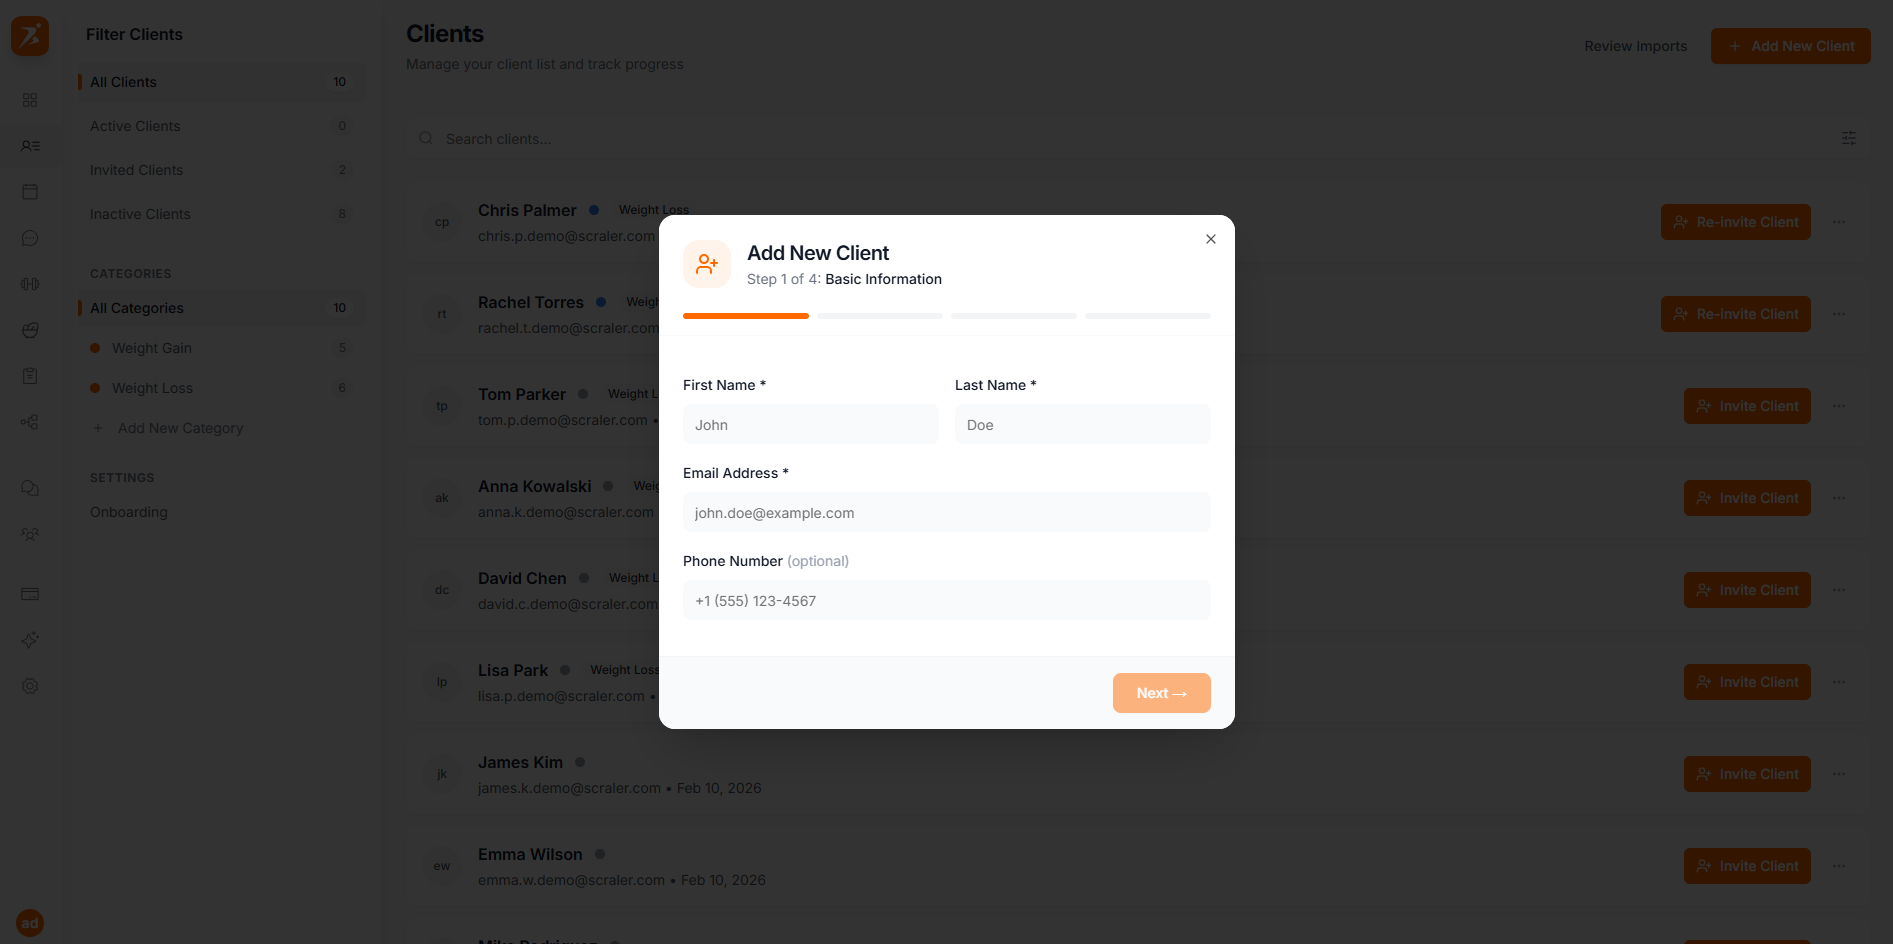
Screenshot: Add client form
Show: add client modal with name and email fields, step indicator, 'Next' button
public/docs/add-client-form.png
After adding them, click Invite Client on their profile. They'll get an email to set their password.
Go to Workouts to build training programs. Plans are organized into weeks and days with exercises.
Screenshot: Training plan builder
Show: training plan builder with weekly grid, exercises per day, sets and reps
public/docs/plan-wizard.png
Build from Scratch
Pick exercises, set reps and sets, organize by day. Full control.
Generate with AI
Describe the goal and AI builds a complete plan in seconds. Edit everything after.
When your plan is ready, assign it to a client and pick a start date.
Go to Meal Plans to build nutrition plans. Create them manually or let AI generate them.
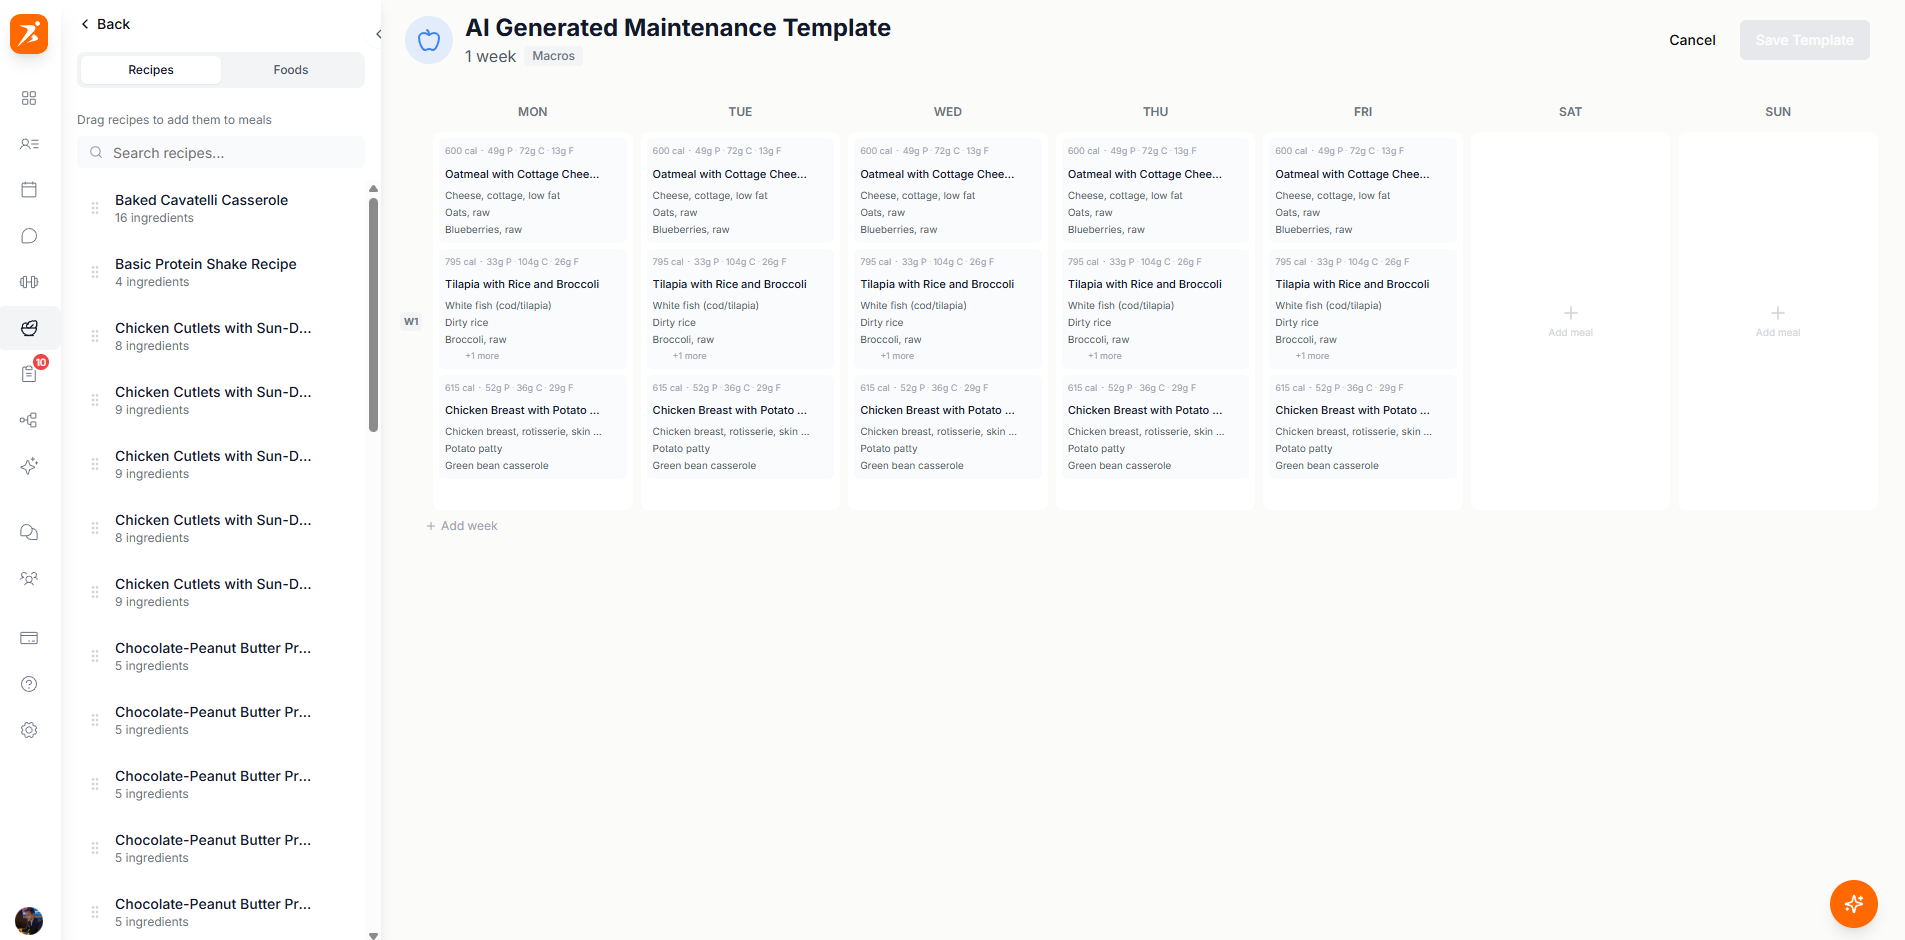
Screenshot: Meal plan builder
Show: meal plan weekly grid with meals per day, macros, ingredients list
public/docs/meal-plan-builder.png
Build Manually
Add meals day by day, set ingredients and macros yourself.
Generate with AI
Set goals and preferences, AI creates a full weekly plan with macros.
Go to Schedule to manage your calendar and book sessions with clients.
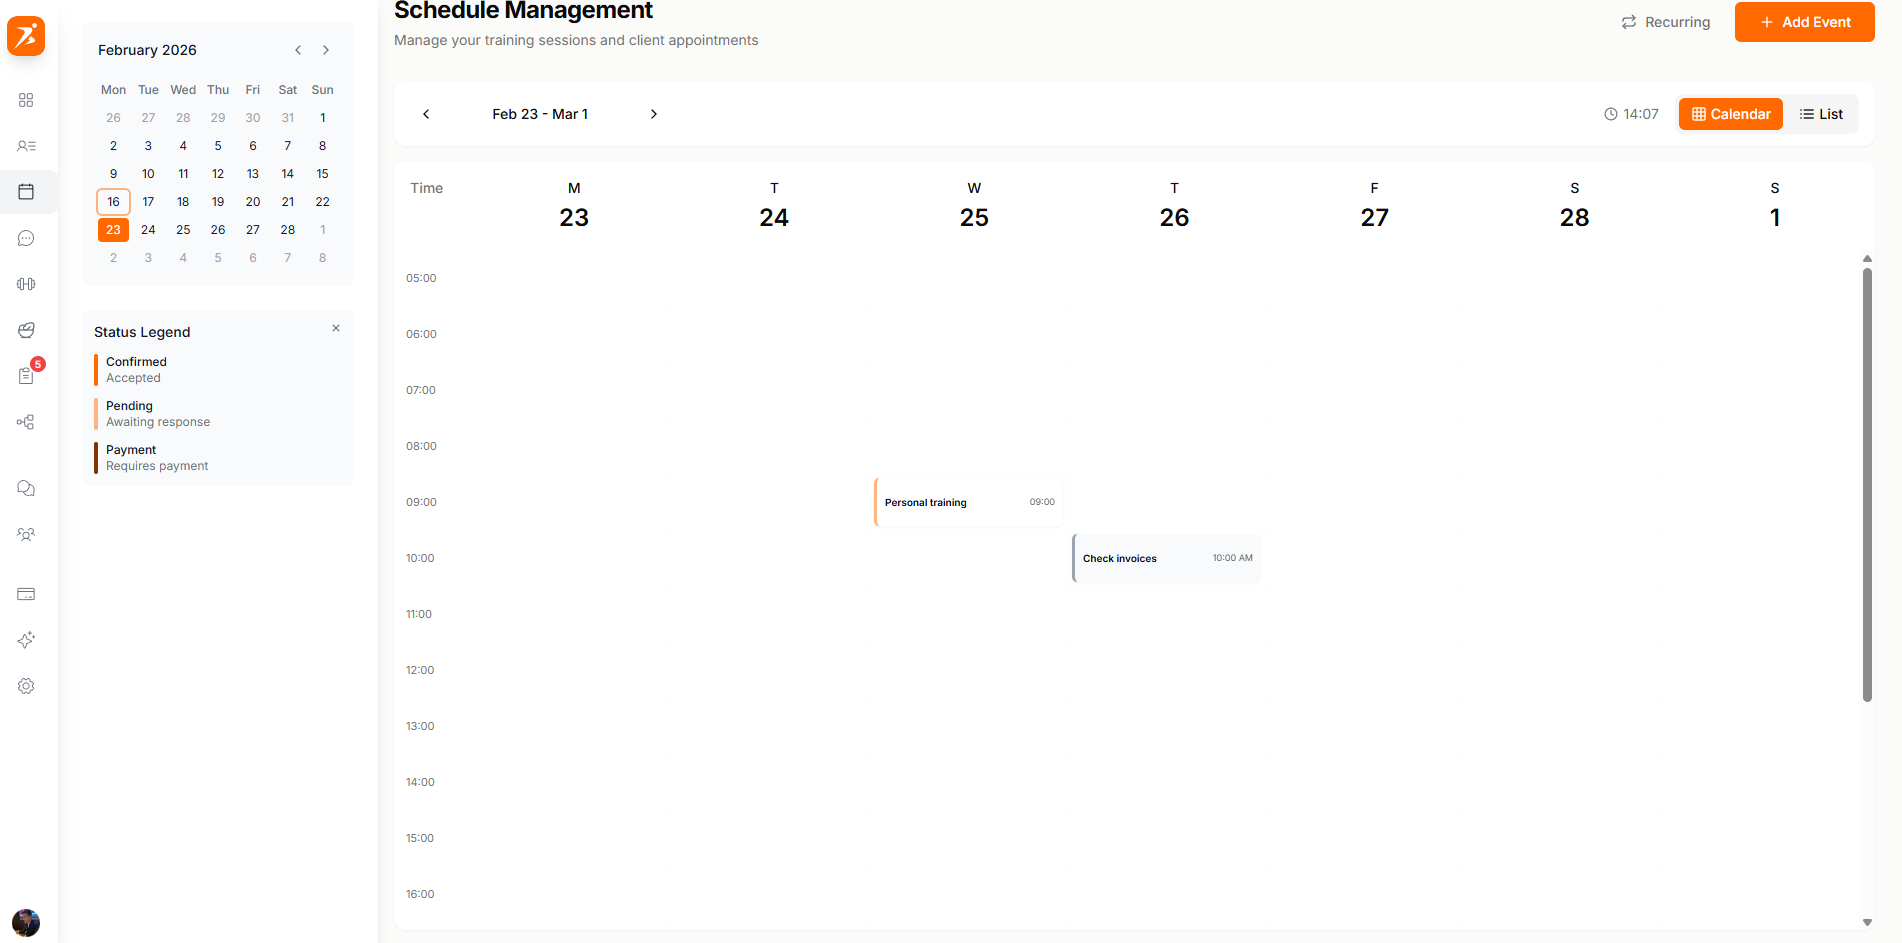
Screenshot: Weekly calendar
Show: weekly calendar with time slots, appointment cards, status badges
public/docs/weekly-calendar.png
1-on-1 Sessions
Book private training sessions with individual clients.
Group Sessions
Schedule group classes with multiple clients at once.
Recurring
Set up weekly or bi-weekly sessions that repeat automatically.
Go to Chat to message your clients directly. Messages are delivered in real-time.
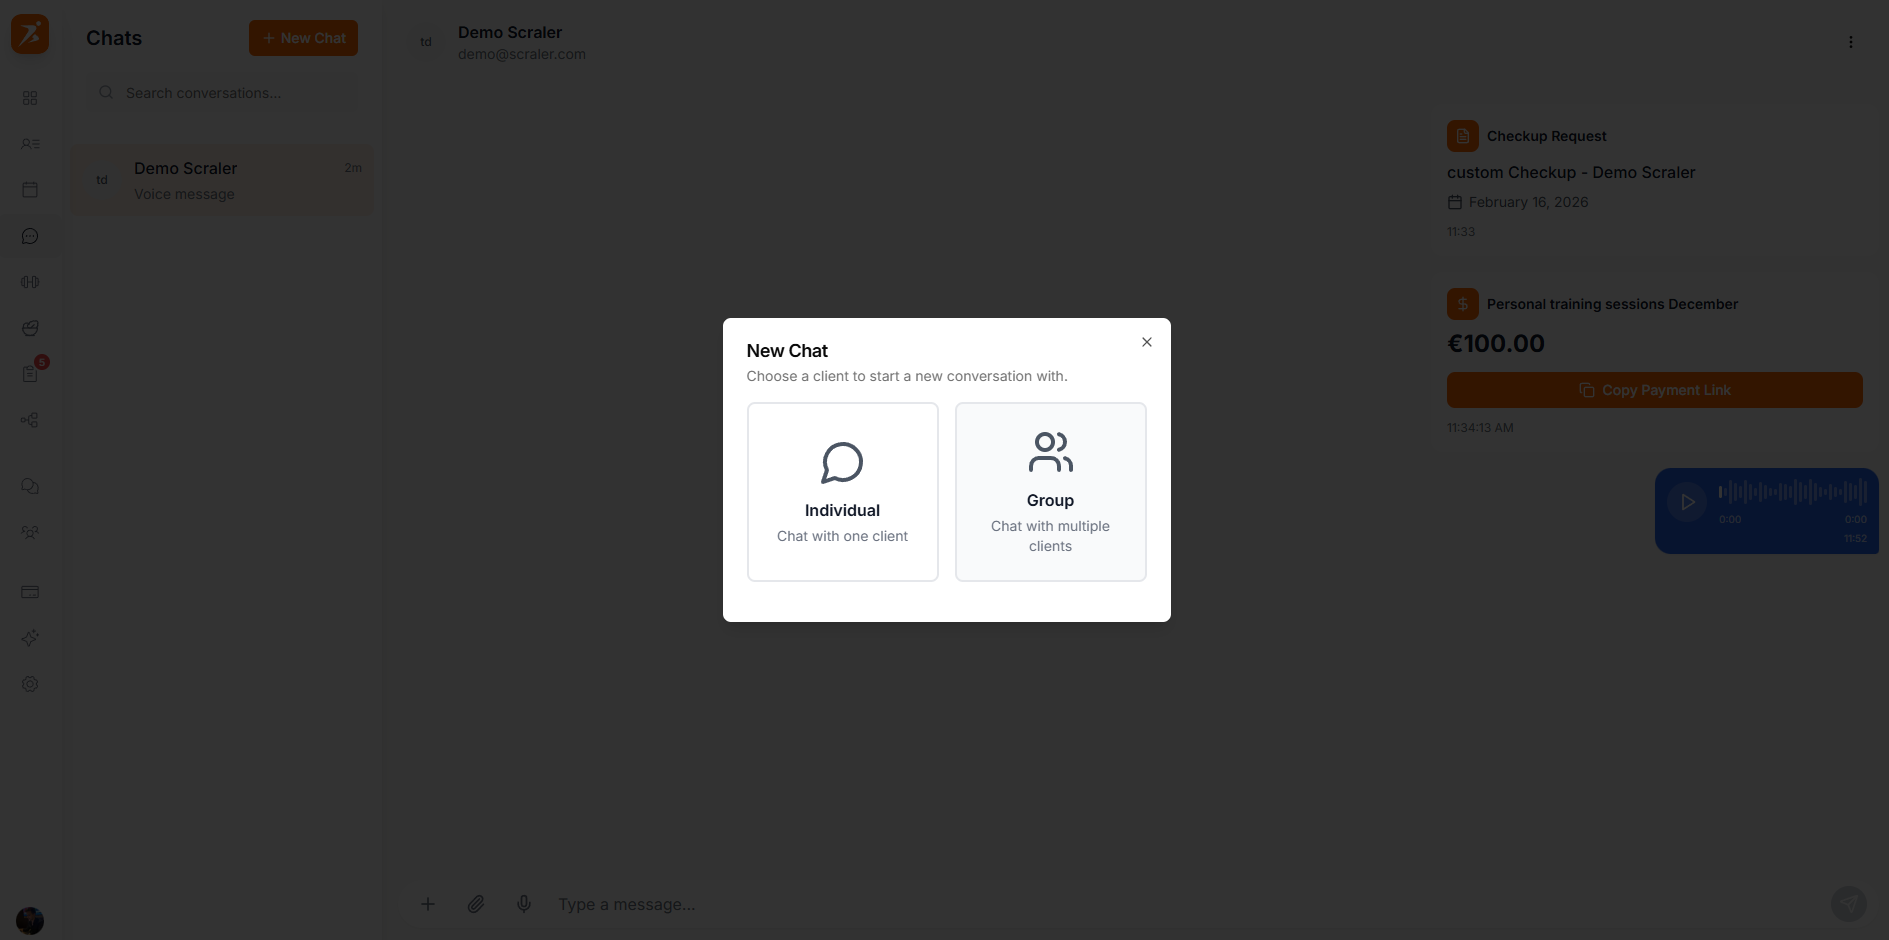
Screenshot: Chat
Show: chat interface with message bubbles, client avatar, send button, attachment options
public/docs/group-chat.png
Text Messages
Send and receive messages instantly.
Voice Notes
Record and send audio messages.
Files & Images
Share documents, photos, and attachments.
Payment Requests
Send payment links directly in the chat.
Go to Check-ins to create templates and request progress updates from clients.
Data
Weight & measurements
Questions
Custom forms
Rating
Scale responses
Photos
Progress pictures
Go to Automation to create workflows that run automatically when things happen.
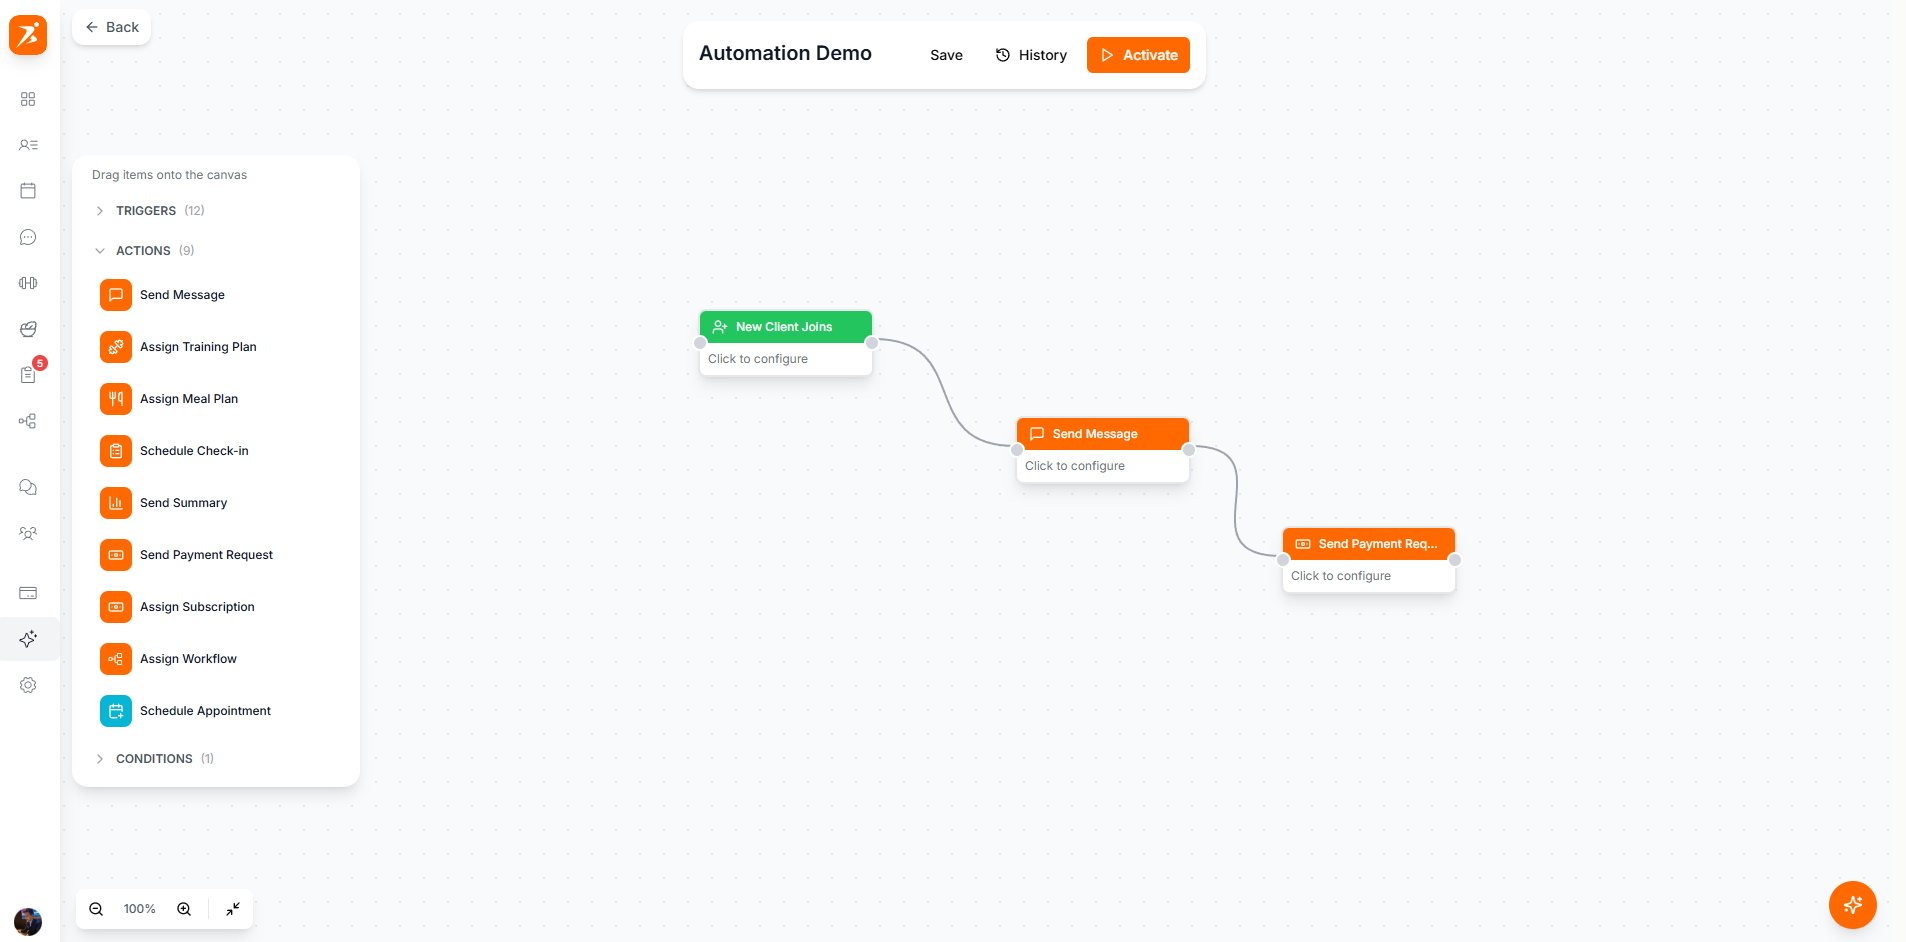
Screenshot: Automation builder
Show: visual workflow builder with trigger node, action nodes, delay nodes connected by lines
public/docs/automation-builder.png
New Client Welcome
New client signs up — send welcome message and assign onboarding check-in.
Weekly Check-in
Every Monday — send check-in request to all active clients.
Payment Confirmed
Payment received — assign training plan and meal plan automatically.