Create custom roles with specific permission sets. Define what each role can access so you can quickly onboard new team members.
Create named roles with a specific set of permissions. Assign roles to managers for quick setup.
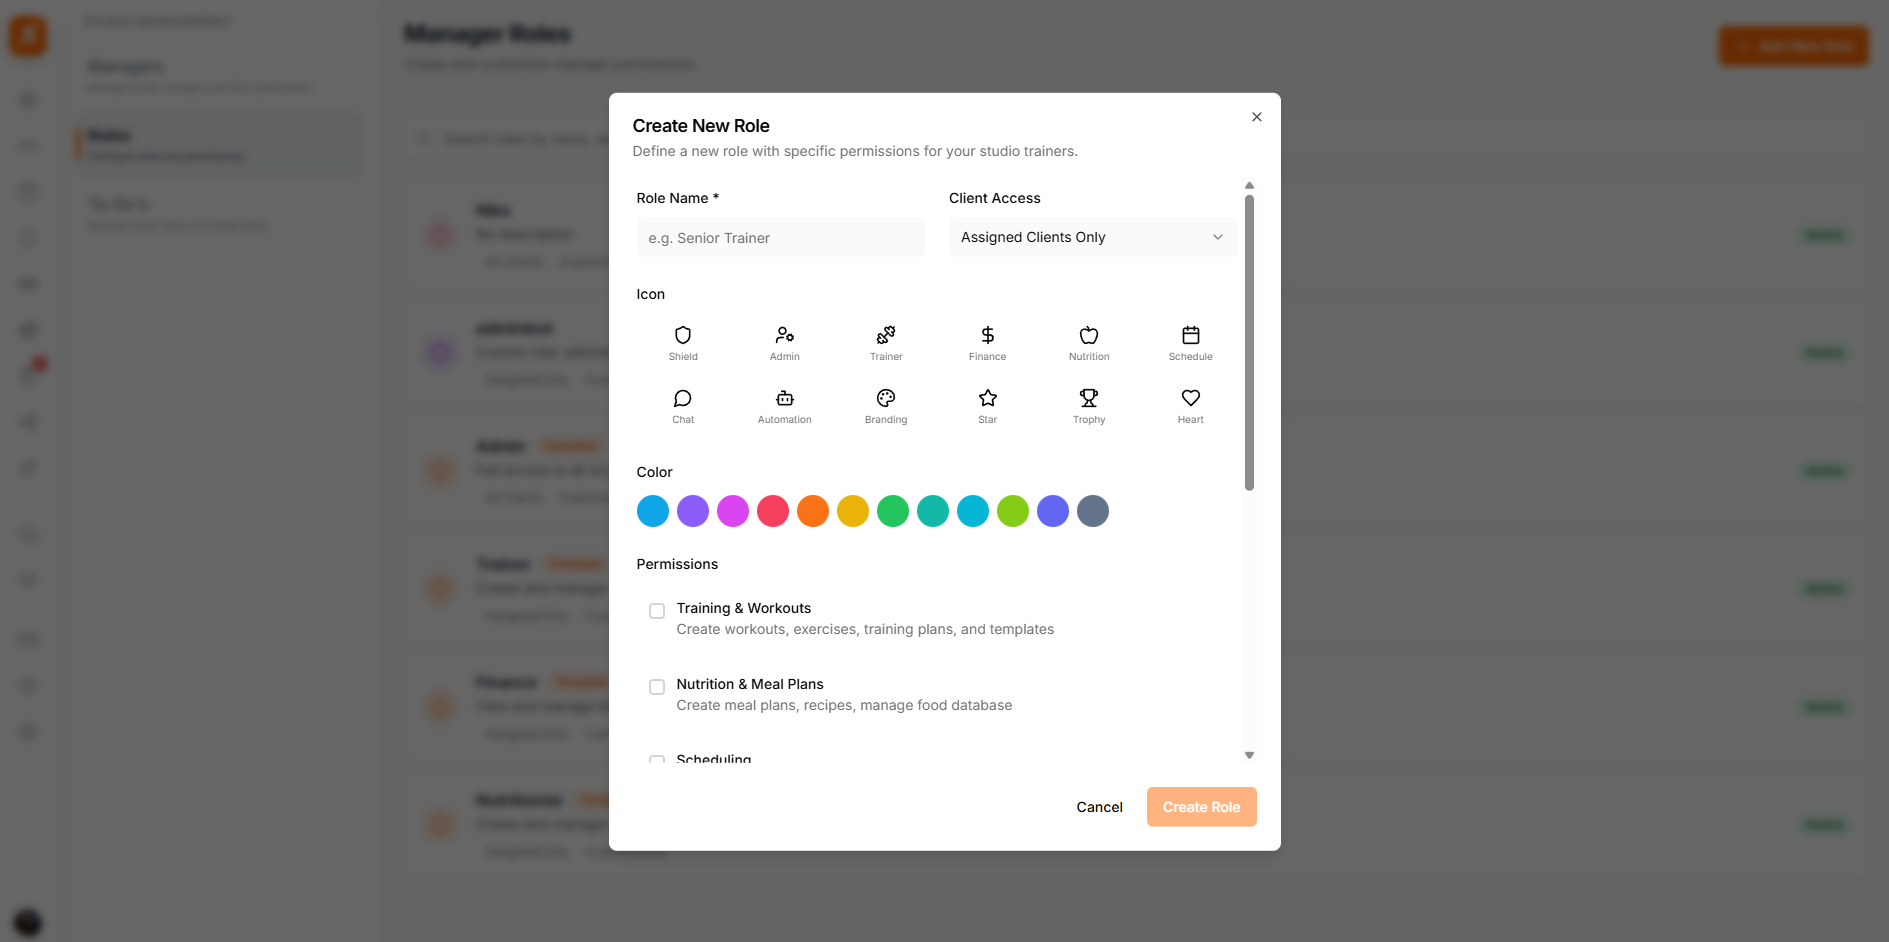
Screenshot: Create role dialog
Show: create role dialog with a role name input field, a description textarea, and a grid of permission toggles organized by category (Clients, Workouts, Meal Plans, etc.), with a 'Create Role' button at the bottom
public/docs/create-role.png
Follow these steps to create a custom role:
Start from a preset and customize — it's faster than building from scratch.
Use presets as starting points to save time. You can customize any preset after applying it.
All permissions enabled — for senior managers or co-owners.
Clients, workouts, meal plans, schedule, and chat. No finance or studio settings.
Clients (view only), schedule, and chat. No workouts, meal plans, or finances.
Presets are starting points — always review and adjust permissions to match your specific needs.
Modify existing roles or remove ones you no longer need.
You cannot delete a role while it's assigned to active team members. Reassign them first.
Only grant permissions that a role actually needs. You can always add more later.
Use clear names like "Senior Trainer" or "Front Desk" so roles are self-explanatory.
Review roles quarterly to ensure permissions still match team responsibilities.
Use presets as a base and customize — it's faster and less error-prone.