Team and roles
Invite managers and coaches to work alongside you in the studio.
Your team
Your team works in your account, each with their own login. This is your team.
Add a team member
Add a team member: their name and email,
Password or invitation
then how they get in: a password you set and share, or an email invitation.
Role and locations
Pick their role, and the locations they work at.
Send the invitation
Create it, and the invitation is on its way. Jade shows as invited until she signs up.
Their sign-up
The email opens this page, in your brand. She chooses a password, and signs in. From then on, she works in your studio.
More details and screenshots
Team and roles Ultimate
Add managers to your studio, give each one a role and choose which clients they work with. You find it all under Studio Management, in Managers and Roles.
Adding a team member
Open Studio Management, then Managers, and click Add New Manager.
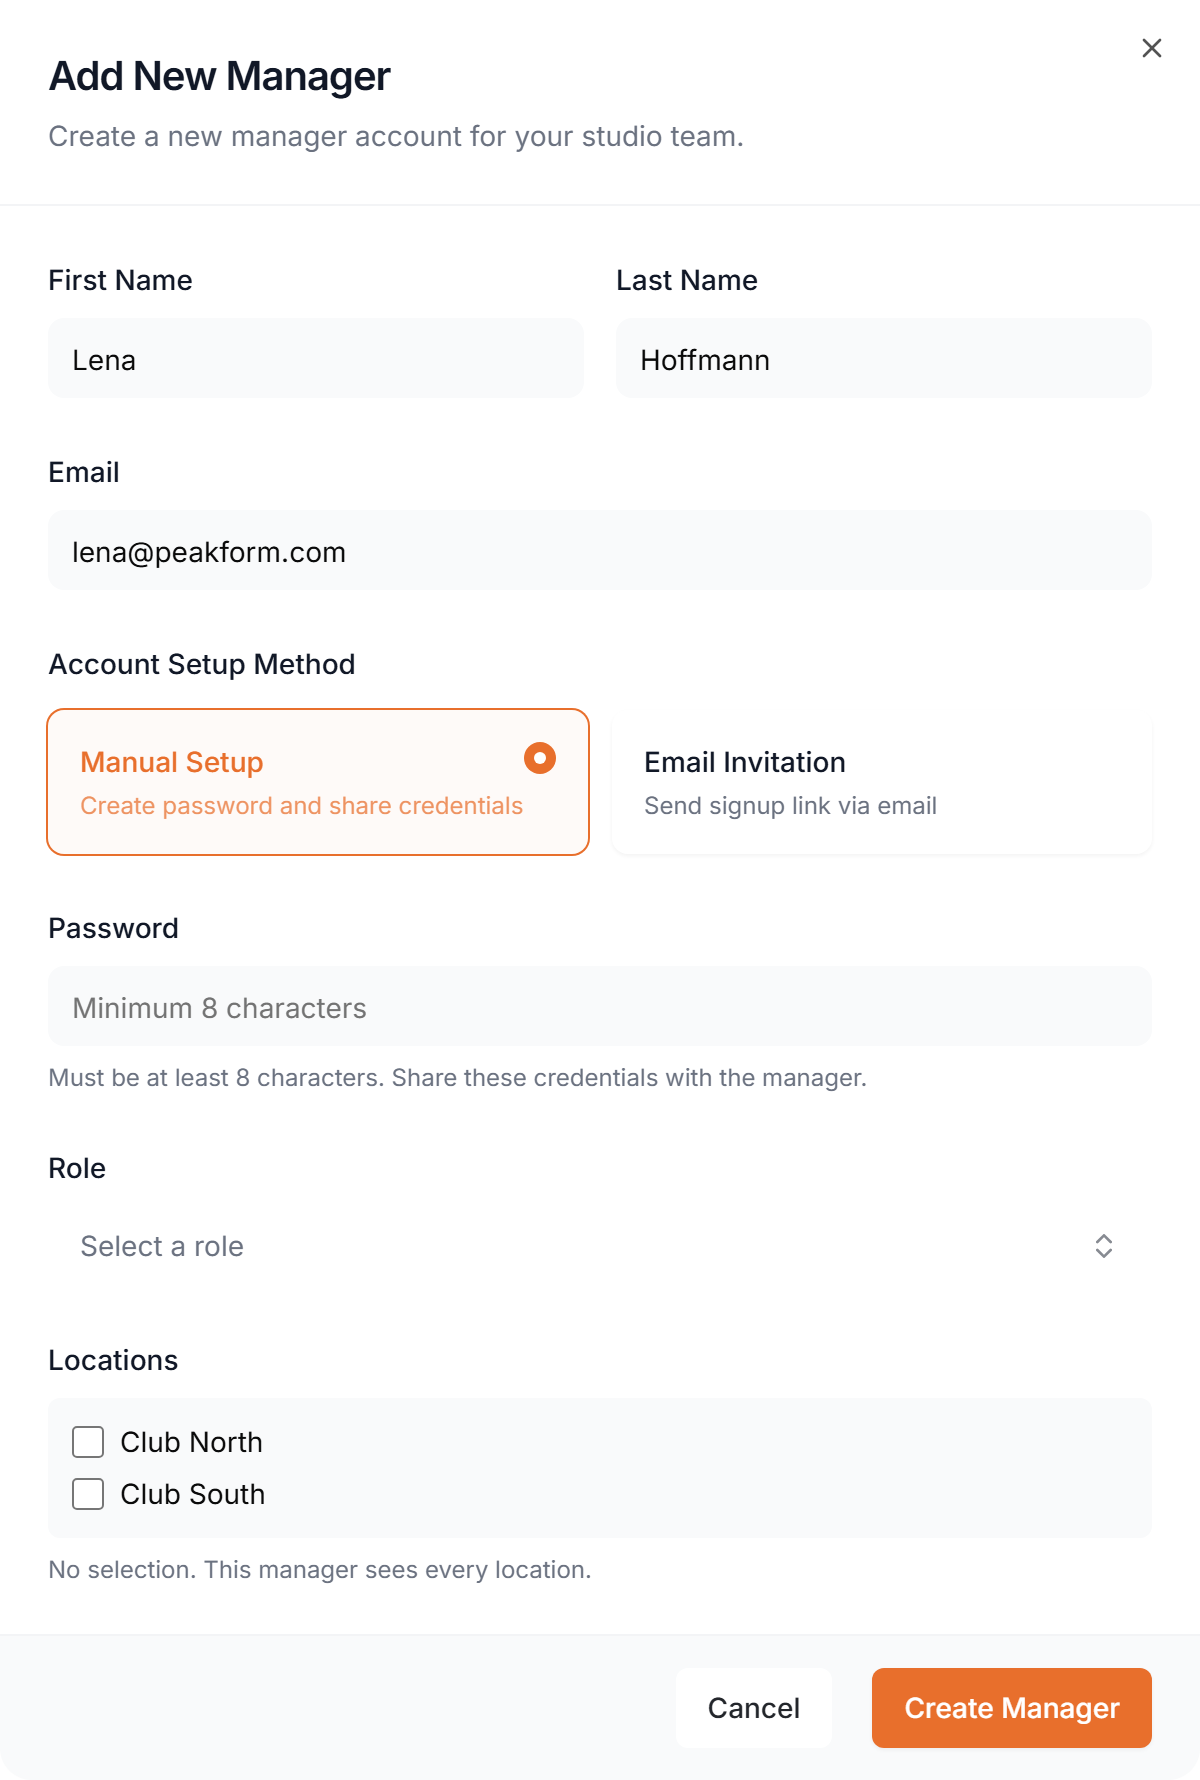
- Name and email
- First Name, Last Name and Email of the manager.
- Account Setup Method
- Email Invitation sends a signup link and the manager picks their own password. If the email cannot be sent, the link is shown so you can copy it. Manual Setup lets you set a password of at least 8 characters. Copy the credentials straight away: the password is shown once and Scraler does not email it.
- Role
- A built-in role or one of your custom roles. Every manager has exactly one.
- Locations
- Optional. With no selection the manager sees every location. Otherwise they only see clients and sessions at the selected ones.
Click Create Manager. The manager signs in on your studio's dashboard and can use what their role allows.
Managing your team
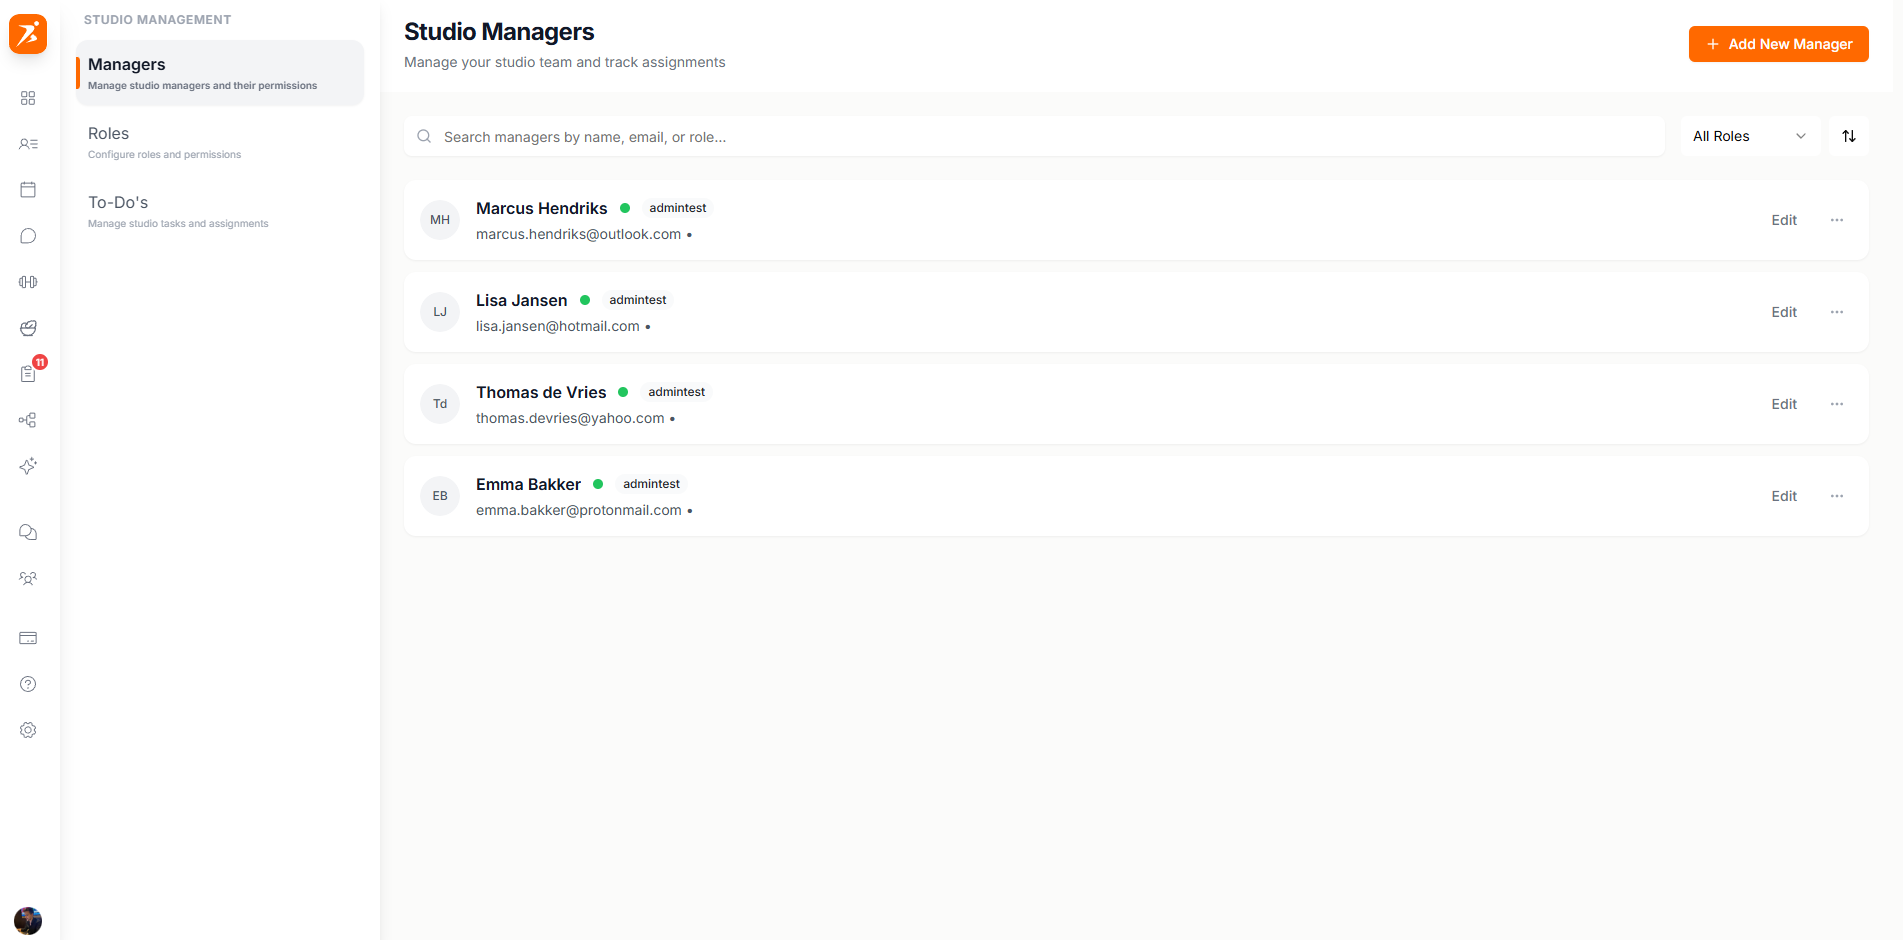
- Team list
- Each row shows the manager's name, a status dot (active or still invited), their role and their locations. Search by name or email and filter by role.
- Change role
- Click Edit, pick a new role or other locations and click Update Manager. It applies when the manager reloads their dashboard.
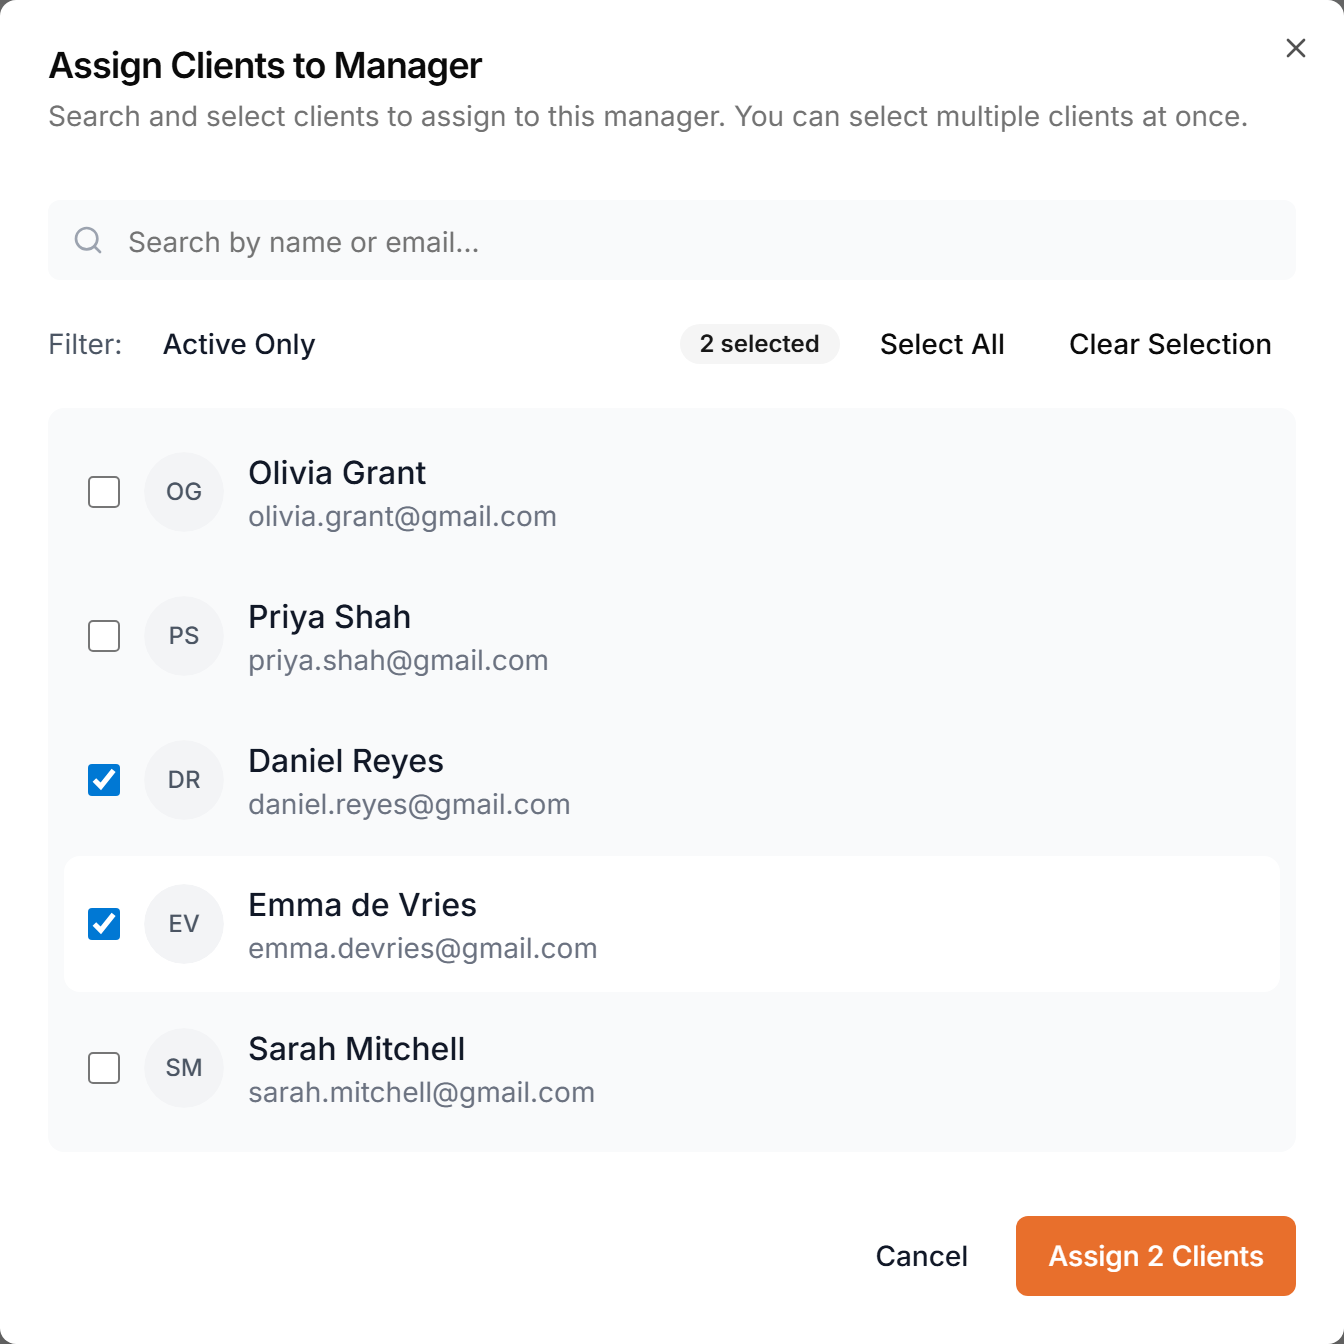
- Assign clients
- Open the menu on the row, choose View Profile, go to Assigned Clients and click Assign Client. Search, tick the clients and confirm. Remove a client with the cross on the same tab. Client data, plans and history stay untouched.
- Client access
- On the same tab, choose Assigned clients only or All studio clients for this manager.
- Remove a manager
- Open the menu on the row and choose Remove Manager. They lose access straight away and their client assignments are removed. Your clients and their plans stay. It cannot be undone. To bring someone back, add them again.
Permissions
Permissions are set on the role, not on the person. A manager gets exactly the permissions switched on in their role. The studio owner always has full access.
Roles
Open Studio Management, then Roles.
Built-in roles
Admin, Trainer, Finance and Nutritionist are marked Template. You cannot edit or delete them.
- Admin
- Everything except the owner's personal settings. Sees every studio client.
- Trainer
- Clients, workouts, meal plans, schedule, chat, check-ins, community and habits. No automation, finances, studio or branding.
- Finance
- Finances only.
- Nutritionist
- Clients, meal plans, schedule, chat, check-ins, community and habits. No workouts, automation, finances, studio or branding.
Managers with any role other than Admin only see the clients assigned to them, unless you switch them to All studio clients.
Custom roles
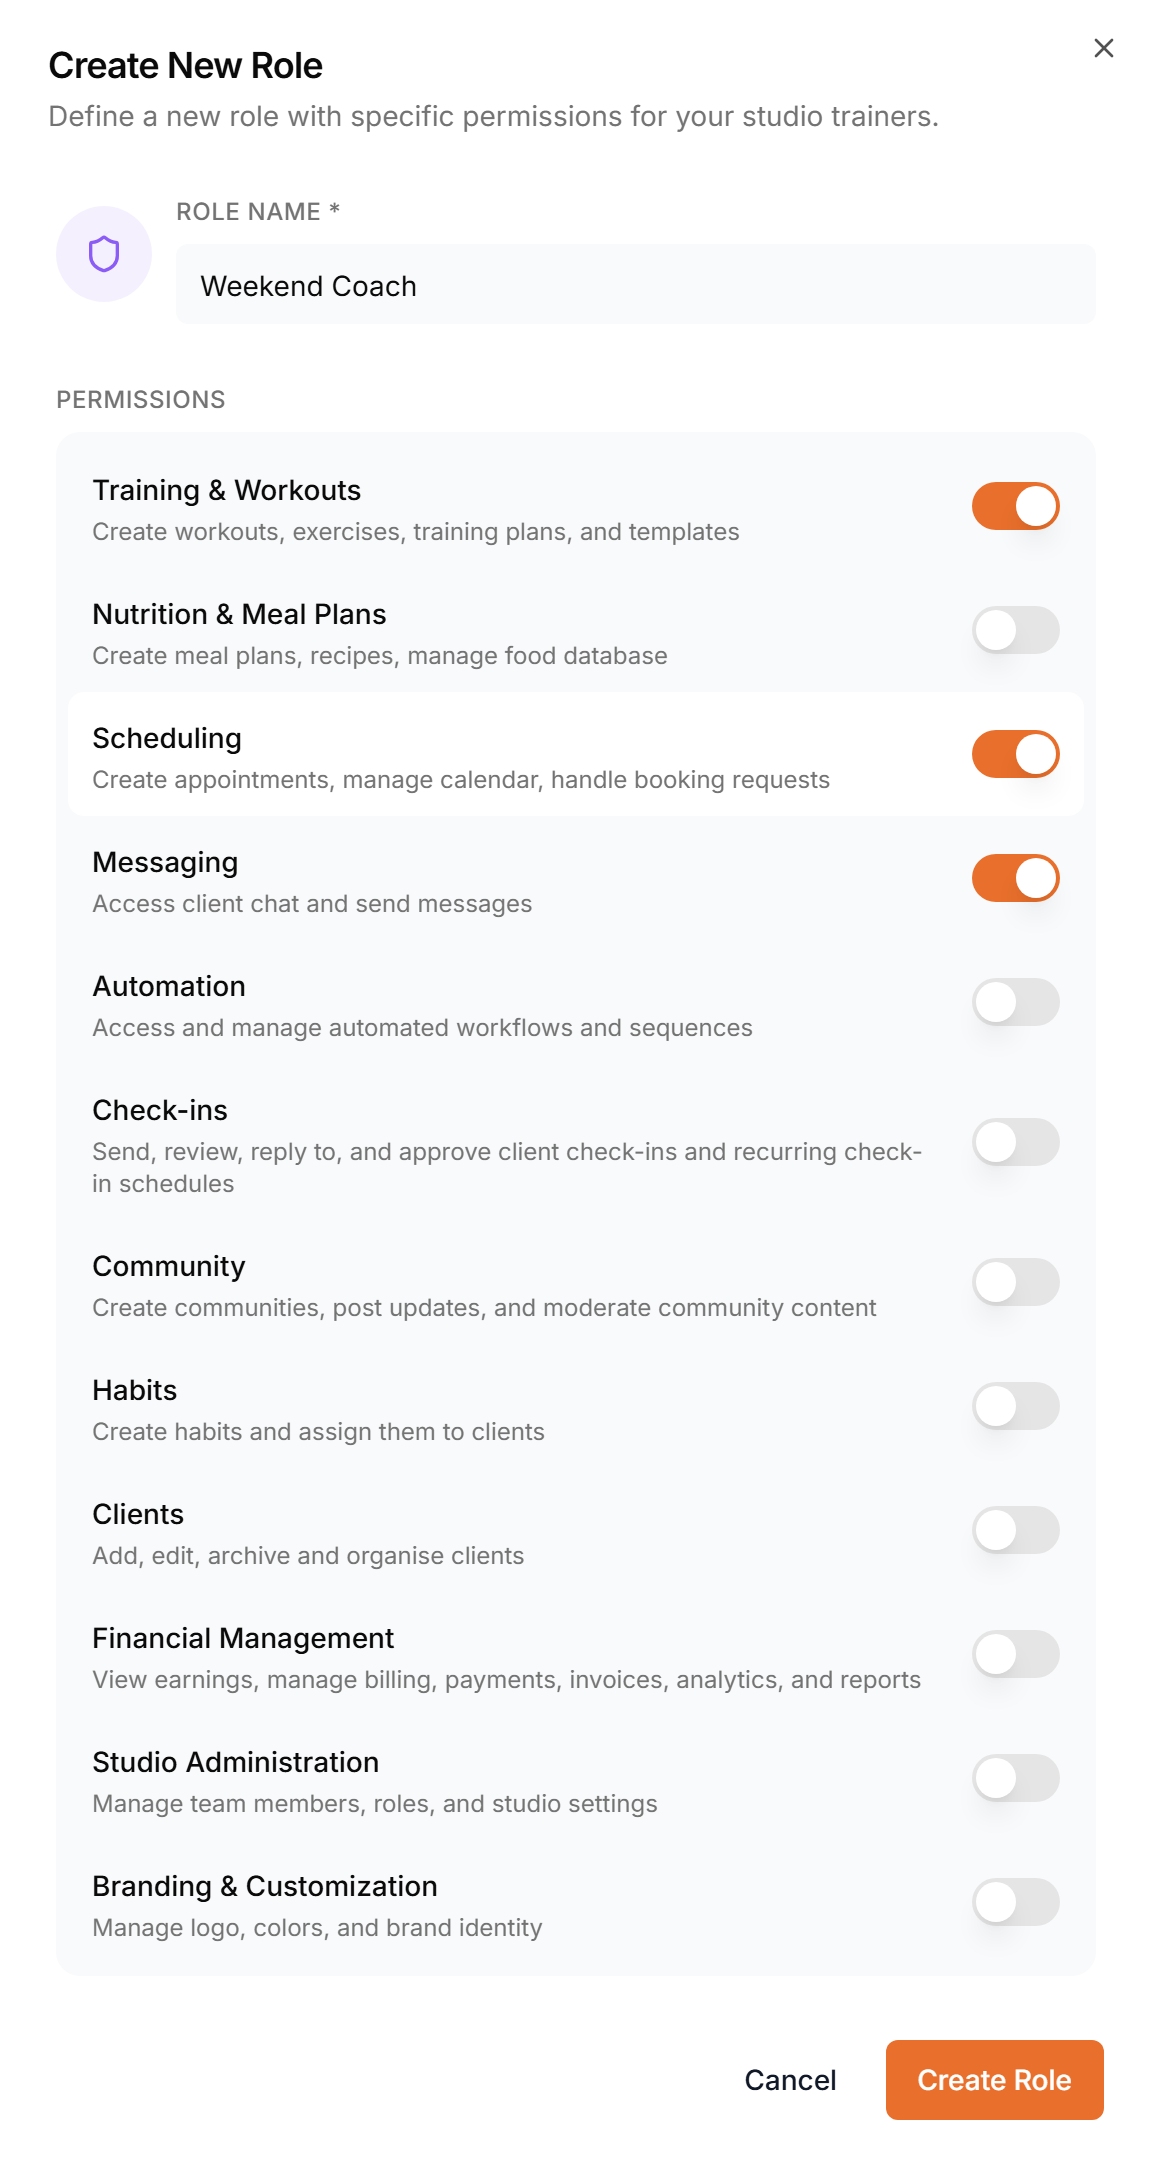
- Click Add New Role.
- Enter a role name and, if you like, pick an icon and a color.
- Switch on the permissions the role needs. New roles start with only Messaging on.
- Click Create Role.
To change a role later, click it, edit it and click Save Changes. You cannot delete a role while a manager has it. Roles are deleted in the Scraler mobile app under Studio, Roles.
The 12 permission areas
Each area is one switch. When it is off, the area is hidden from the manager's dashboard and the server rejects matching requests. Changes apply when the manager reloads.